Perfect for the summer months when cherry tomatoes are in abundance and the sweetest! This easy cherry tomato pasta is made in less than 30 minutes and tastes delicious.
It was just Valentine’s Day here recently and I could not stop myself from buying this super cute heart-shaped Barilla Pasta! This simple tomato sauce pairs beautifully with it and with any of your favourite pasta and is easy to make.
The sauce is made with just a handful of fresh ingredients and some pantry staples.
FRESH INGREDIENTS: Garlic, basil, cherry tomatoes and parmesan. For the cherry tomatoes I like to use a mixture of types like cherry, datterini and orange ones.
Made with fresh cherry tomatoes from our garden, which in summertime are super sweet and delicious! Cooked gently for 15 minutes till they are burst and softened, they make the most luscious sauce. I also add some sun-dried tomatoes for added depth of flavour.
The sauce is finished the the sauce pan. Adding some of the starchy cooking pasta water, some fresh basil, and of course, more parmesan and olive oil. Enjoy!
Easy cherry tomato pasta with fresh tomatoes, garlic and basil
Ingredients
250 grDried Pasta
2Garlic cloves(finely chopped)
500 grCherry Tomatoes(a mixture of cherry, datterini, orange or yellow cherry tomatoes are the best!)
2tbspTomato Paste
1bunchFresh Basil
6tbspExtra Virgin Olive Oil
Salt & Pepper
5Sun Dried Tomatoes (Chopped, optional)
4tbspGrated Parmesan((more to serve))
Instructions
Start by bringing a large pot of salted water to the boil.In the meantime Heat 3 tbsp of olive oil in a large non stick pan.
Add the chopped garlic and stir over low heat for 2-3 minutes being careful of it not burning it!
Add the tomatoes, half a teaspoon of salt and some cracked pepper and stir gently over medium heat for 10-15 minutes. Pierce and squash the tomatoes with a fork and stir to release the juices and form a sauce.When the water comes to the boil, start cooking the pasta till al dente. Once cooked reserve half a cup of pasta water.
To the pan, add the tomato paste and the chopped sun-dried tomatoes (if using), adjust the seasoning as needed and continue stirring for a few minutes. Add the fresh basil.
Add the cooked pasta to the pan with the sauce, along with a few tablespoons of pasta water and continue cooking for 1-2 minutes. Add the parmesan and olive oil and take off the heat. Serve immediately with more grated parmesan. Enjoy!
This creamy sausage and mushroom Rigatoni only needs a few ingredients and is so tasty! The meaty mushrooms and fresh rosemary added at the end add a beautiful earthiness to the dish and the creamy parmesan sauce makes it that extra luxurious. You will want to save this for a special occasion!
Origins of this dish
This Sausage and Mushroom pasta dish is a typical dish from Tuscany – and is usually eaten in autumn during the mushroom season.
The popular name of this pasta dish in Italy is called Pasta alla Boscaiola, typically using fresh Porcini mushrooms, which are the most incredible, flavourful mushrooms very popular in Italy but can only be found pre-packaged and dried here in Australia. Some versions of this dish also have tomato (passata) in them, but I prefer this version just with cream!
Ingredients required for this Creamy Sausage and Mushroom Rigatoni
Rigatoni Pasta
A short pasta like a penne or rigatoni is generally used for this creamy sauce, but that said I have had this type of sauce with a fresh pappardelle and it is also as delicious!
Classic Rigatoni Pasta
Sausages
I have used some classic pork sausages for this dish. You are looking for something like an Italian-style pork sausage, with coarse meat and lots of pepper and spices ideally. You can remove them from their casings or just chop them as is, whatever is your preference!
Mushrooms
For this version of creamy sausage and mushroom rigatoni dish, I am using king oyster mushrooms, which I prefer over button mushrooms for the meatier taste.
You can although use any type of mushroom you can find, an assortment of button & brown mushrooms. For a more intense mushroom flavour, you can add some soaked dried porcini to the other mushrooms too!
Other Ingredients required
Garlic Cloves
Light cream
Parmesan – finely grated Grana or Parmigiano Reggiano
Stock Cube / Bouillon – vegetable or chicken to boost the flavour of the cream sauce
Fresh Rosemary – you can replace for 1 tsp dried rosemary if you don’t have fresh one on hand!
Salt, Pepper and Extra Virgin Olive Oil
How to make these Rigatoni Boscaiola
Fry Garlic and Sausages
Start by heating 3 tablespoons of olive oil in a large non-stick fry pan. Add garlic and chopped sausages and cook through for 4-5 minutes. Remove from the pan and set aside.
In the meantime bring a large pot of salted water to the boil.
Cook Mushrooms
Add a few tablespoons of oil to the same pan you used to cook the sausages. Add the mushrooms, a splash of water, along with the stock cube and a large pinch of salt and pepper.
Cook the mushrooms stirring gently for 7-8 minutes over medium heat. You want the mushrooms to be cooked through and to have released all the water.
In the meantime, start cooking the Rigatoni till al dente (around 12-14 minutes) as per packet directions.
Add cream and parmesan
Once the mushrooms have cooked and softened, add the cream, chopped rosemary and 3 tablespoons of grated parmesan. Lower the heat to low. Stir through and return the cooked sausages to the pan and continue cooking for a few minutes.
Combine with rigatoni
Once the rigatoni are cooked, reserve half a cup of pasta water and add the cooked rigatoni to the large pan with the cream sauce and combine over low heat.
Add the reserved pasta water, 3 tablespoons of parmesan and more pepper, adjust the seasoning as needed and simmer over low heat for a few minutes. The sauce should thicken slightly and stick to the rigatoni beautifully!
Garnish and serve
Combine and take off the heat. Add more pepper and parmesan to your liking. Serve immediately! Enjoy.
Serving Size
For this recipe I have used 400 gr of dried rigatoni – this yielded a generous 3 servings of pasta or 4 smaller servings.
A tasty pasta dish with sausages and mushrooms cooked in a light cream and parmesan sauce
Ingredients
400grRigatoni Pasta(or penne)
4Garlic Cloves(finely chopped)
3Italian Pork Sausages(sliced or removed from casing)
300grMushrooms(Oyster / King Oyster or Button mushrooms, cleaned and sliced)
300mlLight cooking cream
6tbspGrated Parmesan(plus more to serve)
1Stock Cube
halftspSalt
Pepper
6tbspOlive Oil
2SprigsFresh Rosemary(Finely chopped)
Instructions
Start by heating 3 tbsp of olive oil in a large non-stick fry pan over medium heat. Add garlic and chopped sausages and cook through for 4-5 minutes. Remove from the pan and set aside.In the meantime bring a large pot of salted water to the boil.
Add a few tablespoons of oil to the same pan used to cook the sausages and add the mushrooms. Add a splash of water, along with the stock cube and a large pinch of salt (around half a teaspoon) and pepper.
Cook the mushrooms stirring gently for 7-8 minutes over medium heat. You want the mushrooms to be cooked through and to have released all the water.In the meantime, start cooking the Rigatoni till al dente (around 12-14 minutes), as per packet directions.
Once the mushrooms have cooked and softened, add the cream, chopped rosemary and 3 tablespoons of grated parmesan. Lower the heat to low. Stir through and return the cooked sausages to the pan and continue cooking for 2-3 minutes.
Once the rigatoni is cooked, reserve half a cup of pasta water. Add the cooked rigatoni to the large pan with the cream sauce and combine over low heat.
Add the reserved pasta water, 3 tablespoons of parmesan and more pepper, adjust seasoning as needed and simmer over a low heat for a few minutes, till the sauce slightly thickens.
Take off the heat. Add more pepper and parmesan to your liking. Serve immediately.
Course: Main Course
Cuisine: Italian
Keyword: creamy mushrooms sausage rigatoni, creamy pasta, creamy rigatoni, light cream, mushrooms sausage pasta, pasta alla boscaiola
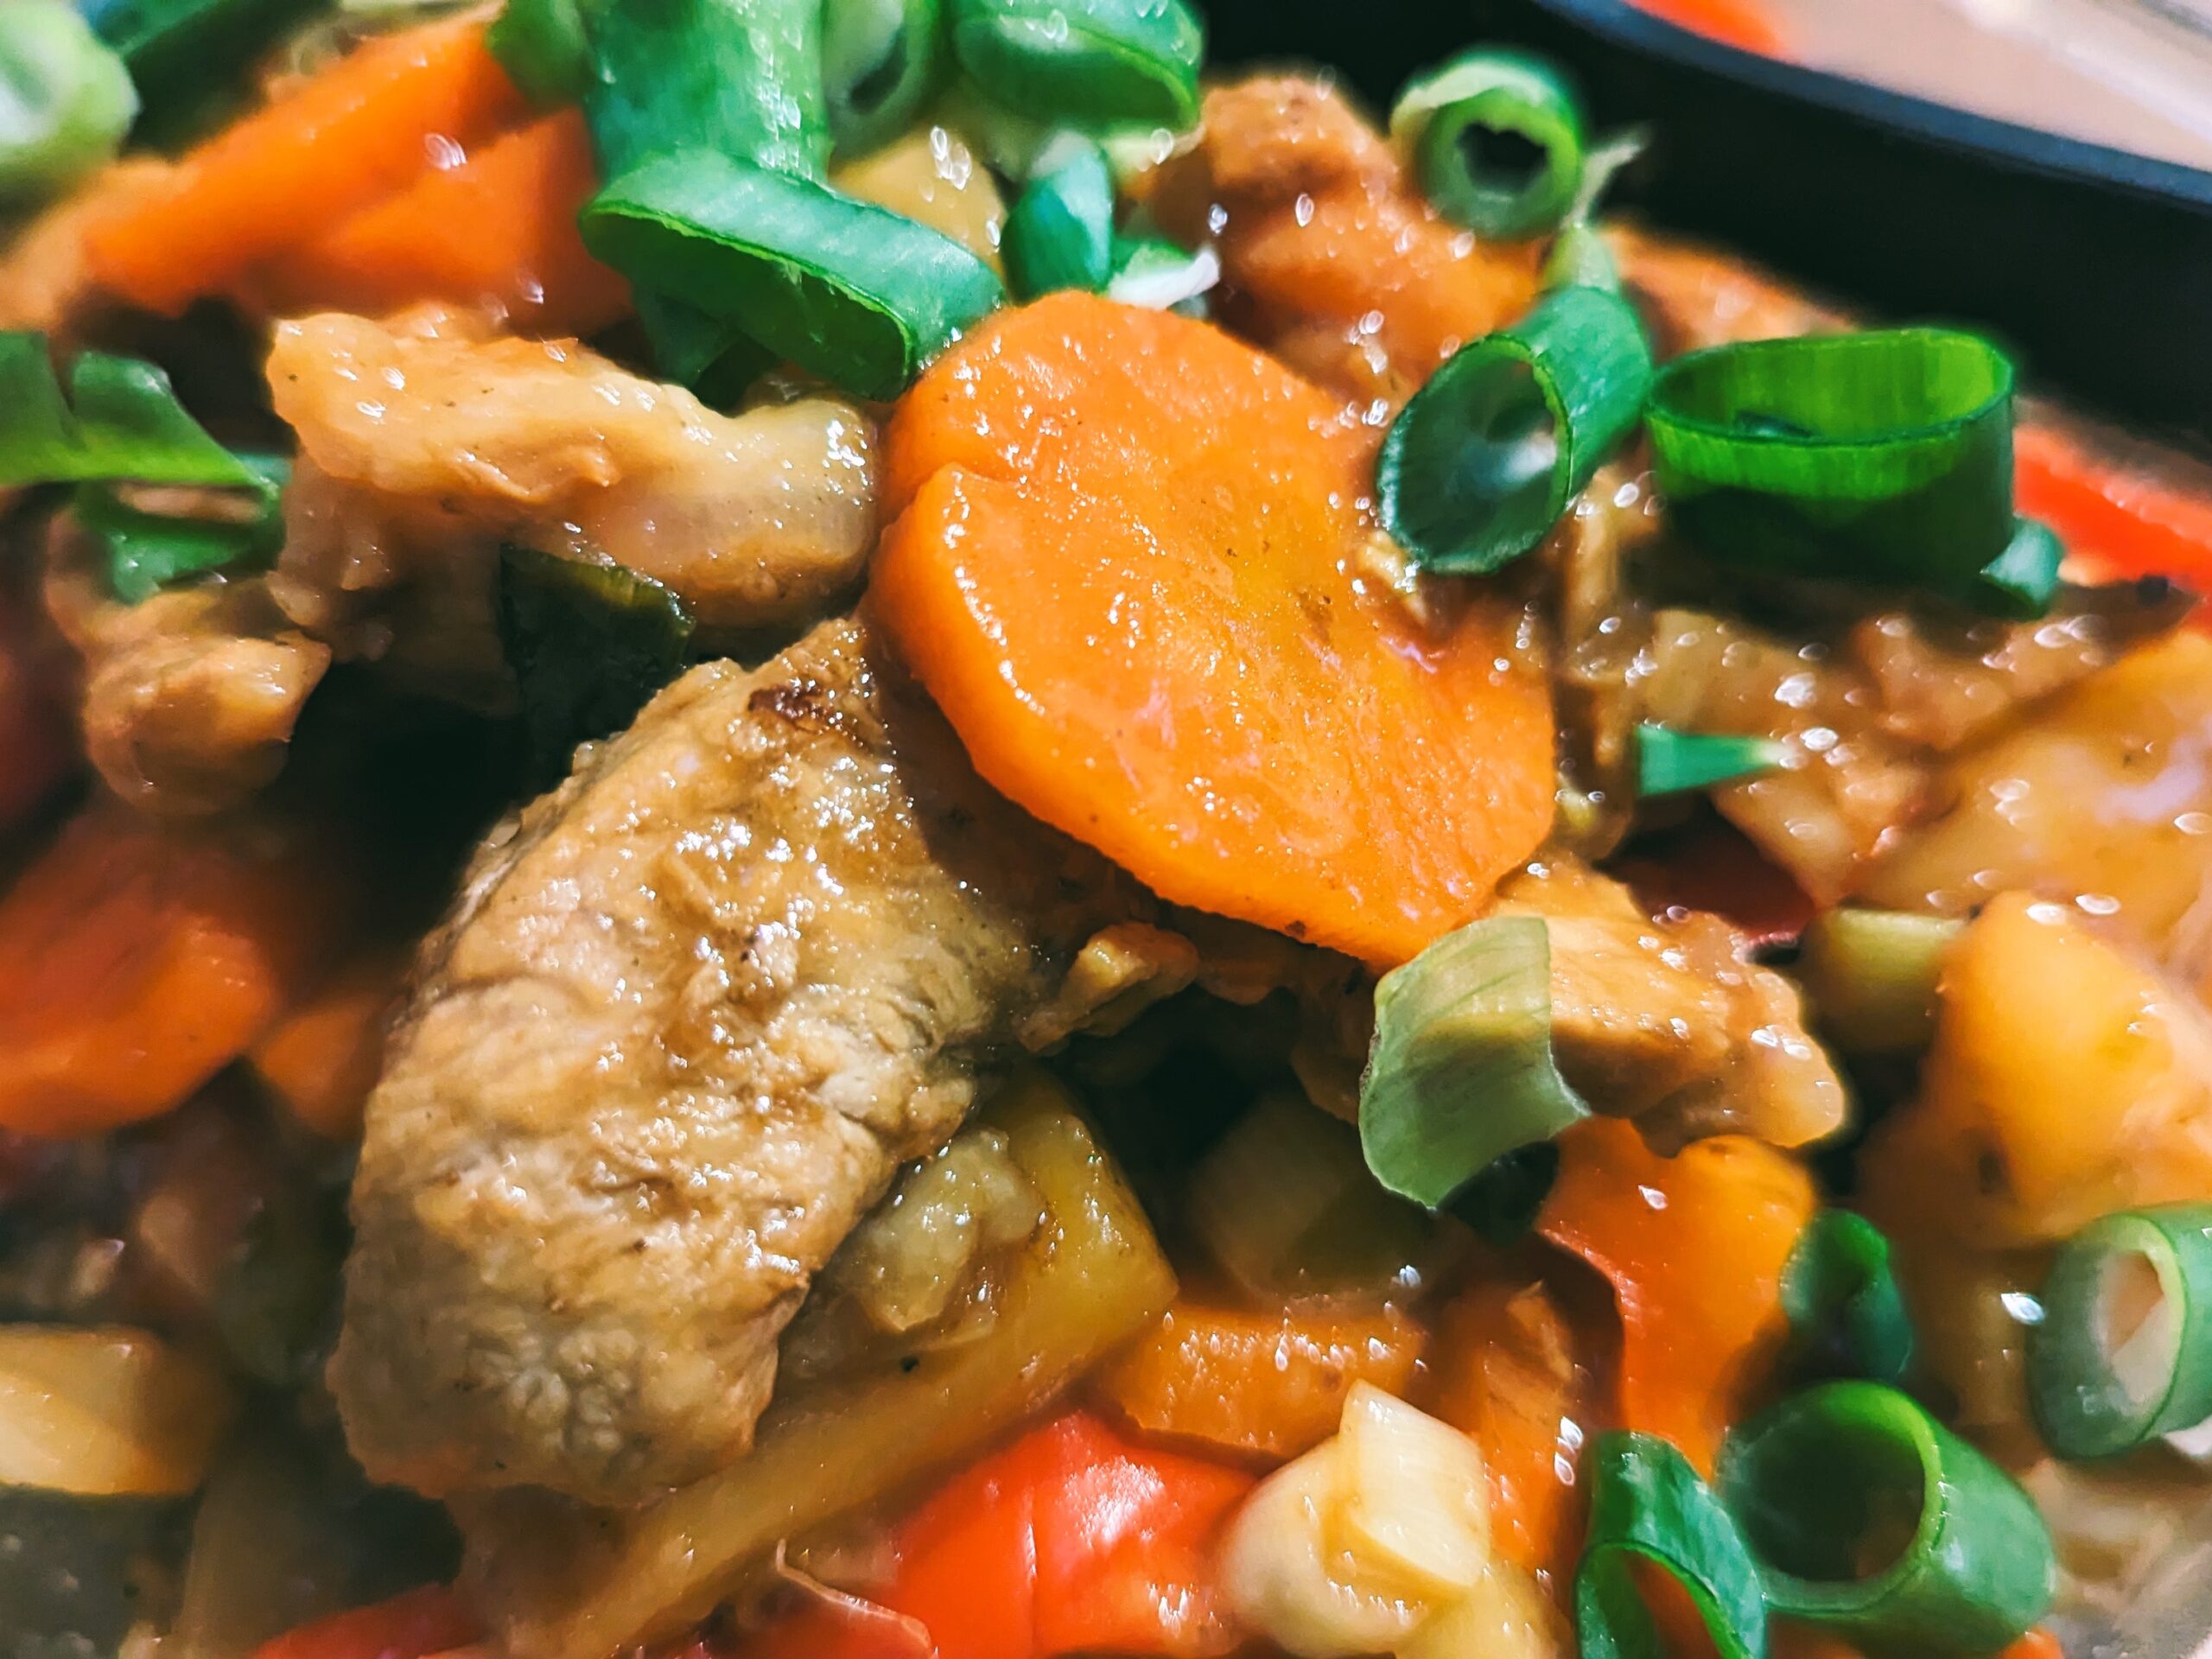
A healthier version of the classic takeaway dish of sweet and sour pork. Stir-fried, rather than deep-fried with lean pork fillet, and a punchy flavourful sweet and tangy sauce. This is my Healthy Sweet and Sour Pork, made in a flash!
I love a stir-fry for those busy weeknight dinners, and this one is a winner with everyone in the family! Made in 30 minutes and with wholesome ingredients, it is a take on the classic Chinese takeaway dish Sweet and Sour Pork but without the heaviness of the deep frying, not overly sweet and with Tamari, a lower sodium alternative to soy sauce.
Ingredients for this Healthy Sweet & Sour Pork
What you will need for this Healthier Sweet and Sour Pork:
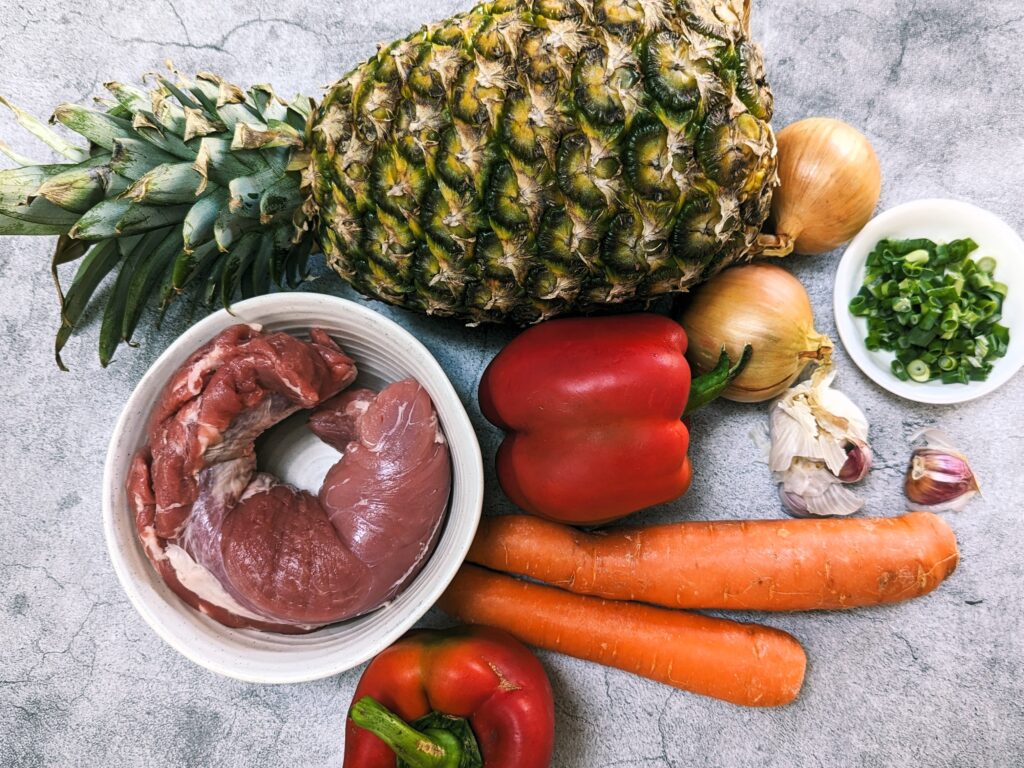
Pineapple, Capsicum, Onion, Carrots, Garlic & Spring Onions
Ingredients for Sweet & Sour Sauce
Sesame Oil
Tamari
Maple Syrup
Brown Sugar
Apple Cider Vinegar
How to make this Healthier Sweet and Sour Pork
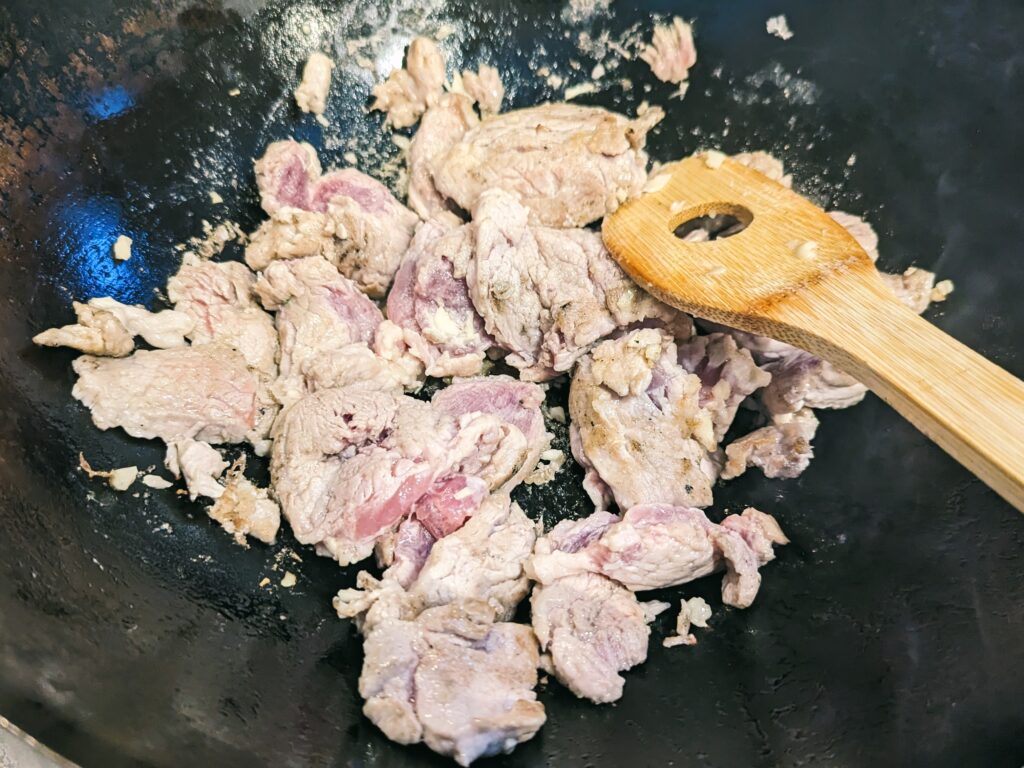
Prepare and brown pork meat
Mix the cornflour with some water and combine till it forms a paste. Add this to the sliced pork fillet till well combined.
Heat a wok or large fry pan over medium heat and add some sesame oil.
Cook the pork slices till just cooked for 3-4 minutes. In the meantime, prepare the stir fry sauce by combining the tamari, with the apple cider vinegar, sesame oil, brown sugar and maple syrup.
Remove from the wok and set aside.
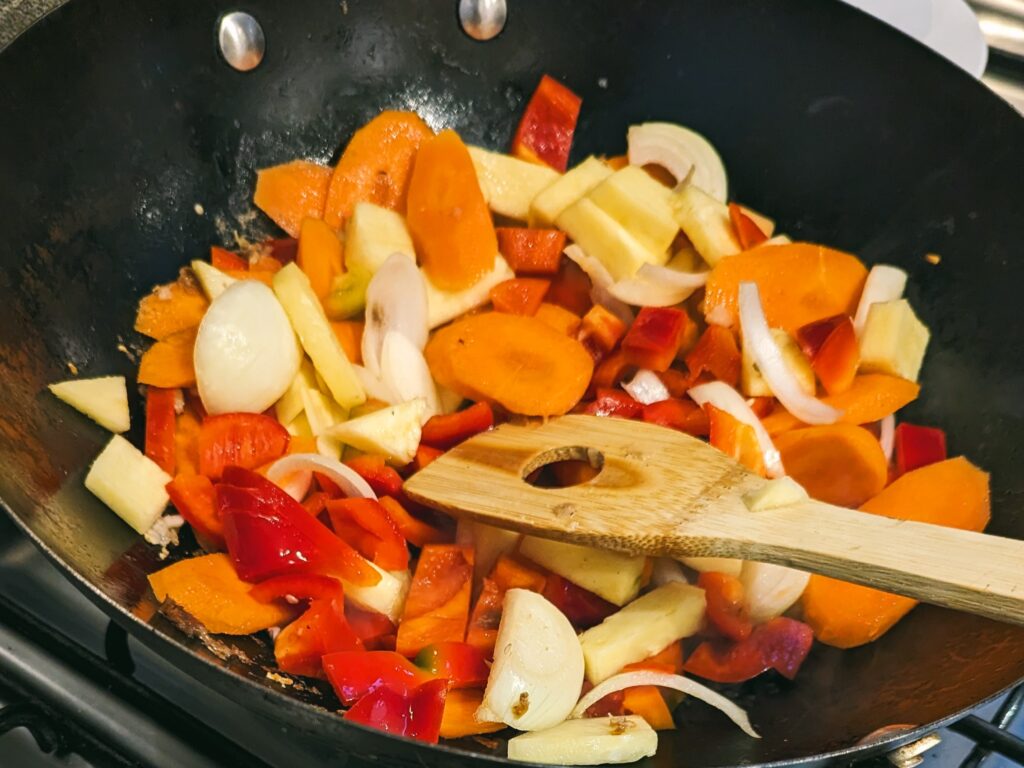
Stir-Fry Vegetables
Add the garlic, carrots, pepper, onions and pineapple to the hot wok with a splash of water and cook till they slightly soften for 3-4 minutes.
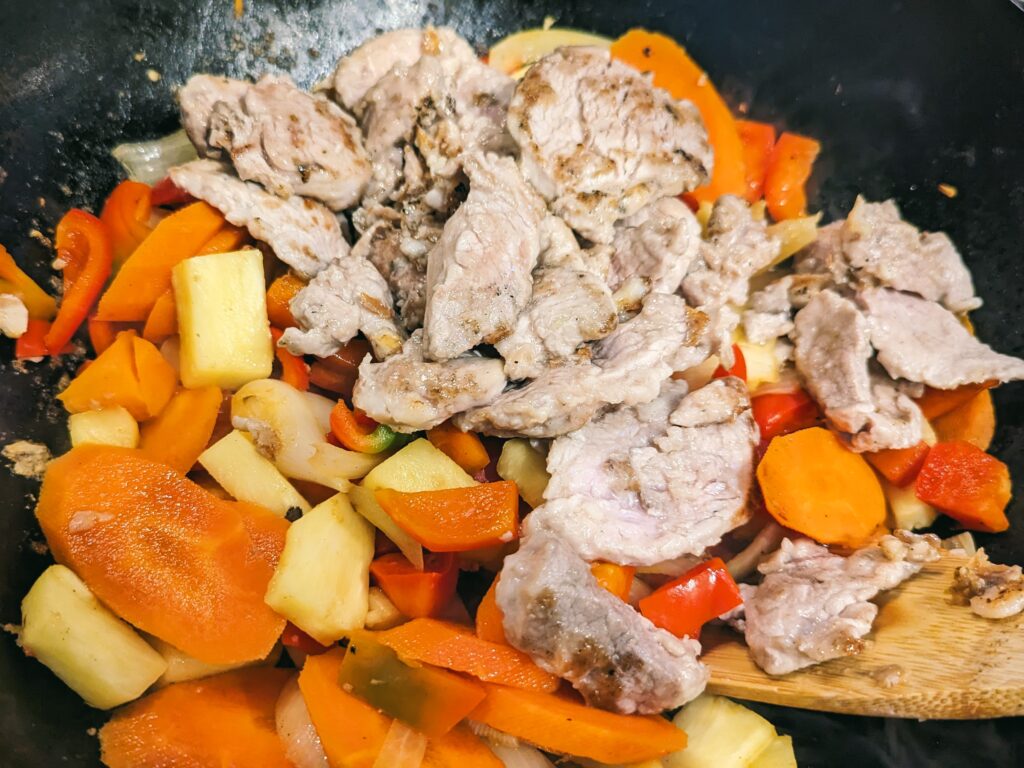
Return Pork to the Wok and add stir-fry sauce
Add the pork back in the wok, the sweet and sour sauce and cook for a further 2 minutes till the pork is cooked fully,
Garnish and Serve
Add the sliced spring onions. Turn off the heat and serve immediately with some brown or white rice.
A healthier version of the classic Sweet and Sour Pork
Equipment
1 Wok
Ingredients
Stir Fry
500grPork Fillet(Sliced in 1 cm pieces)
2tbspCorn Flour
3tbspSesame Oil
3Garlic Cloves(Thinly Sliced)
1cupPineapple((half a pineapple) Cut into chunks)
2Red Capsicum(Cut into chunks)
2Carrots(Peeled and roughly sliced)
6Spring Onions(Sliced)
Sweet and Sour Sauce
5tbspSesame oil
5tbspApple cider Vinegar
4tbspMaple Syrup
3tbspTamari(or Soy Sauce)
1tbspBrown Sugar
Instructions
Mix the cornflour in a small bowl with 2 tablespoons of water and combine till it forms a paste. Add this to the sliced pork fillet till well combined.
Heat a wok or large fry pan over medium heat and add 3 tablespoons of sesame oil.Cook the pork slices till just cooked for 3-4 minutes. In the meantime, prepare the sauce ingredients by combining the maple syrup with the sesame oil, the tamari and the apple cider vinegar.Remove from the wok and set aside.
Add the garlic, carrots, pepper, onions and pineapple to the hot wok with a splash of water and cook till they soften for 3-4 minutes.
Add the pork back in the wok, the sweet and sour sauce and cook for a further 2 minutes till the pork is cooked fully,
Add the sliced spring onions. Turn off the heat and serve immediately with some brown or white rice.
Course: Main Course
Cuisine: Chinese
Keyword: chinese food, easy dinner, healthy food, stir-fry
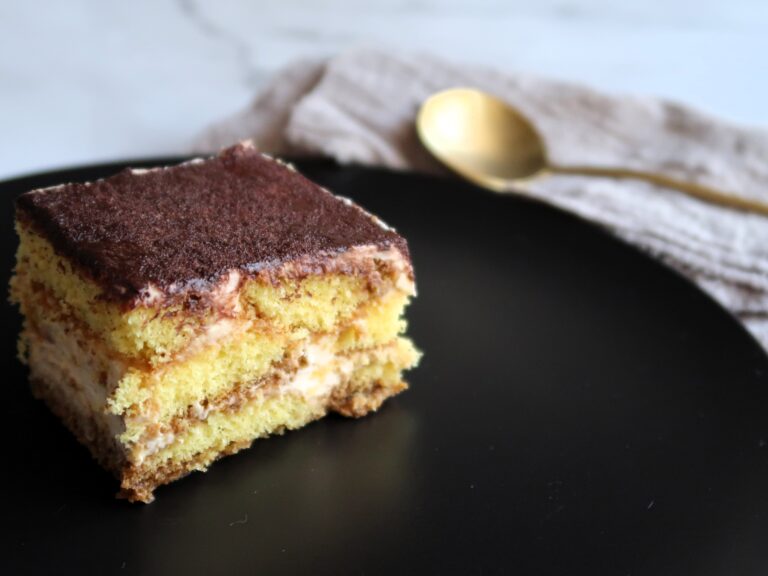
A traditional and authentic recipe of a Classic Italian Tiramisu, just as my mum always makes it for me! A simple and timeless dessert of sweet savoiardi biscuits dipped in strong espresso coffee, then layered with a silky mascarpone cream.
A classic dessert recipe: Tiramisu
Everyone loves a good tiramisu. It literally translates to ‘pick me up’ and from as long as I remember it’s my favourite dessert. Set to have originated in the mid 1900′ in the north of Italy in Treviso, this dessert has gained some recent popularity again. And the bottom line is, this easy no-bake dessert is delicious and the perfect ending to an italian fest!
Tiramisu can also be made ahead of time, and actually tastes BETTER the next day. This is to give a chance to the savoiardi to soak well in the espresso and the mascarpone cream. So here is how to make it!
What is a traditional Tiramisu made with?
Like all classic dishes that have been around for a while, some versions differ from others, some include liqueur, some don’t. Some have egg whites, some don’t.
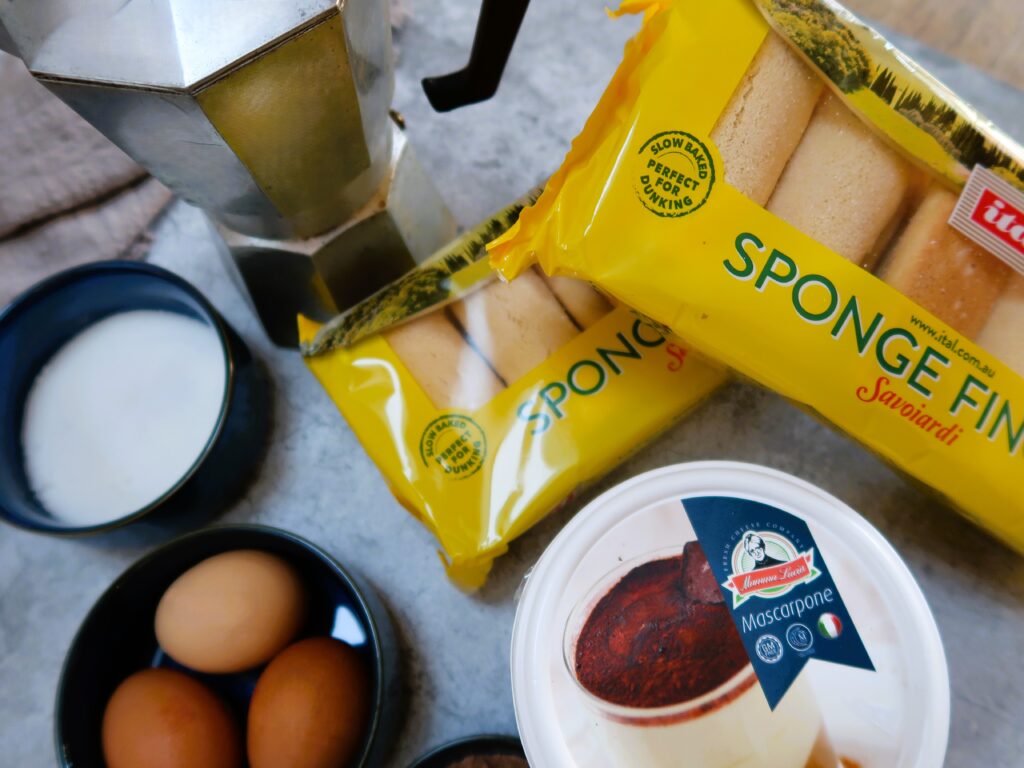
This classic italian tiramisu recipe that I have had passed on in my family is made with just 6 ingredients: Savoiardi biscuits, eggs, mascarpone, sugar, espresso coffee and cocoa powder.
The eggs are used raw – and there is traditionally no cream in a classic tiramisu.
Ingredients for this Classic Italian Tiramisu
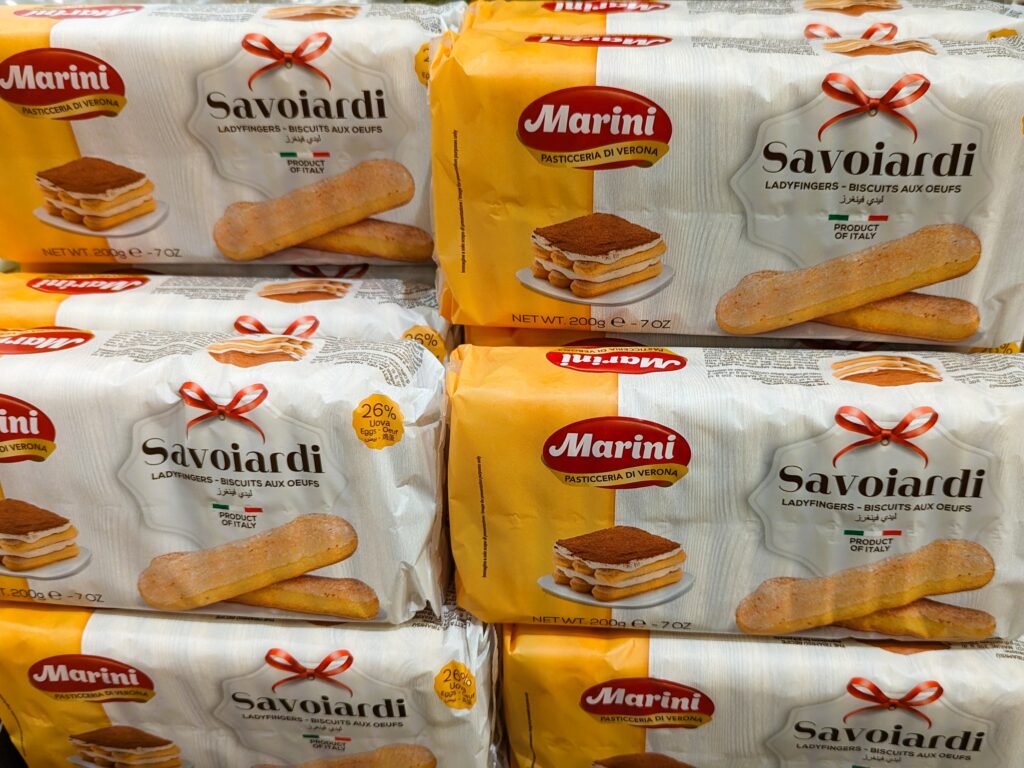
Savoiardi – the perfect biscuit for tiramisu
These biscuits traditionally used for tiramisu are also called sponge fingers or lady fingers. These dry sponge biscuits are made of flour, sugar and a high content of eggs (around 25%), and coated with a thin layer of sugar. They are the perfect for soaking in coffee and layering in a classic tiramisu!
My favourite brands to use are classic italian made savoiardi like Di Leo, Marini, or Vincenzovo which can be easily found in major supermarkets or italian delicatessen.
Look for long thin biscuits that are quite airy – as these will soak the coffee better. The thicker and denser the biscuit is – they will struggle to soak in the coffee (you may need to dip them for longer) and may result in a dry biscuit in the inside, even after being soaked.
What other biscuits can I use an an alternative to Savoiardi?
Savoiardi or ladyfingers are the most authentic biscuits to use to make a traditional tiramisu. But, you can also make other versions of it!
To make it as a cake – you can use thin layers of plain sponge cake. A popular type of biscuit to use as an alternative are also pavesini which give you a similar tiramisu texture. You can also use plain dried biscuits – but the result will be a denser, less airy tiramisu (so you would just have a smaller serve).
Eggs & Sugar
This recipe uses whole raw eggs, . If you prefer to not use raw eggs, these can be replaced for whipped cream, see below notes below the recipe.
Any sugar can be used, I like to use white granulated or caster sugar.
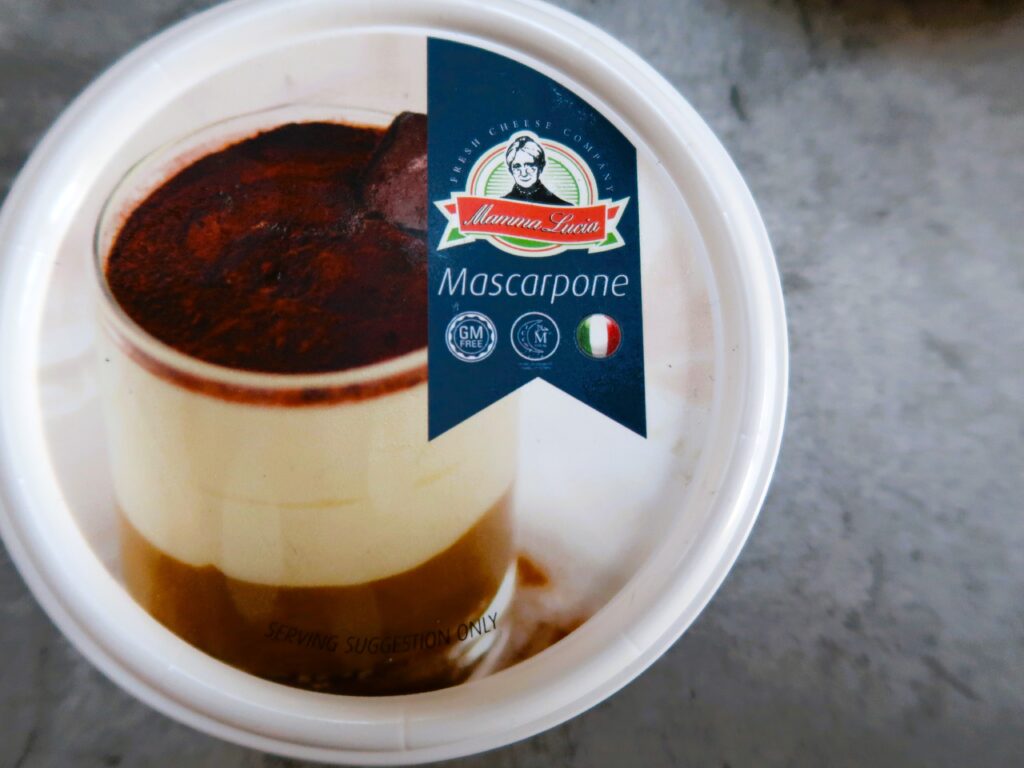
Mascarpone
This dense creamy cheese is what tiramisu is all about. It’s not to be confused with cream cheese! The two quite differ for 2 main reasons. 1. Fat content 2. Flavour profile.
Mascarpone is majority fat (50/60%), whereas cream cheese has a lower fat content. The flavour differs greatly too, as mascarpone has a sweeter, buttery flavour, whether cream cheese is more tangy.
Choose a good quality mascarpone from your local supermarket or italian deli. My favourite brands are Mamma Lucia, Montefiore or Casa del Formaggio.
Can I replace mascarpone for cream cheese?
You can replace it for cream cheese but you would also need to add cream and butter to mimic silkier texture of mascarpone. You can find a recipe to do so here.
Espresso coffee
Freshly brewed and cooled espresso coffee is used for this recipe to dip the savoiardi in.
Cocoa Powder
Traditionally dark bitter cocoa powder is used.
How to make Classic Italian Tiramisu
Prepare the espresso coffee
Prepare the espresso coffee and set aside to cool slightly, then store in the fridge.
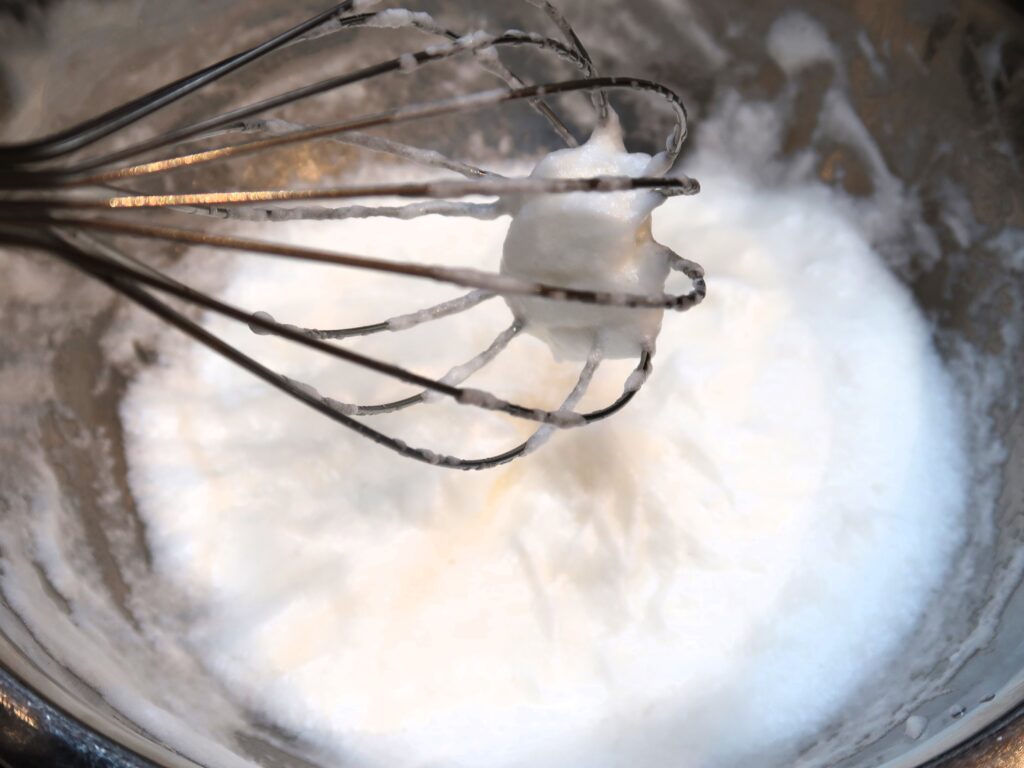
Beat egg whites
You start off by beating the egg whites till they form stiff peaks and set aside.
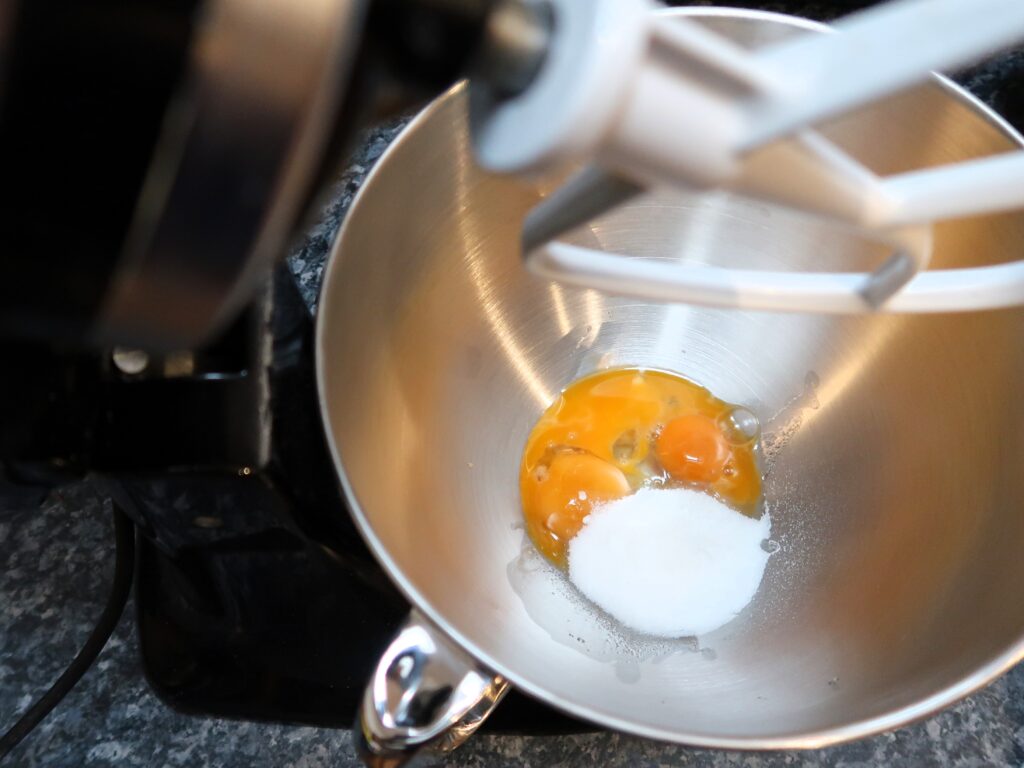
Combine egg yolks and sugar
In a separate bowl, combine the egg yolks and sugar and beat until pale for 5 minutes.
Add mascarpone
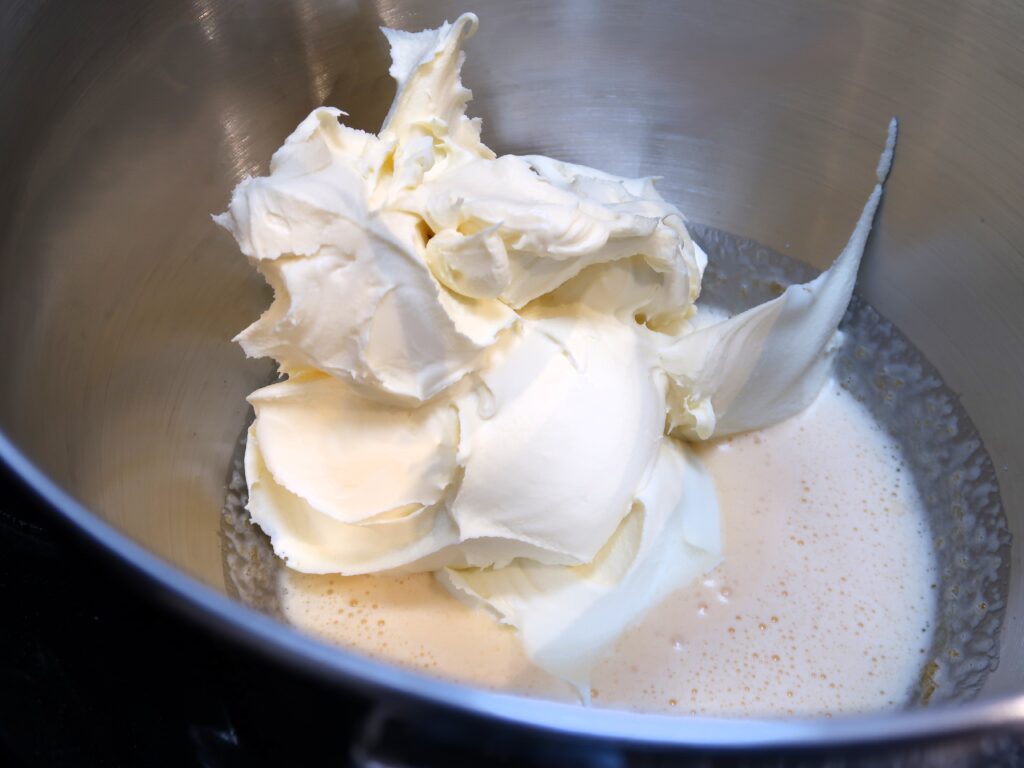
Add the mascarpone to the eggs.
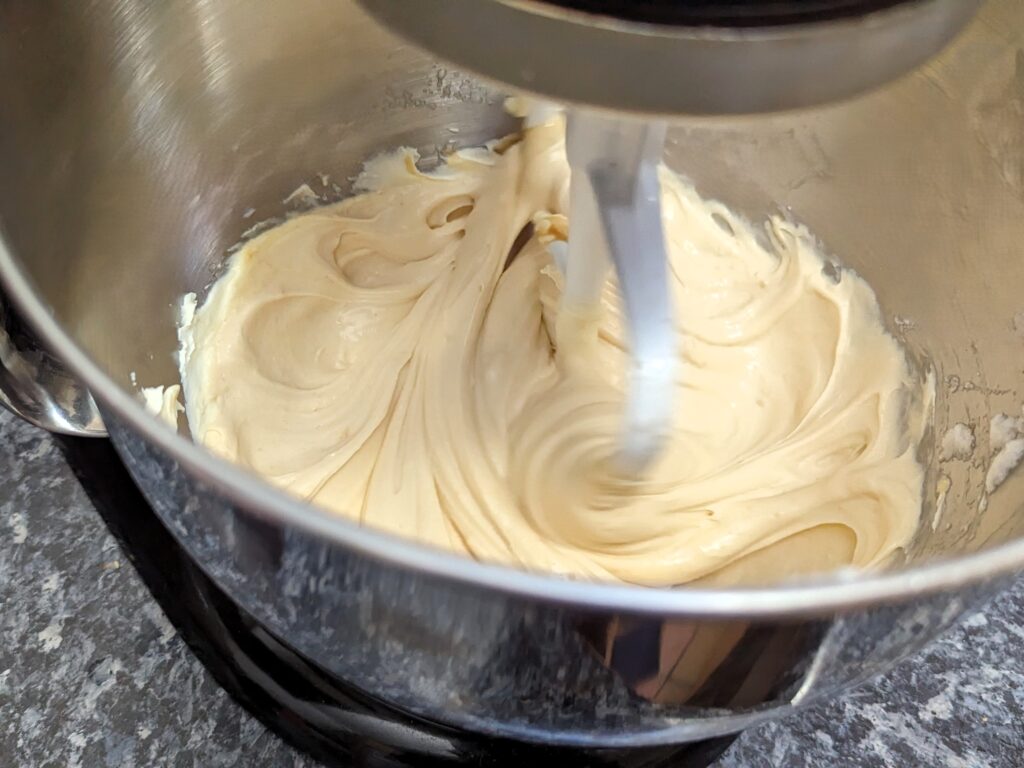
Gently combine till it’s a thick, silky consistency.
Fold in egg whites
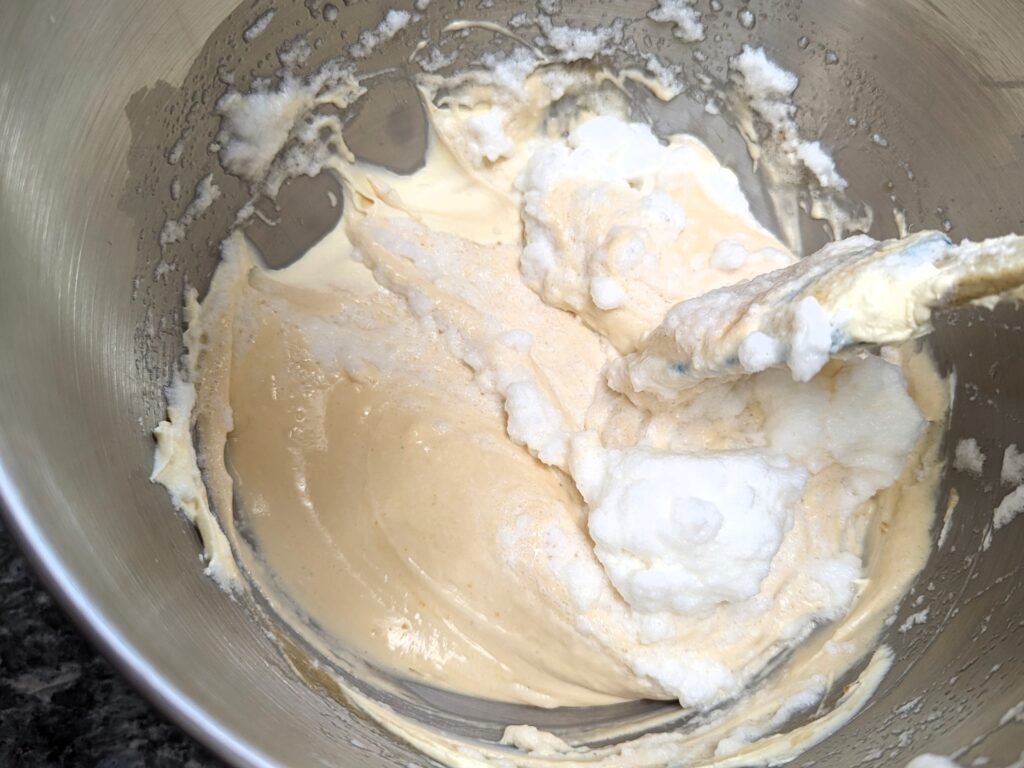
Fold in the egg whites, a spoonful at the time with a spatula.
The eggs whites will lighten the mixture, be sure to not overmix so that the cream stays airy!
Once combined, cover and rest in the fridge for 30 minutes.
Soak biscuits and layer with mascarpone mixture
Prepare a large tray (20 x 30 cm) for the tiramisu. Set up the bowl with the coffee, one with the mascarpone cream, and one with the savoiardi.
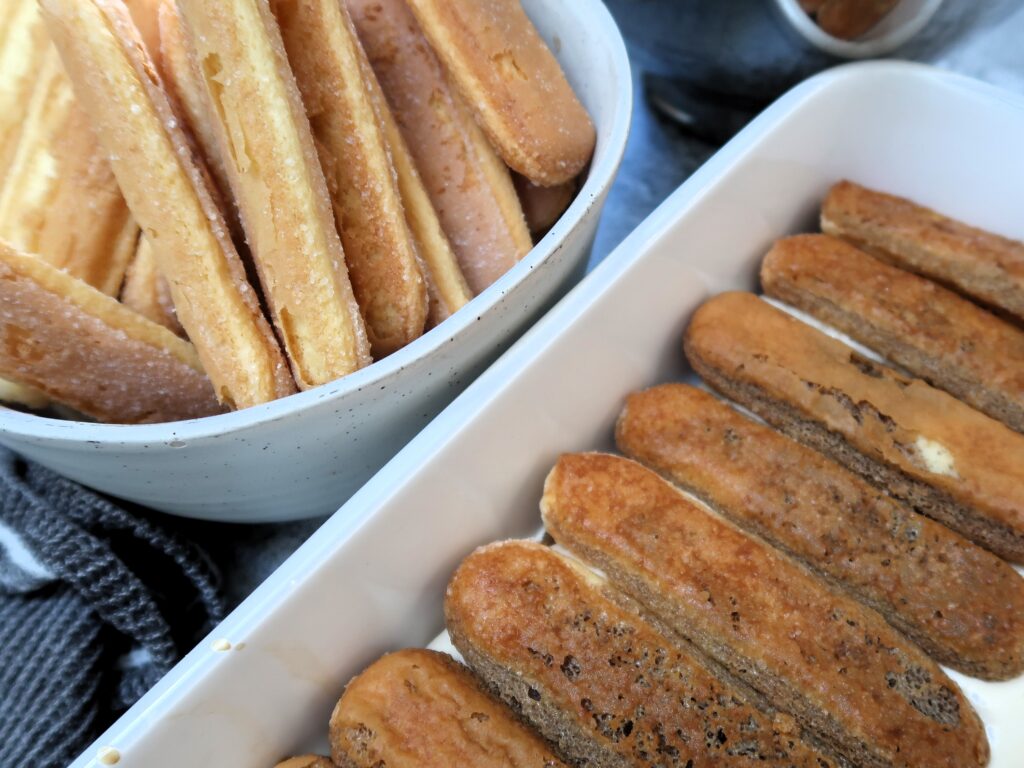
Soak each biscuit for 1-2 seconds in the coffee – no longer, otherwise they will completely disintegrate in your hands! Layer in the tray.
Top with a spoonful of the mascarpone mixture, then layer the biscuits again. The top should be a thick layer of mascarpone cream
Dust with cocoa powder and rest in the fridge
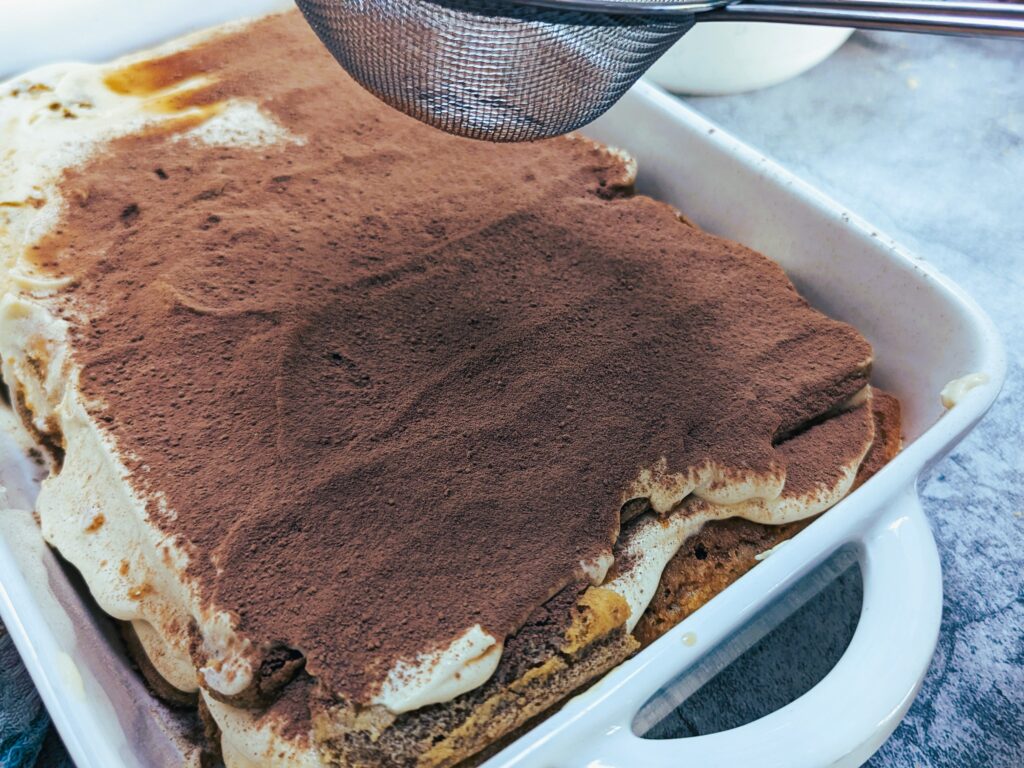
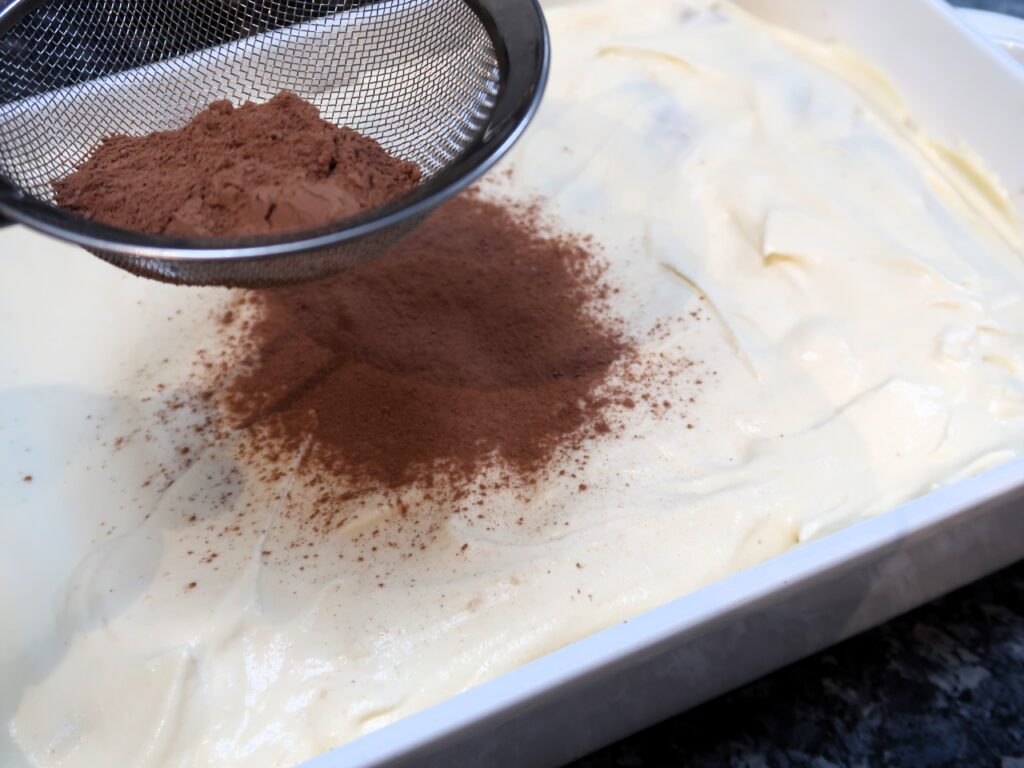
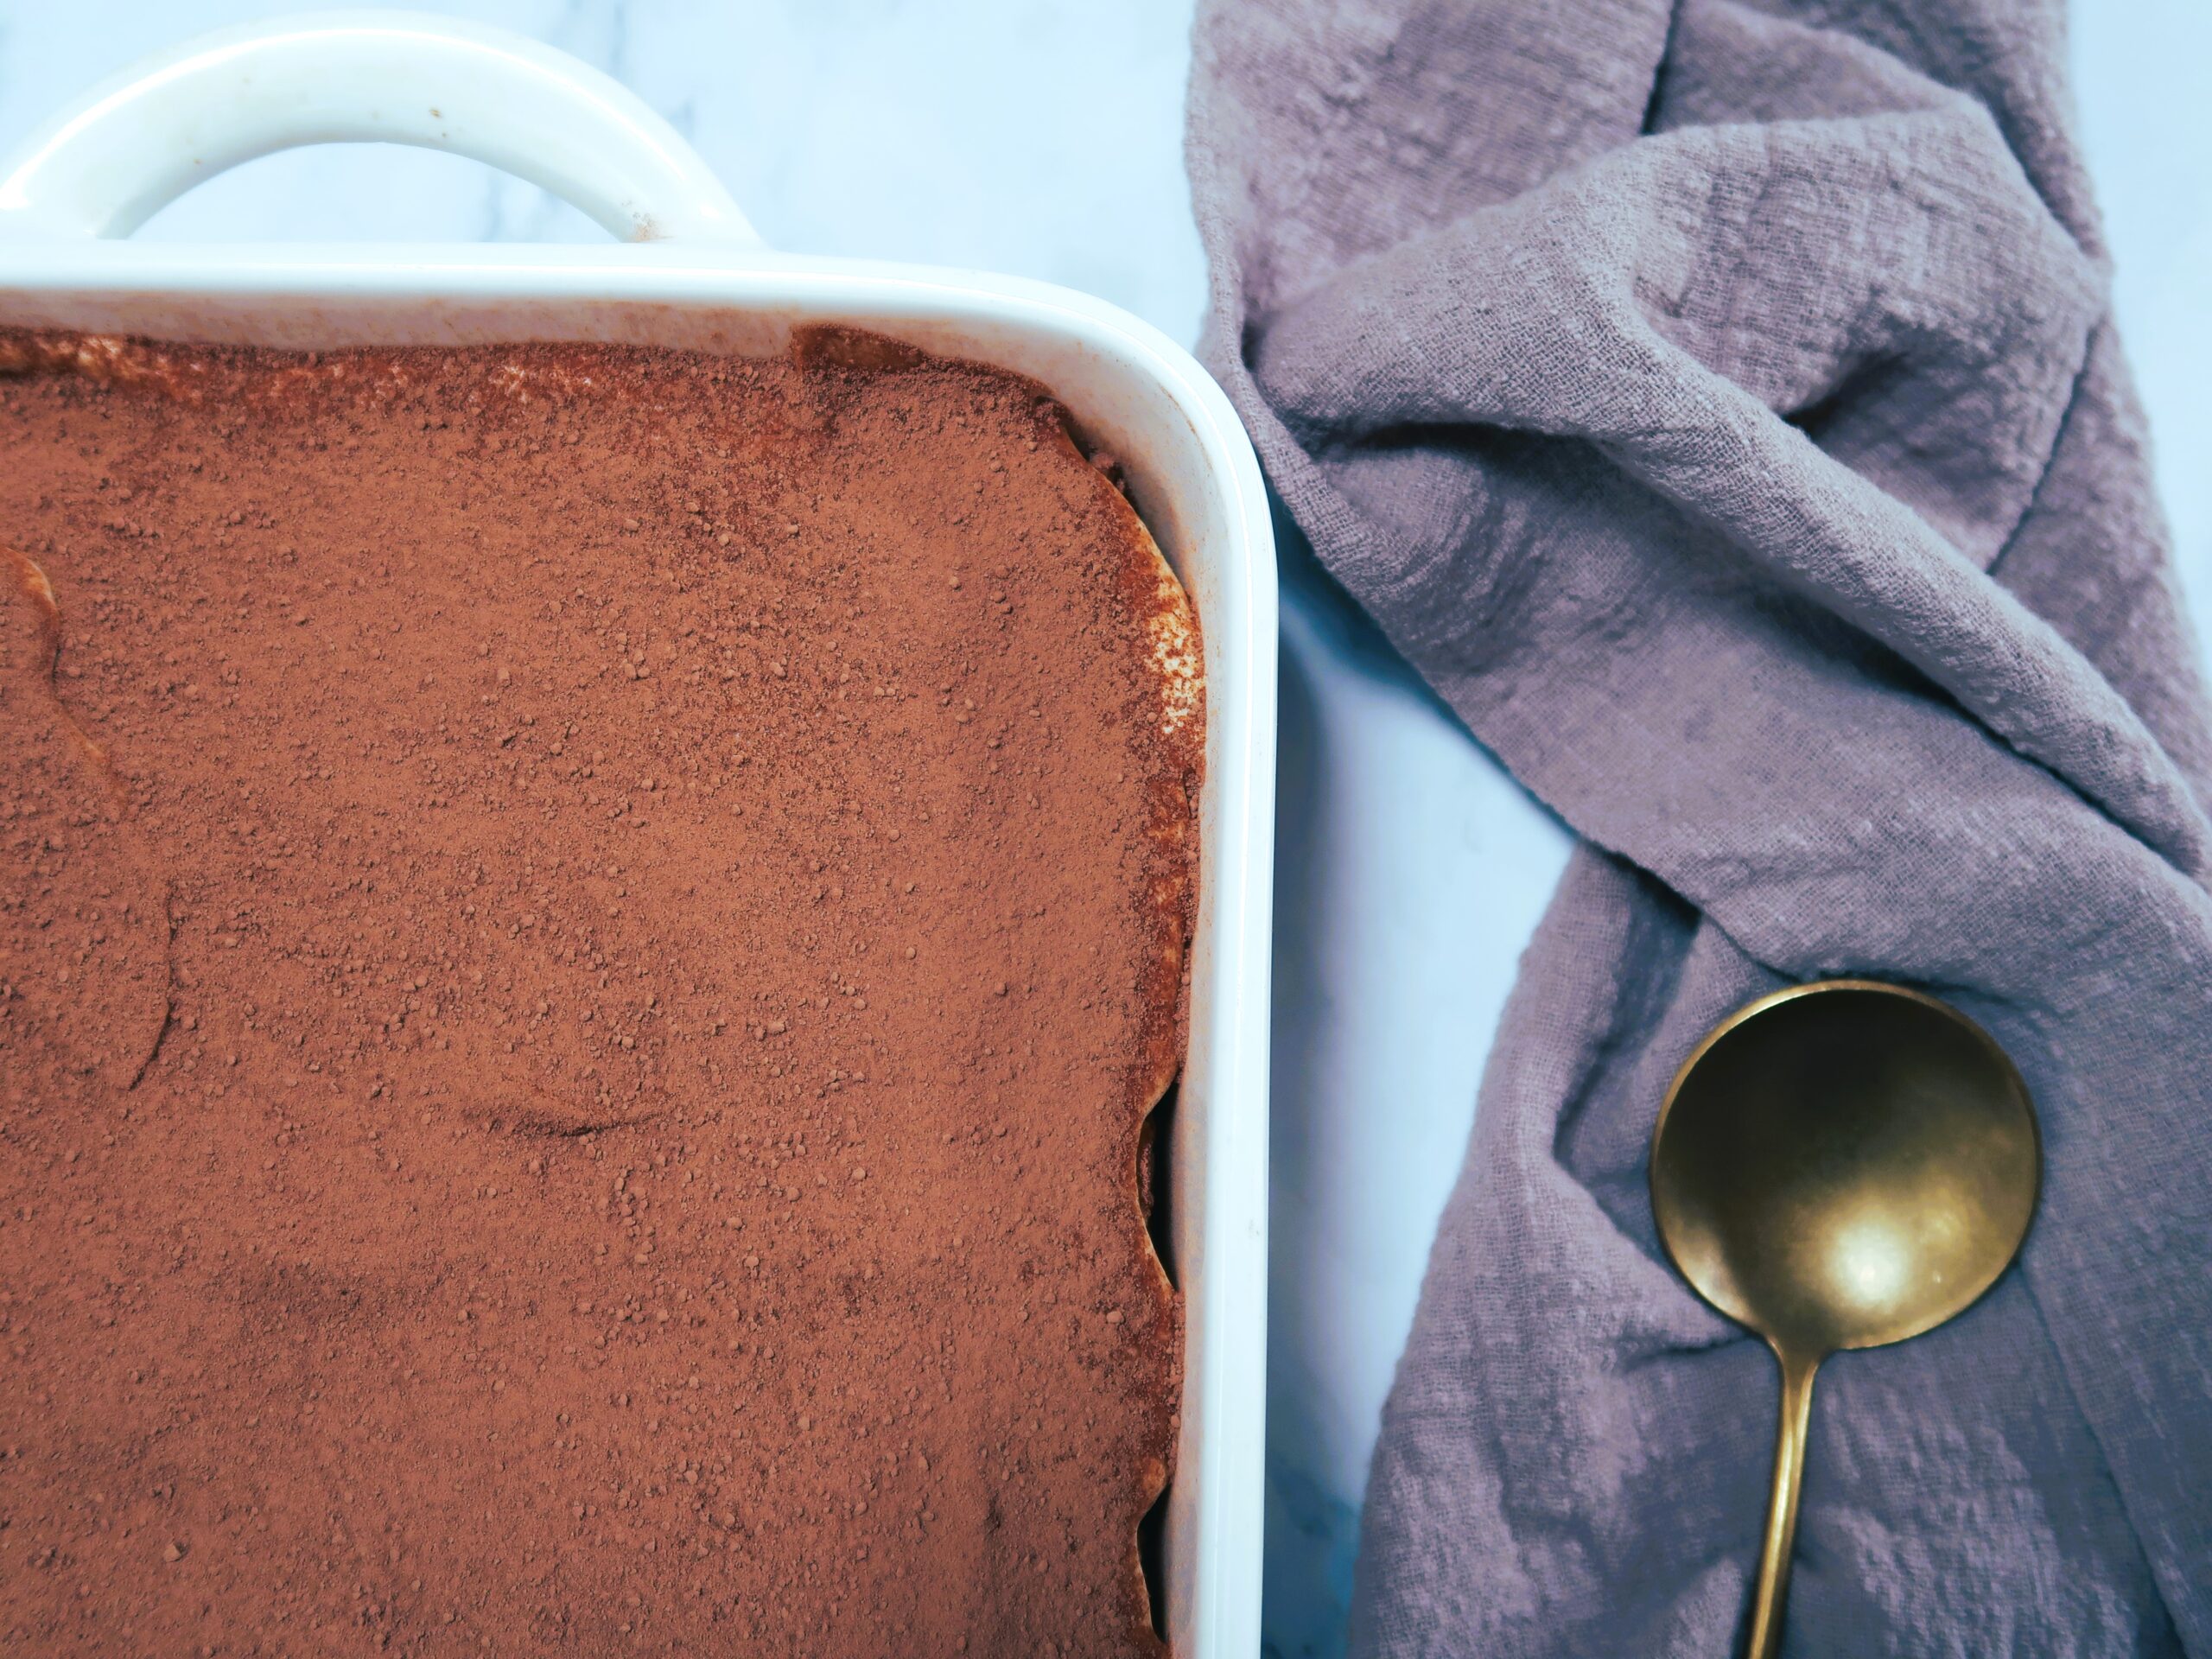
Top the tiramisu with a thick dusting of cocoa powder. Cover and rest the tiramisu in the fridge for at least 6 hours or overnight to allow for the biscuits to fully absorb and soften.
Storage of Tiramisu
Due to containing raw eggs and dairy, Tiramisu must be kept in the fridge right up until serving. Leftover tiramisu needs to be stored in the fridge in an airtight contained and be consumed within the next 3 days.
Safety notice: Alternative to using raw eggs
This recipe uses raw eggs. Some people might not like the idea of using raw eggs, and for some it may be a safety concern. Young children, pregnant women or elderly and immune-compromised individuals are generally recommended to NOT consume products containing raw eggs like this recipe.
The alternative instead of using eggs is to have a similar version of this tiramisu (although not traditional) is to replace the eggs with freshly whipped cream.
Replace the eggs with 200 ml of heavy whipping cream, add the sugar and whip until you get stiff peaks and fold in with the mascarpone. Add 1 tsp of vanilla essence for more flavour. Layer with the coffee-soaked biscuits as per recipe above.
The coffee can also be replaced for a decaf espresso.
A traditional northern italian dessert made with sponge fingers, dipped in coffee and layered with mascarpone cream
Ingredients
3Eggs(separated whites / yolks)
3 tbspSugar(white or caster sugar)
500grMascarpone Cheese
30-40Savoiardi biscuits(400 gr approx)
1.5cupsEspresso Coffee(300 ml approx)
2tbspCocoa Powder
Instructions
Prepare the espresso coffee and set aside to cool slightly, then store in the fridge.
Separate the eggs. In a large bowl, beat the egg whites till they form stiff peaks and set aside.
In a separate bowl, combine the the egg yolks and sugar. Using a stand mixer or hand held mixer, beat until pale for 5 minutes.
Add the mascarpone to the eggs yolks and sugar mixture and gently combine till it's a thick, silky consistency.
Fold in the egg whites, a spoonful at the time with a spatula. The eggs whites will lighten the mixture, be sure to not overmix so that the cream stays airy! Once combined, cover and rest in the fridge for 30 minutes.
Prepare a large tray (20 x 30 cm) for the tiramisu. Soak each biscuit for 1-2 seconds in the coffee – no longer, otherwise they will completely disintegrate in your hands! and layer in the tray.Top with a spoonful of the mascarpone mixture, then layer the biscuits again. The top should be a thick layer of mascarpone cream
Top the tiramisu with a thick dusting of cocoa powder. Cover and rest the tiramisu in the fridge for at least 6 hours or even better overnight to allow for the biscuits to fully absorb. Enjoy!
Notes
Storage: Due to containing raw eggs and dairy, Tiramisu must be kept in the fridge right up until serving. Leftover tiramisu needs to be stored in the fridge in an airtight contained and be consumed within the next 3 days.Safety notice: This recipe uses raw eggs. Some people might not like the idea of using raw eggs, and for some it may be a safety concern. Young children, pregnant women or elderly and immune-compromised individuals are generally recommended to NOT consume products containing raw eggs like this recipe.Alternative of using raw eggs: To have a similar version of this tiramisu (although not traditional) is to replace the eggs with freshly whipped cream.Replace the eggs with 200 ml of heavy whipping cream, add the sugar and whip until you get stiff peaks and fold in with the mascarpone. Add 1 tsp of vanilla essence for more flavour. Layer with the coffee-soaked biscuits as per recipe above.The coffee can also be replaced for a decaf espresso.
Course: Dessert
Cuisine: Italian
Keyword: easy dessert, make ahead meal, tiramisu
Want to read more?
I hope you enjoyed this recipe of classic italian tiramisu. More easy delicious dessert recipes coming soon!
A deliciously creamy side dish perfect to accompany roast meats like a slow cooked lamb leg or roast pork. Thinly sliced potatoes are layered with rosemary and baked slowly with cream, garlic and mozzarella cheese to make this Rosemary and Garlic Potato Gratin.
Ingredients for this Rosemary and Garlic Potato Gratin
This easy Potato Gratin recipe only uses a handful of ingredients, most of them you probably already have at home!
What are the best Potatoes to use for this Rosemary and Garlic Potato Gratin
Most importantly, find the right potatoes for roasting. Ideally, you are looking for a floury potato, which will go creamy on the inside, and crispy on the outside once cooked.
The best variety to use the Sebago type, which are long / oval shaped, but Desiree and Dutch Cream varieties also work well.
Shredded Mozzarella or you can substitute for tasty shredded cheese
Garlic
Rosemary
Salt & Pepper
Olive Oil
Parsley, to garnish
How to make this Rosemary and Garlic Potato Gratin
Slice and layer potatoes
Pre-heat oven to 180 degrees (160 fan forced).
Put a few tablespoons of olive oil at the bottom of the tray you will use for the gratin. I used a shallow 30 cm round cast iron pot to layer the potatoes in a circle, but you can also use a square or rectangular (roughly 20 cm x 30 cm) oven proof tray.
Peel and thinly slice (roughly half a cm thick slices) the potatoes and arrange them tightly layered next to each other. Arrange the rosemary sprigs amongst the potatoes.
Combine cream, garlic & mozzarella mixture
In a separate bowl, combine the cream, salt, pepper, finely chopped garlic and chicken stock. Once combined add the shredded mozzarella and stir. Pour the mixture over the potatoes.
Bake till crispy
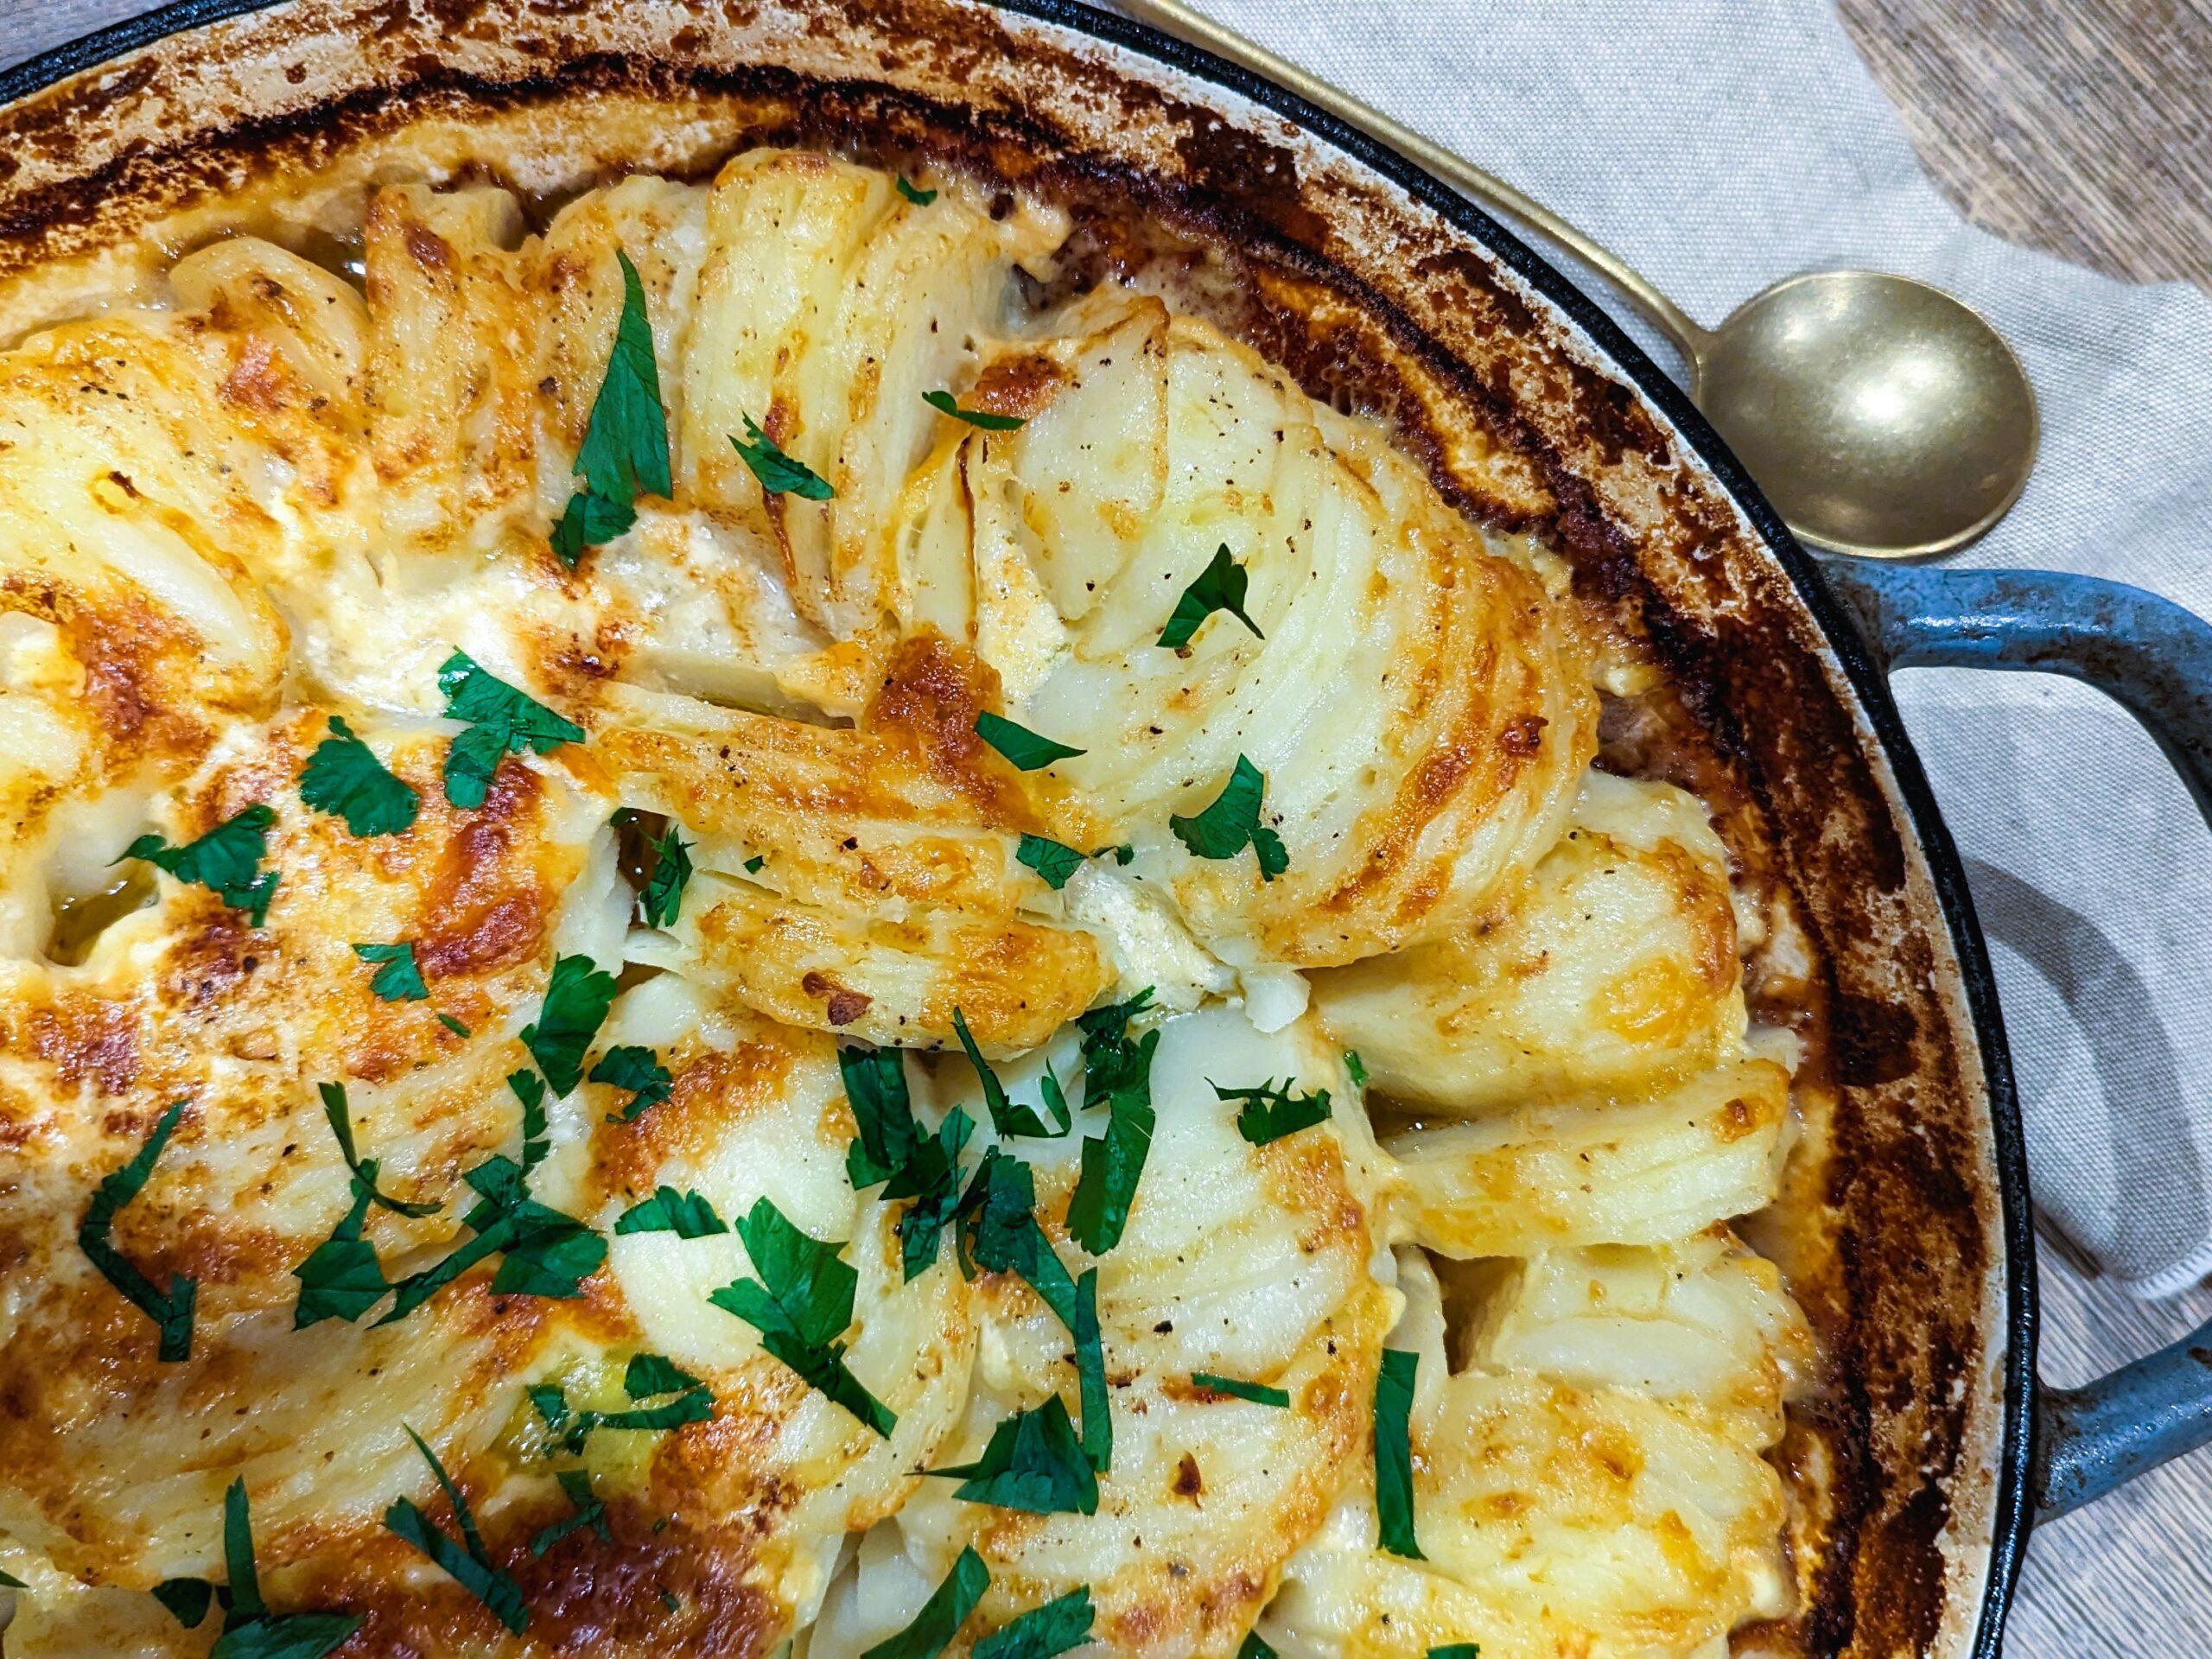
Cover with foil or with an ovenproof lid and bake in the oven for 45 minutes. Uncover and bake for a further 30 minutes uncovered.
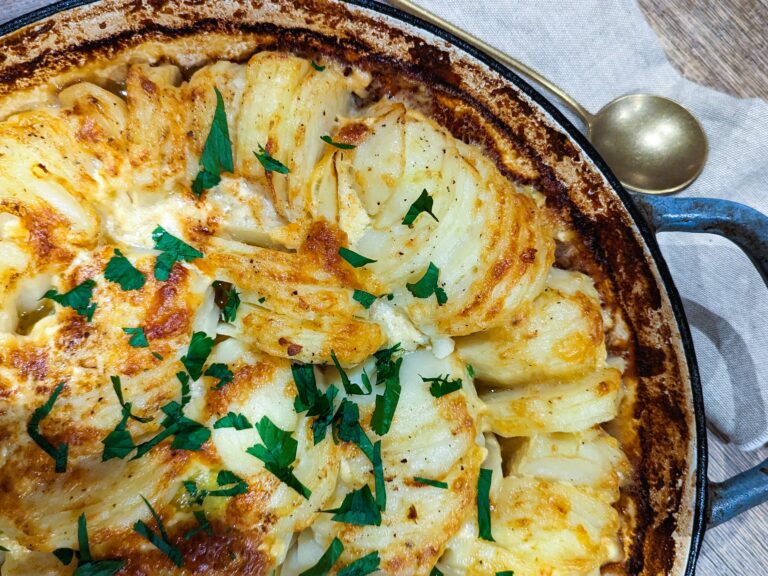
Rest for 5 minutes, top with chopped parsley and serve. Enjoy!
Thinly sliced potatoes baked with a creamy garlic sauce till crispy
Equipment
1 Circular Cast Iron Pot 30 cm
Ingredients
2kgRoasting Potatoes (Peeled and Thinly Sliced half a cm thick)
1cupCooking Cream(250 ml)
1cup Shredded Mozzarella Cheese
1cupChicken or Vegetable Stock(200 ml)
3TbspOlive Oil
4SprigsRosemary
3 ClovesGarlic(Thinly Sliced)
1TspSalt
Ground Pepper
Instructions
Pre-heat oven to 180 degrees (160 fan forced).Put a few tablespoons of olive oil at the bottom of the tray you will use for the gratin. I used a shallow 30 cm round cast iron pot to layer the potatoes in a circle, but you can also use a square or rectangular (roughly 20 cm x 30 cm) oven-proof tray.Peel and thinly slice (roughly half a cm thick slices) the potatoes and arrange them tightly layered next to each other. Arrange the rosemary sprigs amongst the sliced potatoes.
In a separate bowl, combine the cream, salt, pepper, finely chopped garlic and chicken stock. Once combined add the shredded mozzarella and stir. Pour the mixture over the potatoes.
Cover with foil or with an ovenproof lid and bake in the oven for 45 minutes. Uncover and bake for a further 30 minutes uncovered.
Rest for 5 minutes, top with chopped parsley and serve. Enjoy!
Course: Side Dish
Cuisine: French
Keyword: baked potatoes, gratin, potato gratin, side dish
Want to read more?
Hope you enjoyed this recipe! More potato recipes coming on the blog soon. If you like this recipe, you might also like this Balsamic and Maple Roasted Pumpkin.
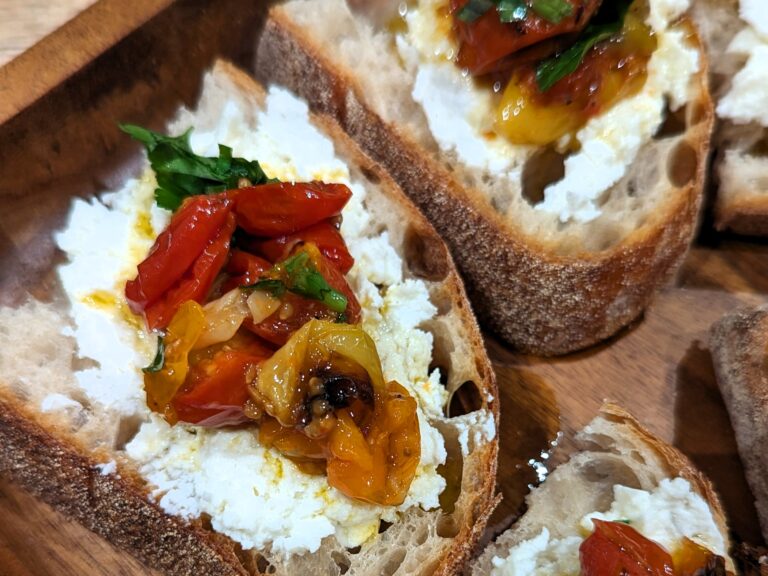
A great wintery version of the classic tomato bruschetta! The tomatoes are slow-roasted in the oven and caramelize and sweeten beautifully. Perfect with some creamy ricotta over crispy bread. These Slow Roasted Tomatoes and Ricotta Bruschette are so easy to make and my new favourite starter!
Datterini & Grape Tomatoes: Perfect for slow roasting
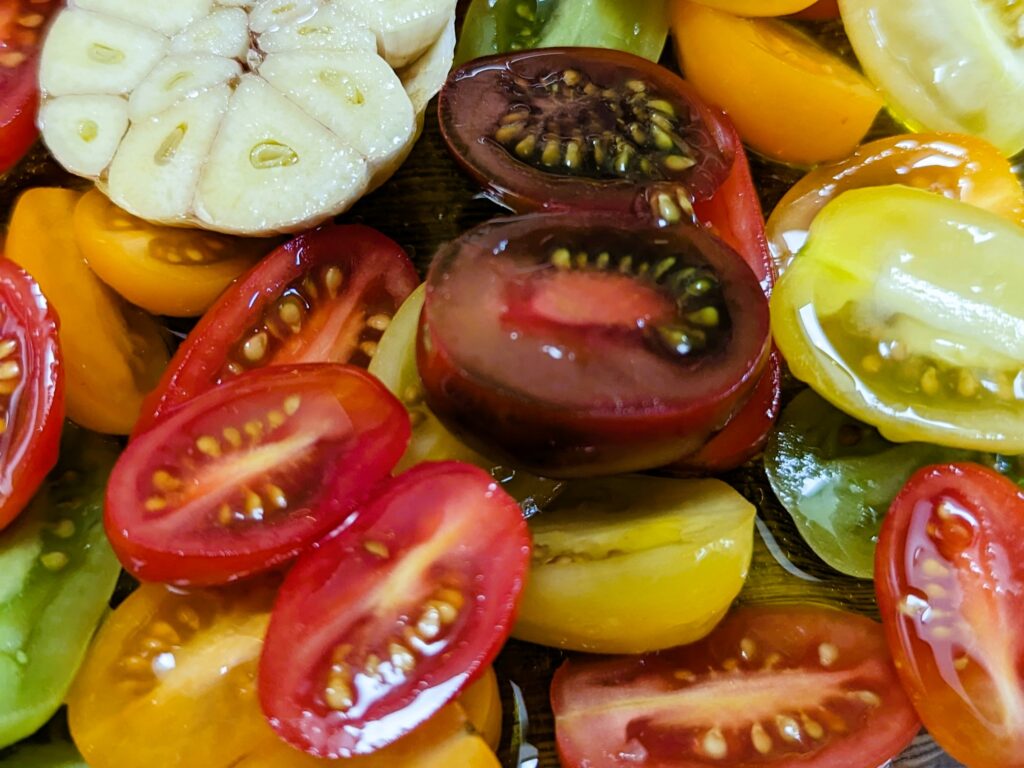
On the days when my oven is on, I don’t pass up the chance to also bake a tray of the sweetest little tomatoes. These tomatoes can easily be found at almost all major stores – and you can recognize them for their date like shape (in italian its datteri – that’s where the name Datterini comes from) and they are a delight to eat, either fresh or slow roasted.
You can also find them in orange, green and dark red varieties, also called grape tomatoes as they are the shape of – grapes! The main difference with cherry tomatoes is that they are meatier, have a thicker skin (great for roasting) and sweeter. Pair it with some creamy ricotta and you have a delicious starter for any meal.
Supermarket varieties of cherry and grape tomatoes
Ingredients for this Slow roasted tomatoes and ricotta bruschette
Only a few ingredients are required for these easy slow roasted tomatoes and ricotta bruschette:
Tomatoes – I like to use a mixture of datterini and grape tomatoes, red and orange for the vibrant colours. Pick the sweetest you can find as these will make a lovely combinations of flavours and textures. Cherry tomatoes also work well but I find that they need a bit extra salt to bring out more sweetness, especially if these are out of season!
Garlic – a whole bulb sliced in half to slow roast with the tomatoes
Fresh Ricotta
Extra virgin olive oil – LOTS of it!
Salt and Pepper
Bread – A light airy loaf that you can slice in thick slices, or a nice sourdough or ciabatta loaf. A baguette will also work for smaller crostini style bruschetta.
Fresh Parsley – for garnish
How to make these Slow roasted tomatoes and ricotta bruschette
Prepare the Tomatoes and Garlic for slow-roasting
Start off by preheating the oven at 180 degrees. Slice the tomatoes in half and place in a small glass tray with the sliced garlic bulb, the olive oil, a pinch of salt and pepper.
Roast till tender and sweet and combine with the garlic
Roast for 40 minutes till the tomatoes are falling apart. Remove the garlic cloves from the bulb, mash them and mix gently with the tomatoes. Check for seasoning and add more salt as required. Set aside to cool slightly.
Top the bruschette
In the meantime, grill or toast the bread, spread the ricotta, top with the slow-roasted tomatoes, fresh parsley and more cracked pepper. Serve immediately!
A mixture of tomatoes are used for this Slow Roasted Tomatoes
Want to read more?
If you enjoyed these Slow roasted tomatoes and ricotta bruschette! Check out my other Bruschette variations on this Easiest Tomato Bruschetta recipe!
Slow roasted tomatoes and garlic gently oven roasted to serve on crusty bread with creamy ricotta
Ingredients
500GramsGrape, Datterini or Cherry Tomatoes(halved)
1BulbGarlic(sliced in half)
HalfCupExtra Virgin Olive Oil(125 ml)
8SlicedThick crusty bread (Sourdough, Vienna or Baguette )
6TbspRicotta
Salt
Pepper
1HandfulParsley(Finely chopped)
Instructions
Preheat oven at 180 degrees.Slice the tomatoes in half and place in a small glass tray with the sliced garlic bulb, the olive oil, a pinch of salt and pepper.
Roast for 40 minutes till the tomatoes are falling apart. Remove the garlic cloves from the bulb, mash them and mix gently with the tomatoes. Check for seasoning and add more salt as required. Set aside to cool slightly.
In the meantime, grill or toast the bread, spread the ricotta, top with the slow-roasted tomatoes, fresh parsley and more cracked pepper. Serve immediately!
Notes
Notes: Tomatoes can be roasted ahead of time too! Once roasted and if not using immediately, let the tomatoes cool and place them in an airtight container in the fridge for up to 3 days. You can top the bruschette with the mixture warm or cold.
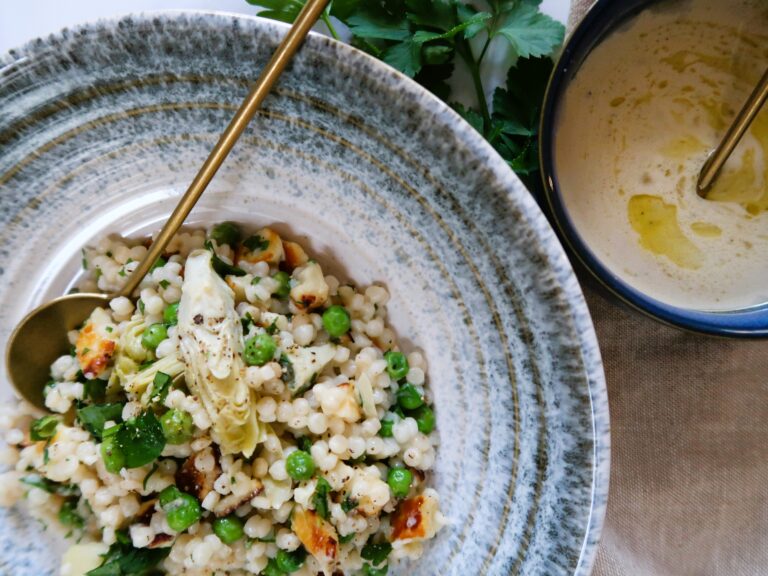
This Halloumi Pearl Couscous salad is so zingy and fresh and is perfect to accompany BBQ meats and seafood. The nutty pearl couscous pairs beautifully with the creamy hummus and crispy halloumi, making every mouthful a delight! This couscous is so easy to make and one of my favourite salad recipes!
Ingredients needed for this Halloumi Pearl Couscous Salad with Hummus Dressing
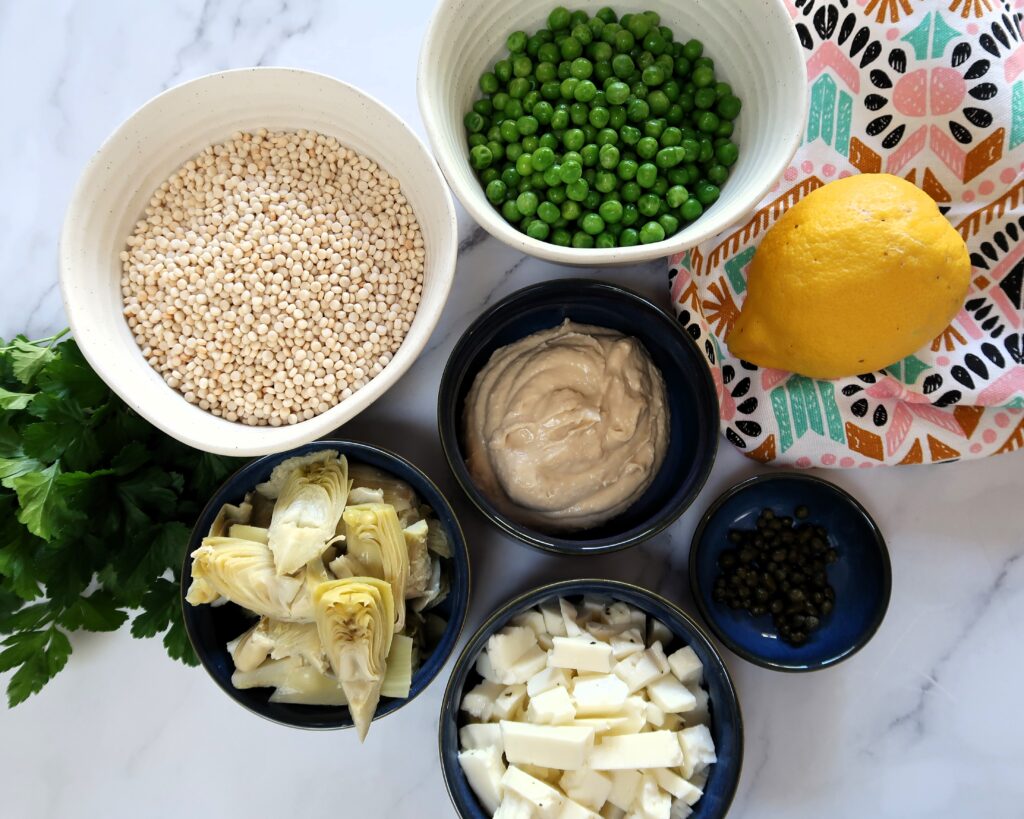
A super easy salad that comes together in just 30 minutes. The ingredients you will need:
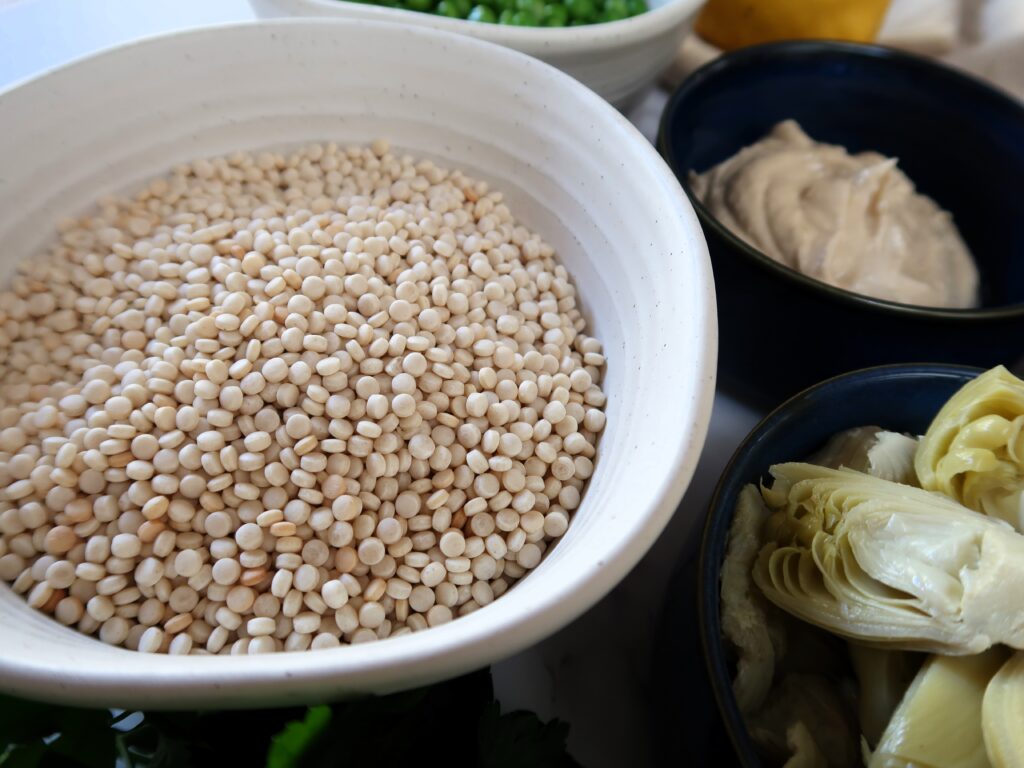
Pearl Couscous: Normal or Wholemeal (also called Israeli couscous). I love the texture and nutty flavour of this type of couscous and find it holds the dressing better than normal couscous. I cook it in some stock or water as per packet directions and stir some olive oil through it at the end of cooking to stop it from sticking together.
Halloumi: A 200 gr piece (I love Dodoni), chopped in small pieces
Peas: Frozen peas that you cook along with the couscous in the last 2 minutes of cooking.
Capers
Parsley: Finely chopped
Artichokes: Not essential – but I like to add these to the salad. I used half of a 400 gr can of whole artichoke hearts, cut into quarters or a small jar of deli marinated artichokes.
For the Dressing:
Hummus: The best quality one you can find from your local supermarket or if you homemade it even better!
Extra Virgin Olive Oil, plenty of it!
Lemon Juice
Salt & Pepper
A splash of water to thin out the dressing so it better coats the couscous salad
How to make this Halloumi Pearl Couscous Salad
Cook the Couscous
First off you start with cooking the couscous. It will need to cool so you can leave all the chopping of the rest of the ingredients for later! Follow packet directions as each brand might vary.
The process is similar for most pearl couscous where you start by heating a few tablespoons of olive oil in a medium pot (with lid).
Once the oil is warm add the cous cous and toast gently in the oil for a few minutes. The couscous will change to a slightly darker toasted colour. This adds to the nutty flavour and allows for the couscous to hold it’s shape better!
You then add double the amount of hot water (straight from your kettle), add salt (or stock powder if you prefer), stir, lower the heat and pop the lid back on for 8 minutes. Makes sure you keep an eye on the timer as the cous cous can overcook easily and become a gluggy mess!
Fry the Halloumi cheese
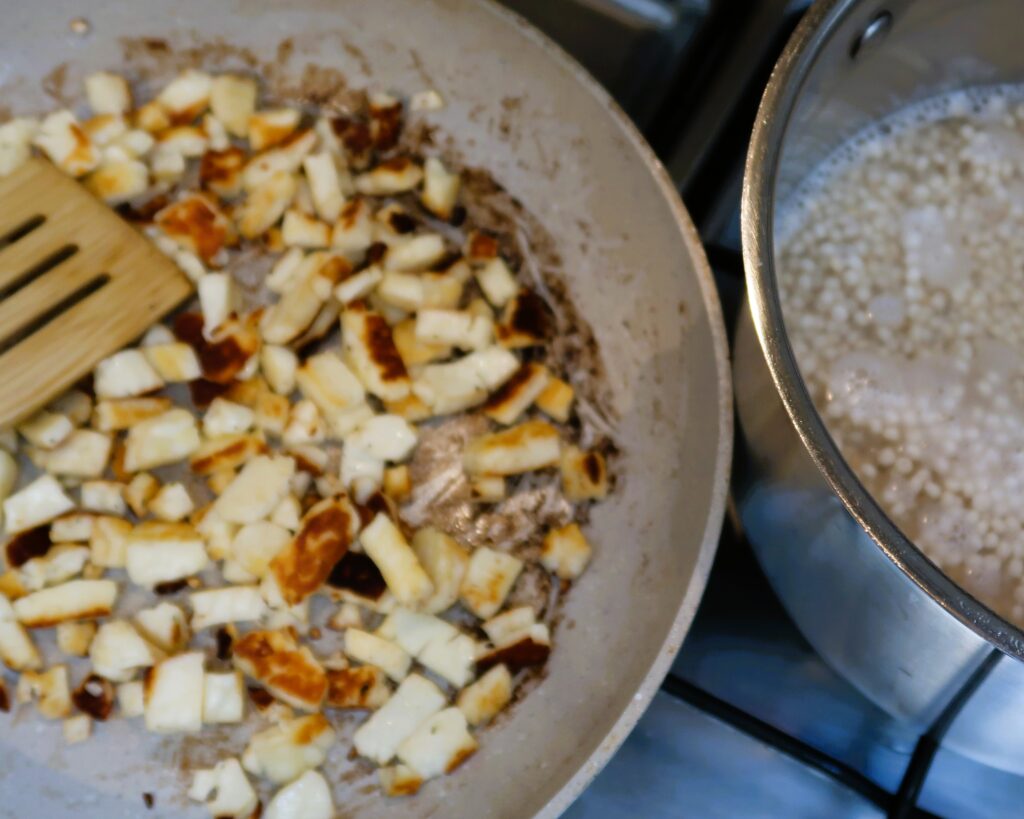
The crispy Halloumi is the star of this pearl couscous salad! Chop the halloumi into small pieces and fry it in a non stick pan with a tablespoon of oil till golden and crispy. Set aside.
Cook the peas
After 8 minutes that the cous cous is cooking add the frozen peas and cook for a further 2 minutes.
Turn off the heat, remove the lid, add a few tablespoons of olive oil and stir. Transfer to a large bowl and allow to cool for at least 15 minutes.
In the meanwhile, prepare the dressing and chop the parsley and the artichokes (if using).
Make the dressing
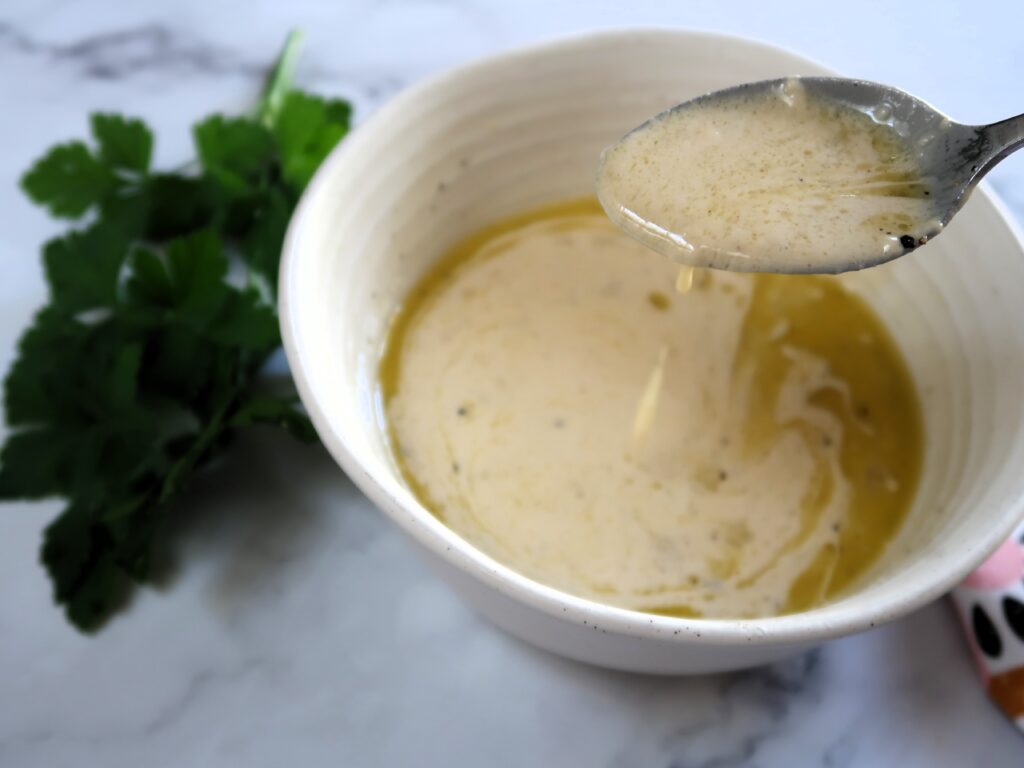
Make the dressing by combining the hummus with the lemon juice, a splash of water (a few tablespoons), olive oil, salt and pepper and combine well till you get a thin dressing.
Combine & Serve
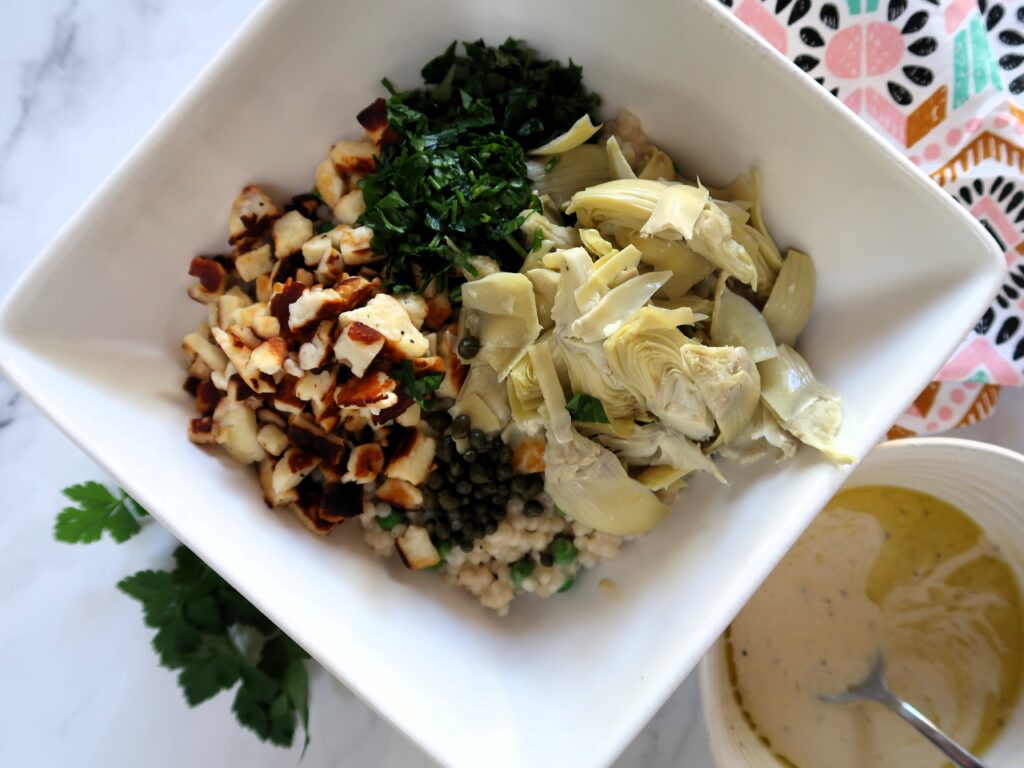
To the cooled couscous and peas add the parsley, artichokes, capers, halloumi and half the hummus dressing and combine. Serve warm at the table with the dressing to the side and add more to your liking!
Enjoy!
Serving suggestions
This Halloumi Pearl Couscous salad is delicious served warm, but can also be eaten cold. I like to reserve some of the dressing to add to later for extra creaminess especially if the salad has been stored in the fridge.
Perfect to bring to dinner parties, BBQ and goes well alongside grilled meats or seafood. Great on its own too for a simple lunch or dinner.
Pearl Couscous Salad with crispy halloumi and a creamy dressing
Ingredients
2cupsPearl couscous (uncooked)
1cupFrozen Peas
1blockHalloumi cheese(200 gr approx, cubed in 1 cm pieces)
2tbspCapers
1small bunchParsley(finely chopped)
1/2 cupsCanned or Marinated Artichoke hearts, quartered(optional)
4tbspHummus(store brought or homemade)
10 tbspExtra Virgin Olive Oil(approx)
halfLemon(Juice of)
1tspSalt
Ground Pepper(to taste)
Instructions
First off you start with cooking the cous cous. It will need to cool so you can leave all the chopping of the rest of the ingredients for later! Follow packet directions as each brand might vary.The process is similar for most pearl cous cous where you start by heating a few tablespoons of olive oil in a medium pot (with lid).Once the oil is warm add the cous cous and toast gently in the oil for a few minutes over medium heat.Add double the amount of hot water (straight from your kettle), salt or stock powder if you prefer, stir, lower the heat and pop the lid back on for 8 minutes. While the cous cous is cooking, prepare the haloumi.
Chop the halloumi into small 1 cm cubes and fry it in a non-stick pan with a tablespoon of oil till golden and crispy. Set aside.
After 8 minutes that the cous cous is cooking add the peas and cook for a further 2 minutes.Turn off the heat, remove the lid, add a few tablespoons of olive oil and stir. Transfer to a large bowl and allow to cool for at least 15 minutes.In the meanwhile, prepare the dressing and chop the parsley and the artichokes (if using).
Make the dressing by combining the hummus with the lemon juice, a splash of water, 6 tablespoons of olive oil, a pinch of salt and pepper and combine well till you get a thin dressing. Set aside.
Once the couscous has cooled down, add the parsley, artichokes, capers, halloumi and half the hummus dressing and combine. Serve immediately warm at the table with the rest of the dressing to the side and add more to your liking.
Notes
Recipe is for 6 Servings as a side dish.Serving suggestions:This salad is delicious served warm, but can also be eaten cold. I like to reserve some of the dressing to add to later for extra creaminess especially if the salad has been stored in the fridge.Keep leftovers in the fridge for up to 3 days.
This filling pasta dish is unlike your usual bowl of wheat or egg pasta. It packs a punch of nuttiness and a distinctive chewy consistency that comes from the buckwheat flour. If you are a pasta lover this Healthy Pizzoccheri Pasta is one to try!
What is Pizzoccheri?
Pizzoccheri is a type of pasta similar to wide tagliatelle, made from a combination of wheat and buckwheat flour. The traditional recipe is mainly made up of buckwheat flour, with the ratio usually 4 parts buckwheat flour to 1 part 00 flour, giving the pizzoccheri a really distinct texture and flavour.
You can read more below in the section about Making Pizzoccheri Pasta too.
Where does Pizzoccheri pasta originate from?
Its origins date as far as the 16th century and is a traditional dish from the Valtellina region of the north of Italy. Valtellina is in the Lombardy region, close to the Swiss border.
Pizzoccheri alla Valtellinese is a buckwheat pasta dish that is traditionally served with potatoes and savoy cabbage, which are boiled together with the pizzoccheri. The pizzoccheri are then dressed in garlic, butter, sage, Grana Padano (parmesan) and Valtellina Casera cheese.
Valtellina Casera Cheese is a DOP typical cheese made in the Valtellina region only so it can be hard to find. If not available is commonly replaced in recipes with Fontina, Gruyere or Gouda.
For my Healthy Pizzoccheri pasta dish, I reduced the cheese and butter amount compared to the traditional recipe. The recipe is of course though full of flavour and makes for a satisfying & delicious one plate meal!
Where can you buy Pizzoccheri?
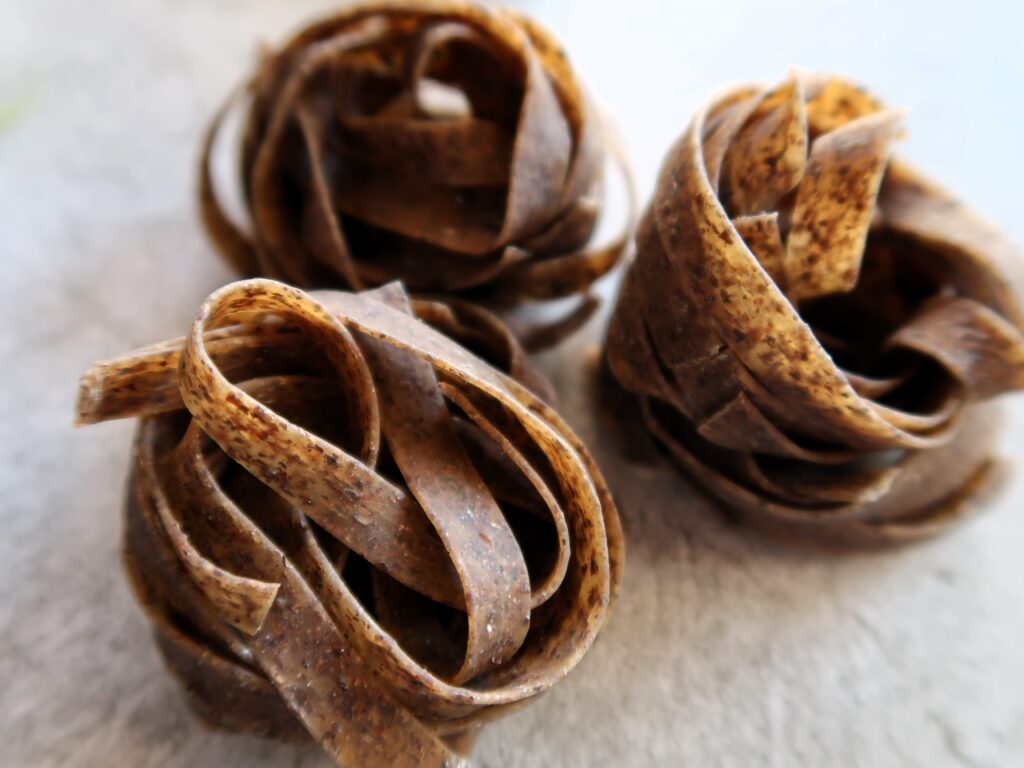
Ready-made Italian dry Pizzoccheri pasta can be hard to find and is generally not available in supermarkets. Look for this in delicatessen stores or online italian importing specialists to get this type of pasta.
Alternatively, you can also buy a good quality buckwheat pasta from your supermarket. Look for one that has a high buckwheat content to be a similar version to Pizzoccheri.
NOTE: In the traditional recipe the ratio of buckwheat flour to wheat flour is 4 to 1 meaning the pasta is quite dense and nutty compared to your standard wheat pasta. If you prefer a milder, smoother pasta – the ratio of the buckwheat can be reduced to half buckwheat and half wheat.
To give you a comparison of texture, If you have eaten Soba noodles before, the shop brought varieties are usually 70% wheat and 30% buckwheat.
Ingredients needed to make this Healthy Pizzoccheri Pasta dish
For this Healthy Pizzoccheri Pasta dish you will need a handful of ingredients:
Pizzoccheri – or buckwheat pasta this recipe is using 250 gr of dried pizzoccheri, which will yield 2 very generous serves or 3 smaller serves of pizzoccheri.
Potatoes
Kale, Cavolo Nero or Savoy cabbage
Parmesan or Grana Padano
Garlic Cloves
Butter, Olive Oil, Salt & Pepper
How to make this Healthy Pizzoccheri Pasta
Cook the pizzoccheri together with the potatoes
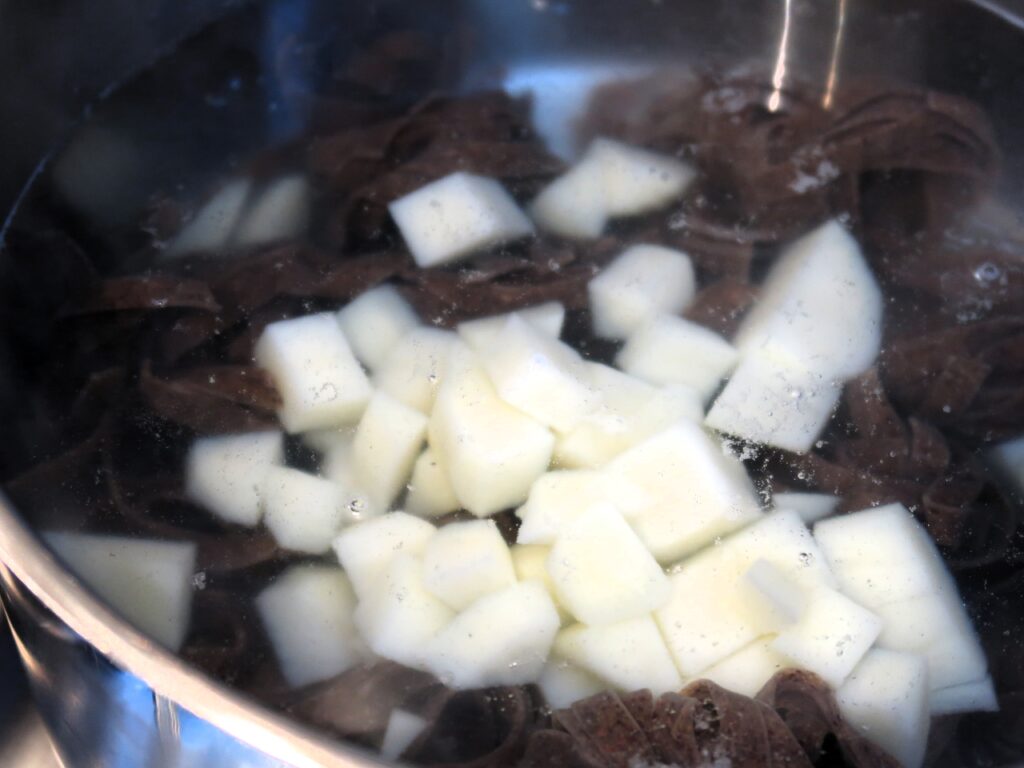
Bring a large pot of salted water to the boil, add Pizzoccheri and chopped potato and cook for about 10 minutes.
Sautee garlic and kale in olive oil
In the meantime, in a large non-stick pan add 3 tablespoons of olive oil and over low to medium heat sautee the garlic for 1-2 minutes, add the kale and half a cup of the pizzoccheri cooking water and cook down till softened for 3-4 minutes
Combine pizzoccheri and add parmesan and butter
Once the pizzoccheri are cooked, add them to the large pan, along with the butter, 3 tablespoons of olive oil, the grated parmesan, a pinch of salt and pepper and gently combine over low heat for 1 minute.
NOTE: Don’t overmix as the pasta can easily break!
Serve immediately
Serve immediately with additional olive oil, parmesan and pepper to taste, enjoy!
1Potato (250 gr approx, peeled and chopped into 2-3 cm cubes)
3cupsKale(roughly chopped with stalk removed)
6tbspExtra Virgin Olive Oil(Plus extra for serving)
2Garlic Cloves(Finely Sliced)
5 tbspButter(50 gr approx)
50grGrated Parmesan(Plus extra for serving)
Salt & Pepper(to taste)
Instructions
Bring a large pot of salted water to the boil
Add Pizzoccheri and chopped potato and cook for about 10 minutes
In the meantime, in a large non-stick pan add 3 tablespoons of olive oil and over low to medium heat sautee the garlic for 1-2 minutes, add the kale and half a cup of the pizzoccheri cooking water and cook down till softened for 3-4 minutes
Once the pizzoccheri are cooked, add them to the large pan, along with the butter, 3 tablespoons of olive oil, the grated parmesan, a pinch of salt and pepper and gently combine over low heat for 1 minute. Don't overmix as the pasta can easily break!
Serve immediately with additional olive oil, parmesan and pepper to taste
Notes
This recipe is using 250 gr of dried pizzoccheri, which will yield 2 very generous serves or 3 smaller serves of pizzoccheri.
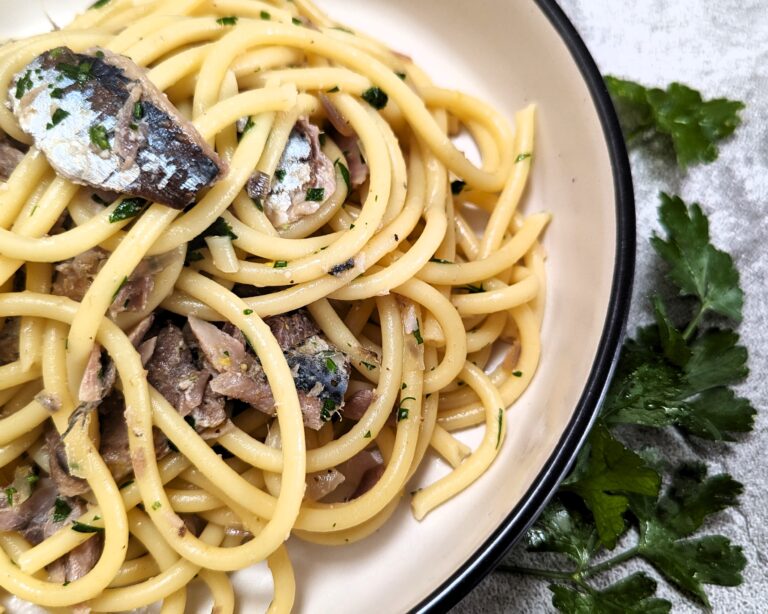
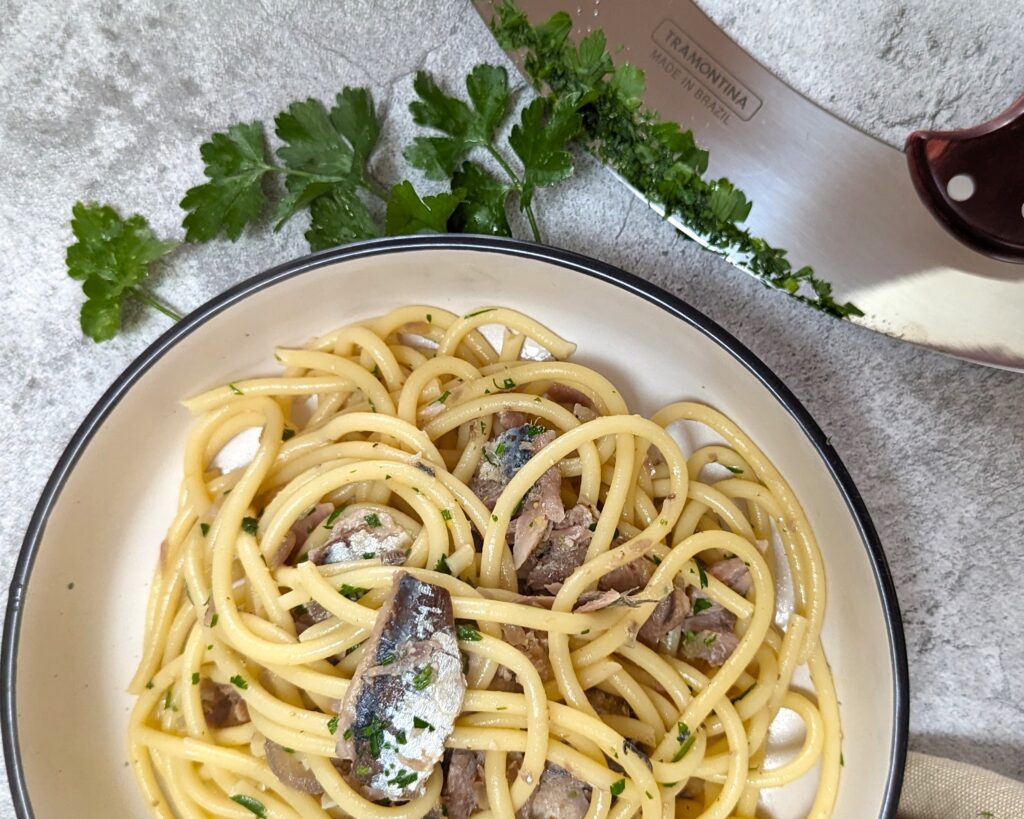
This simple Bucatini with Sardines has strong Mediterranean roots and is made with a handful of ingredients. The thick spaghetti-like pasta is the perfect accompaniment for the sardines and its salty lemony sauce.
Origins of this dish
Pasta with Sardines has strong roots in the south of Italy, with the most popular version being the Sicilian version called Pasta con le Sarde, made using wild fennel, sultanas and pine nuts.
The dish was originally made to celebrate the patron Saint Joseph (San Giuseppe) on 19 March, which also coincides with Father’s Day in Italy.
In Sicily, this simple, yet filling pasta dish is usually served with a crispy topping of Muddica Atturrata – which is toasted breadcrumbs with garlic, salt and olive oil.
The version I make here is a simpler version of a similar regional dish from the north of Italy called Bigoli con le Sarde.
The dish is typical of the area surrounding Lake Garda, made with locally fished sardines which are abundant from the lake. Sometimes fresh tomatoes and chilli are also added to the dish for additional flavour.
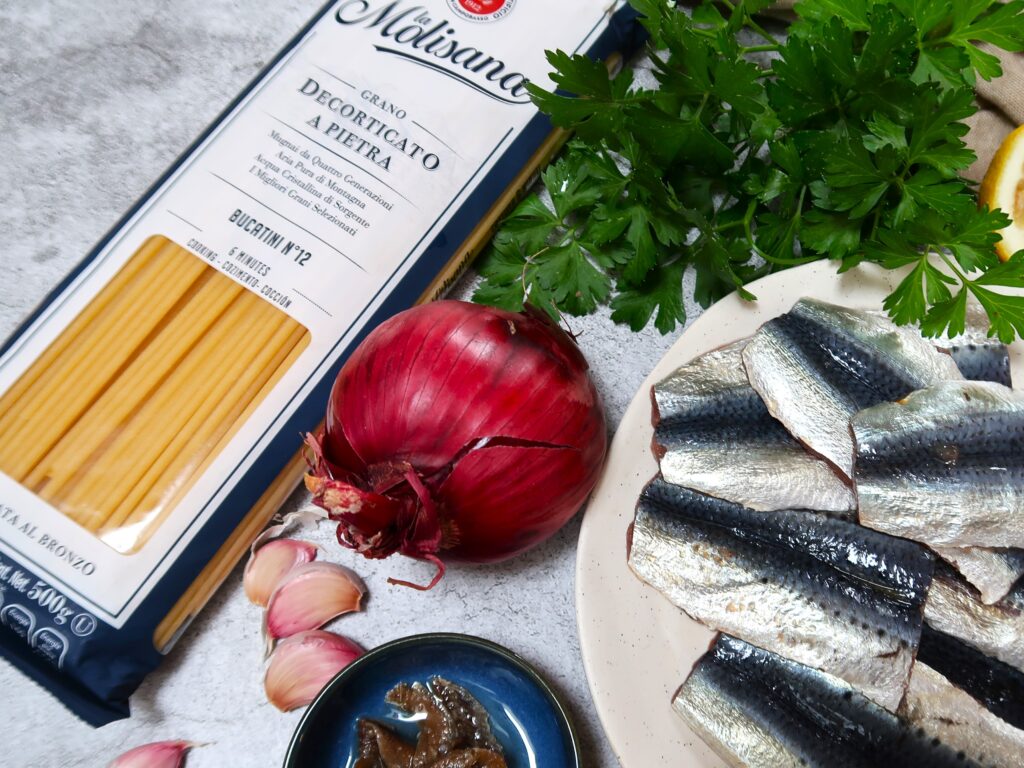
Ingredients required for this Bucatini with Sardines dish
Bucatini Pasta
Thick Bucatini pasta is used for this Bucatini with Sardine. Why is it called bucatini? Because the thick spaghetti-like pasta has a ‘buco‘, which is a little hole.
In the north of Italy, this dish is traditionally made using Bigoli, which is thick spaghetti-like pasta that is rough in texture and is made using a special extruder called Torchio or Bigolaro.
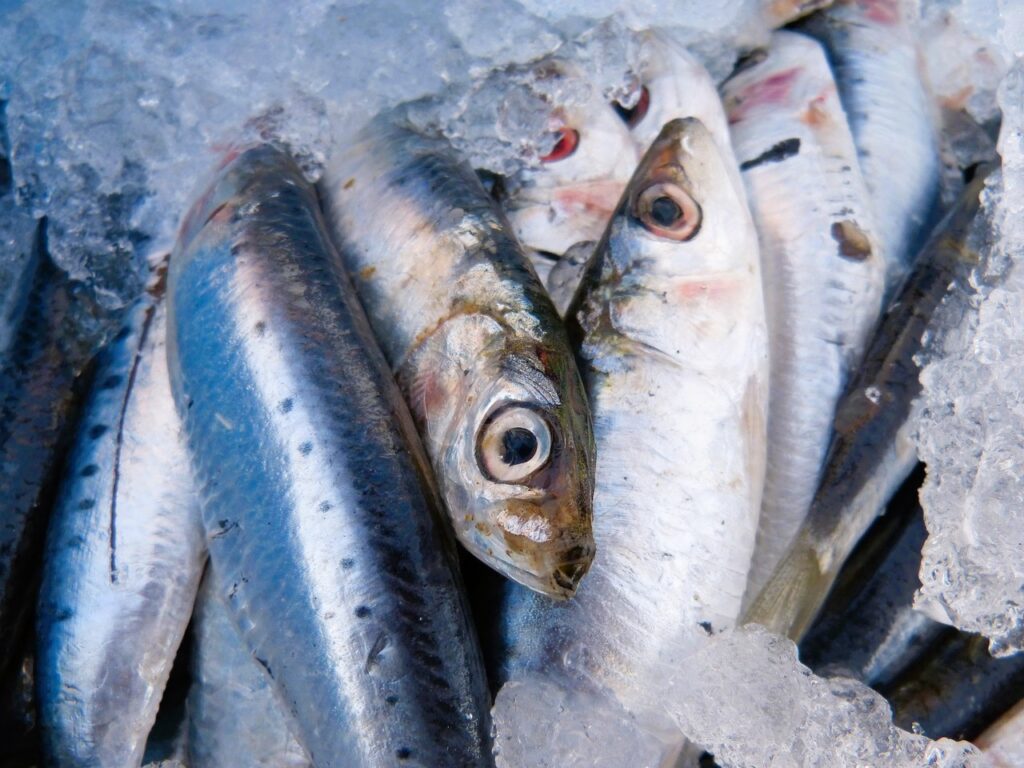
Sardine Fillets
Fresh sardine fillets which have been already cleaned and removed from large bones (skin on is fine) are used for this dish. An alternative is also to use canned sardines, which will require less cooking time and a bit less salt.
Anchovy fillets: For additional saltiness and flavour
Lemon Juice & Rind for freshness to lift the dish
Fresh Parsley: Finely chopped to finish to sauce. (On a separate note, my favourite tool to chop parsley at the moment is my Tramontina Mincing Knife, in italian called a Mezzaluna, what a game changer!)
Salt, Pepper and Extra Virgin Olive Oil
How to make these Bucatini with Sardines
Fry anchovies with Onion and Garlic
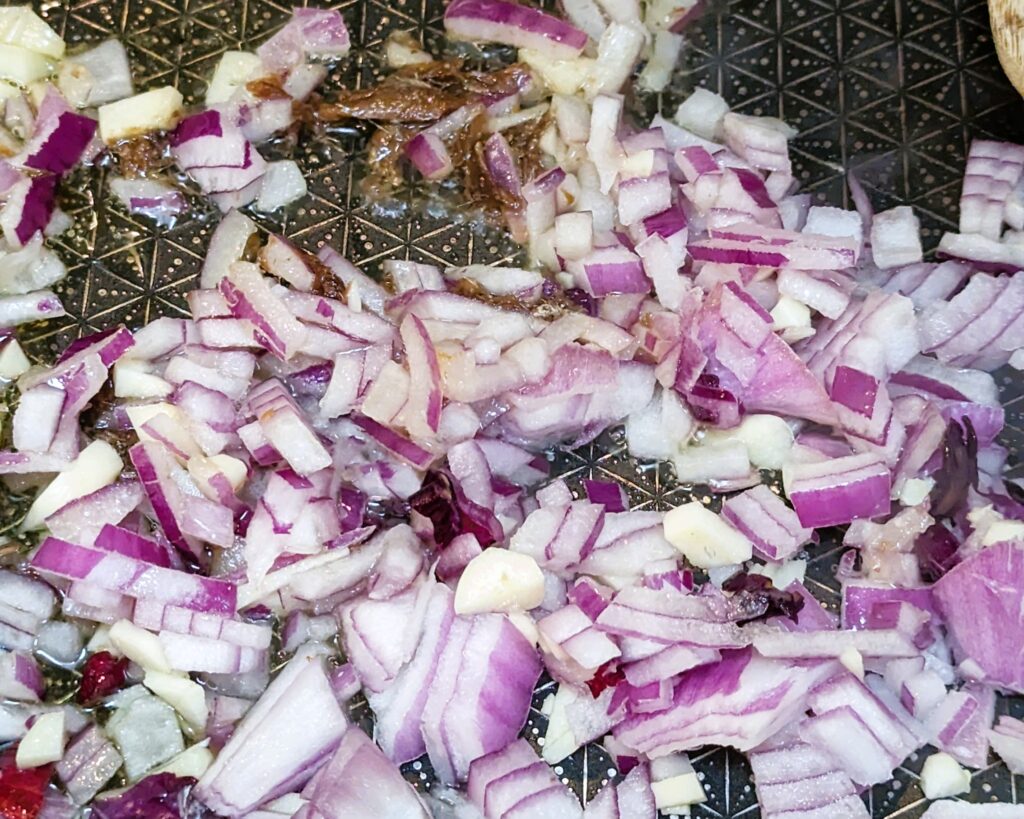
Start by heating the olive oil in a large non-stick fry pan. Add the onion, garlic and anchovy fillets and gently cook them down for 8-10 minutes till softened and slightly caramelized over low to medium heat.
In the meantime bring a large pot of water to the boil.
Add Sardines
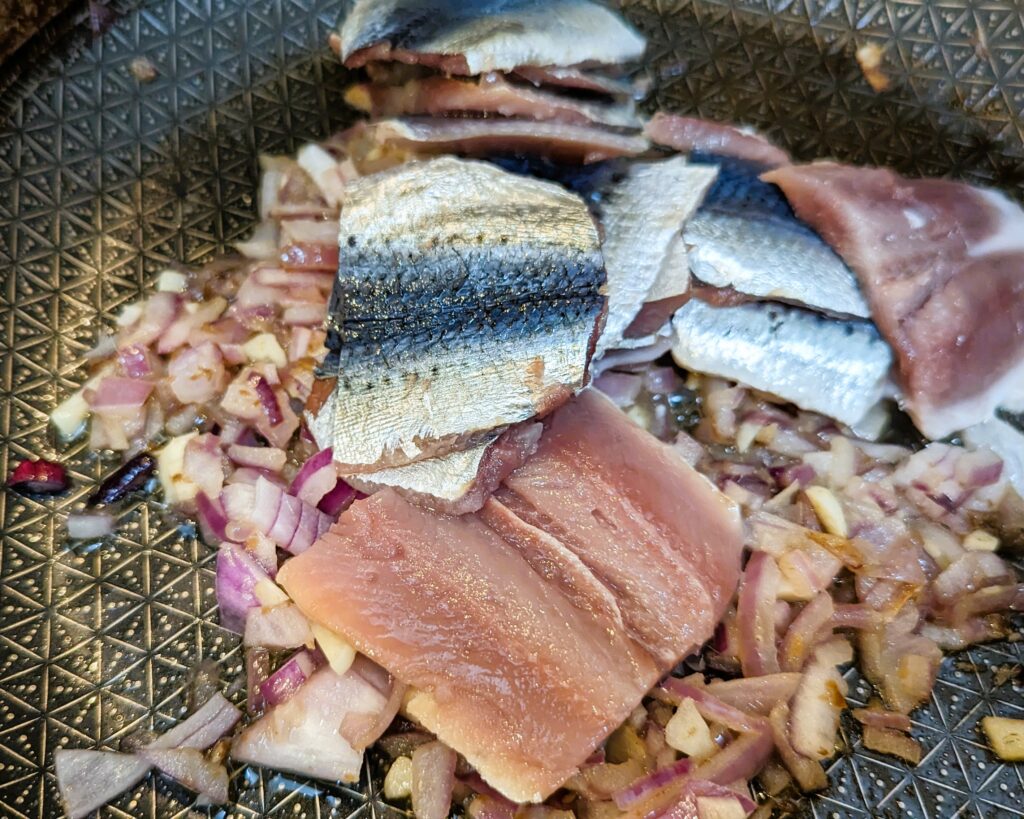
Once the onion and garlic have softened, add the sardine fillets to the pan.
Cook them stirring gently for 7-8 minutes over medium heat. They will break apart as they cook and that is totally fine.
Note:If using cooked tinned sardines, all you need is 1-2 minutes for them to combine with the onion and garlic and heat through.
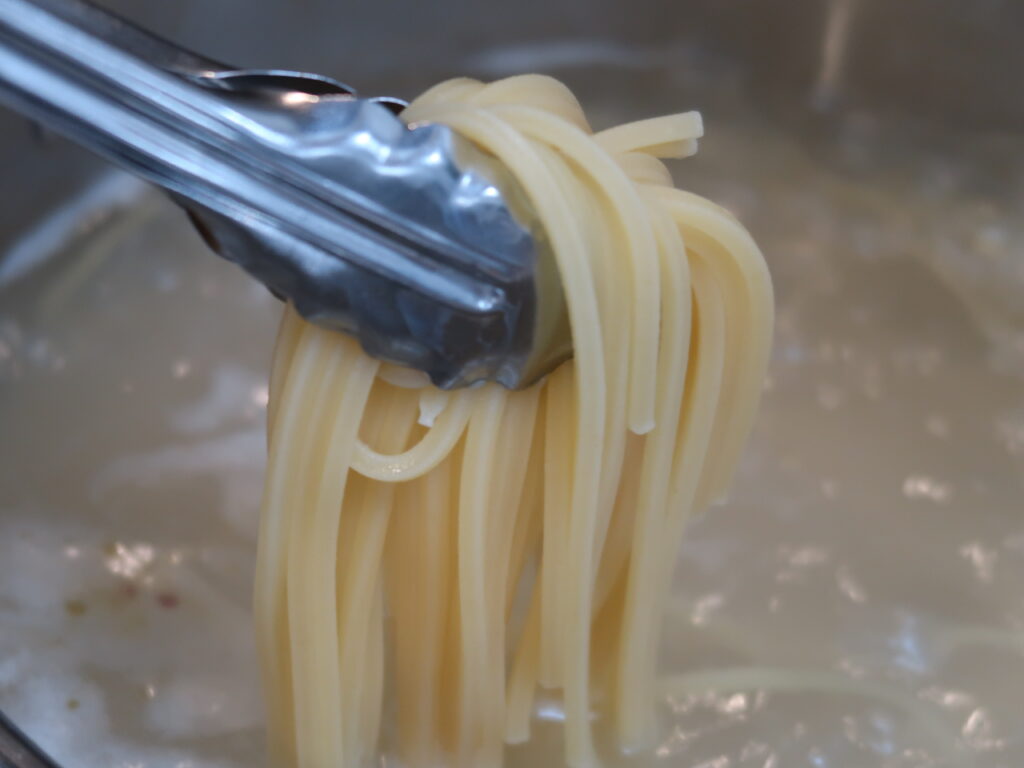
In the meantime, start cooking the bucatini till al dente in a large pot of salted water, as per packet directions (should be around 6 minutes).
Combine with Bucatini
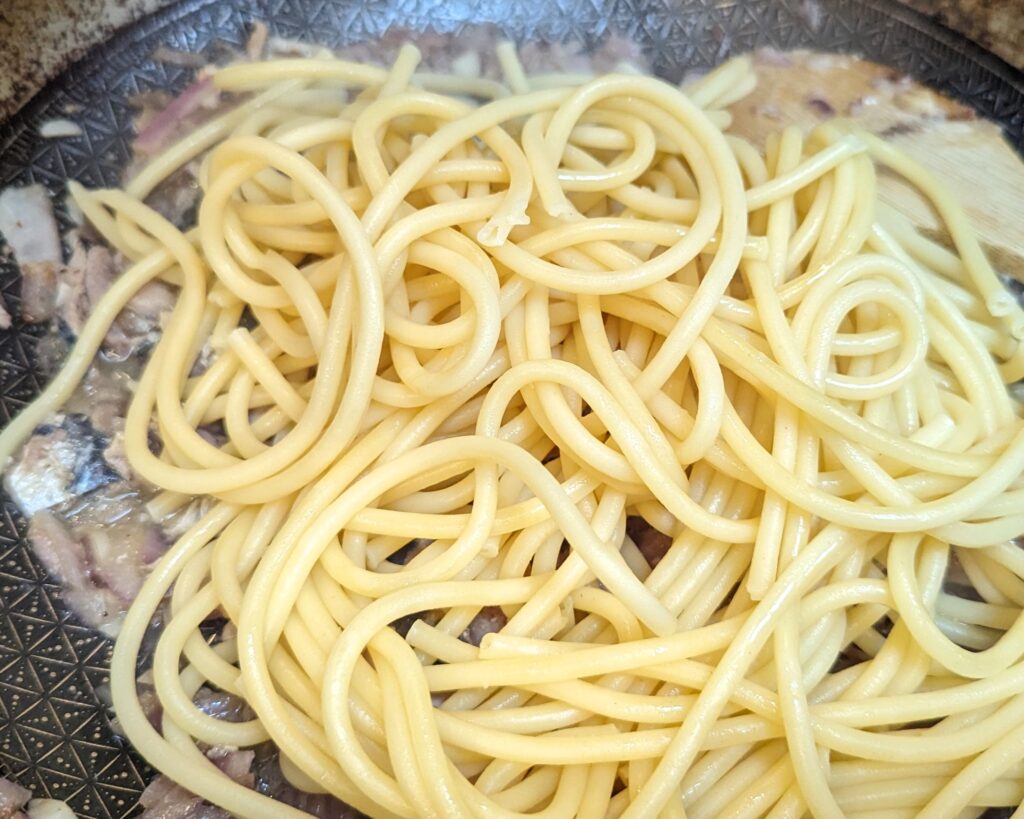
Once the bucatini is cooked, reserve half a cup of pasta water and add the cooked bucatini to the large pan with the sardines and combine over medium heat.
Add the lemon juice, the lemon rind, and some more olive oil. Adjust seasoning and add a good pinch of salt and pepper. Add the reserved pasta water and gently combine.
Garnish and serve
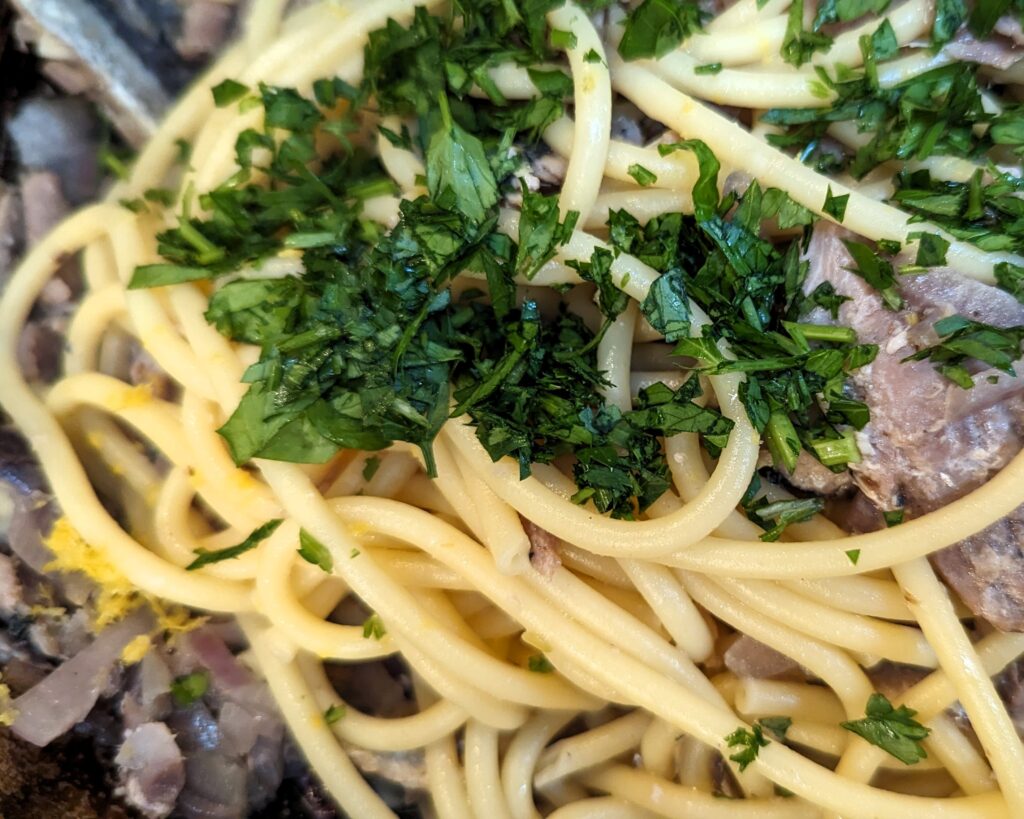
Finally, add the chopped parsley, combine and take off the heat. Serve immediately! Enjoy!
Serving Size
The servings for this dish have been marked for 2 people but it’s a very generous serve (250 gr of pasta and 250 gr of sardine). This would be sufficient for 4 small entrée serves or 3 larger serves.
Thick bucatini pasta stirred through a simple sardine, lemon and parsley sauce
Ingredients
6tbspExtra Virgin Olive Oil
1 Red Onion(Finely Chopped)
3Garlic Cloves(Finely Chopped)
6Anchovy Fillets
250 grFresh Sardine Fillets (cleaned and descaled, cut in 10 cm pieces)
250grBucatini Pasta
1Lemon(Juice and Rind)
1bunchFresh Parsley(Finely Chopped)
Salt
Ground Pepper
Instructions
Start off by heating 4 tablespoons of olive oil in a large non-stick fry pan. Add the onion, garlic and anchovy fillets and gently cook them down for 8-10 minutes till softened and slightly caramelized over low to medium heat.In the meantime bring a large pot of water to the boil.
To the pan add the sardine fillets and cook them stirring gently for 7-8 minutes over medium heat.In the meantime, start cooking the bucatini till al dente in a large pot of salted water, as per packet directions (should be around 6 minutes).
Once the bucatini are cooked, reserve half a cup of pasta water and add the cooked bucatini to the large pan with the sardines and combine with the sauce over medium heat.
Add the lemon juice, the lemon rind and a few tablespoons of olive oil. Adjust seasoning and add a good pinch of salt and pepper. Add the reserved pasta water and gently combine.
Add the chopped parsley, combine and take off the heat. Serve immediately! Enjoy!
Notes
Serving Size
The servings for this dish have been marked for 2 people but it’s a very generous serve (250 gr of pasta and 250 gr of sardine). This would be sufficient for 4 small entrée serves or 3 larger serves.
Course: Main Course
Cuisine: Italian, Mediterranean
Keyword: bigoli con le sarde, bucatini with sardine, pasta con le sarde
This elegant Balsamic and Maple Roasted Pumpkin is not only beautiful to look at but a delight to eat. The sweetness from the Maple syrup gives the pumpkin and red onion a wonderful caramelisation. It pairs so well against the tartness of the balsamic vinegar and the fresh pomegranate seeds! Perfect as a side dish to accompany roast meats but just as good to eat on its own as the creamy feta makes it a complete meal.
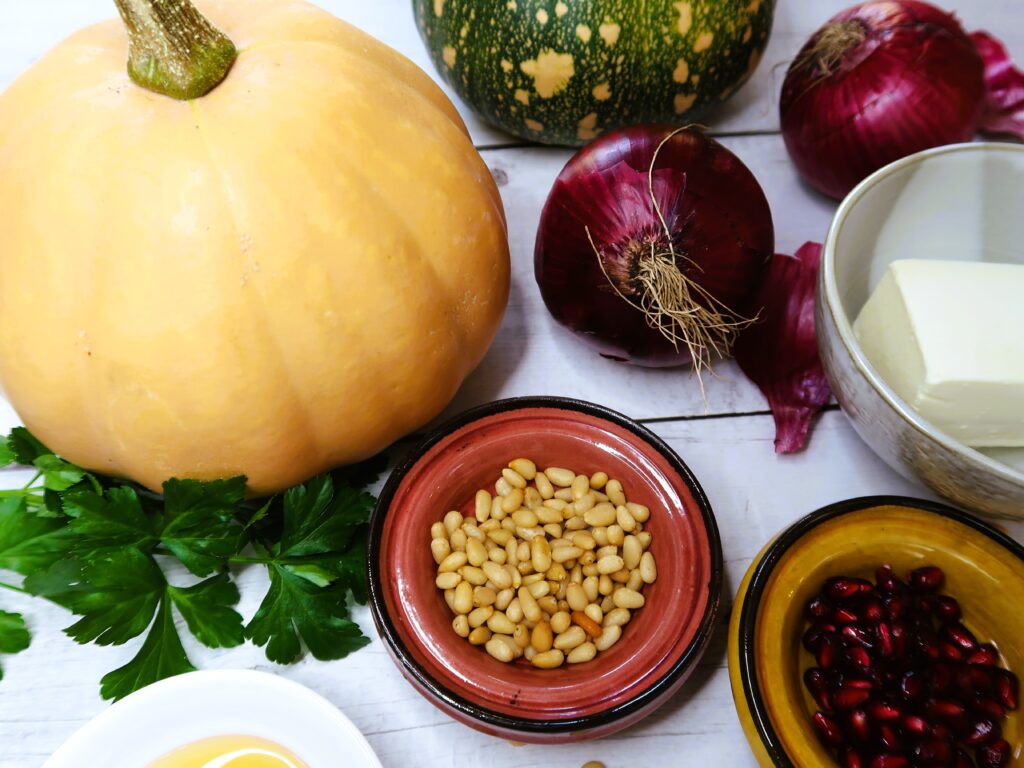
Ingredients needed for this Balsamic and Maple Roasted Pumpkin
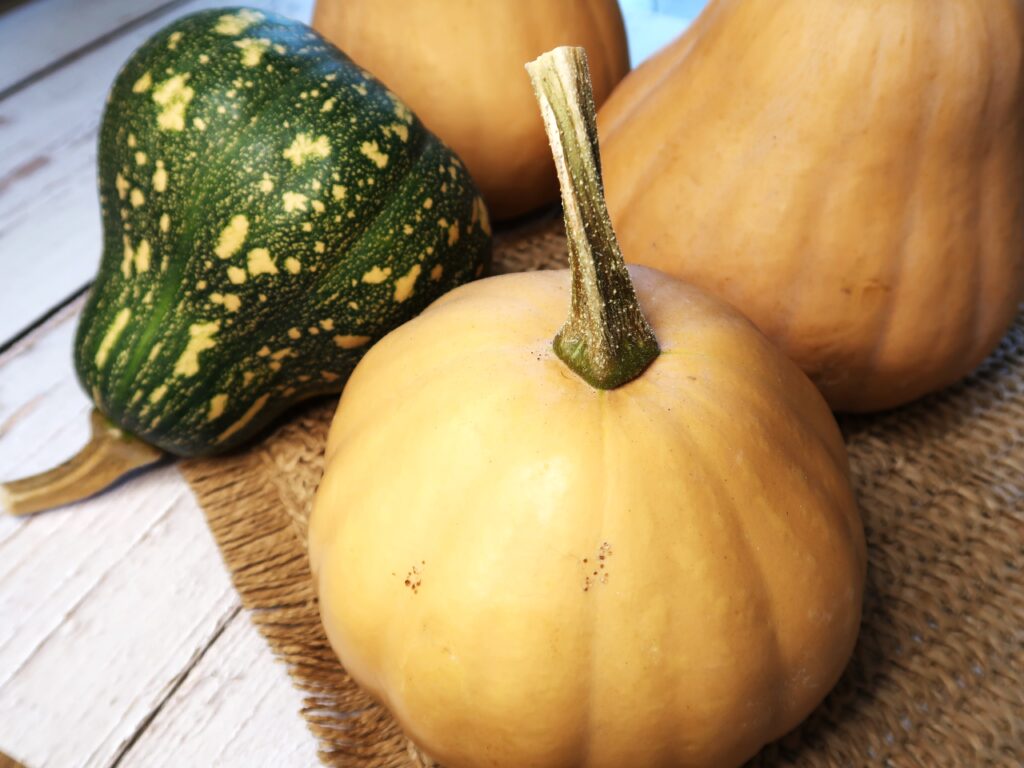
Pumpkin: Any type will work! I usually use Jap or Butternut Pumpkin. The main difference with the two is that if you want to have neater slices of pumpkin, Jap pumpkin can be cut easier into wedges.
Red Onion
Maple Syrup: Gives the pumpkin some great caramelisation. Ensure to choose a Pure Maple syrup which is 100% maple syrup, not a maple flavoured syrup (which is mainly refined sugar and artificial flavours). The caramel flavour in pure maple syrup doesn’t compare and it’s also better for you!
Balsamic Vinegar: I always have on hand a bottle of Aceto Balsamico di Modena to use for dressing salads and it’s great for cooking too! It’s a sweeter vinegar and the sourness of it is perfect against the maple syrup.
Pine Nuts: Add a nice nuttiness to the dish. Can be substituted for slivered almonds, or even Pepitas (pumpkin seeds) added after roasting are a great alternative.
Feta: I like using Danish feta which is a creamier, milder version of the traditional Greek feta. Can also be substituted for Fresh Ricotta cheese.
Pomegranate Seeds: Add a beautiful sweetness and tartness to complement the sweet pumpkin.
Salt, Pepper, Olive Oil and Fresh parsley for garnishing.
How to make this Balsamic and Maple Roasted Pumpkin
Chop the Pumpkin
The hardest thing about this dish is probably chopping the pumpkin as the oven will do the rest of the work! I used a Jap pumpkin for the recipe as it can be chopped in neat wedges, with a thickness of roughly 4-5 cm. You can also cube the pumpkin if you prefer in 5 cm cubes.
A average sized pumpkin that weighs about 1.2-1.3 kg, once peeled, deseeded and chopped should give you roughly 1 kg of chopped pumpkin.
Roast the Pumpkin & Red Onion and Maple Syrup
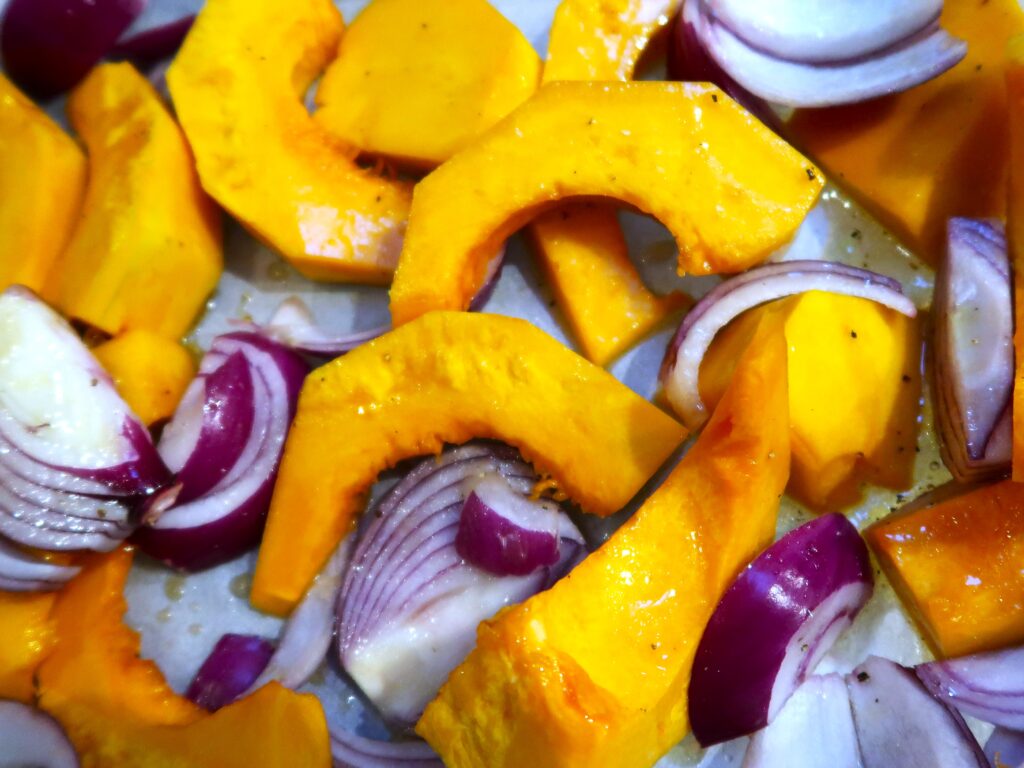
In a large bowl, combine the Maple syrup, salt, pepper and olive oil. Add the pumpkin and sliced red onion and combine till all coated.
Lay the pumpkin and onion across a few oven trays lined with baking paper, in a single layer, so that each piece gets the best caramelization and keeps its shape during roasting.
Roast for around 35-40 minutes at 180 degrees, turning the pumpkin half way through.
Add Pinenuts & Balsamic Vinegar
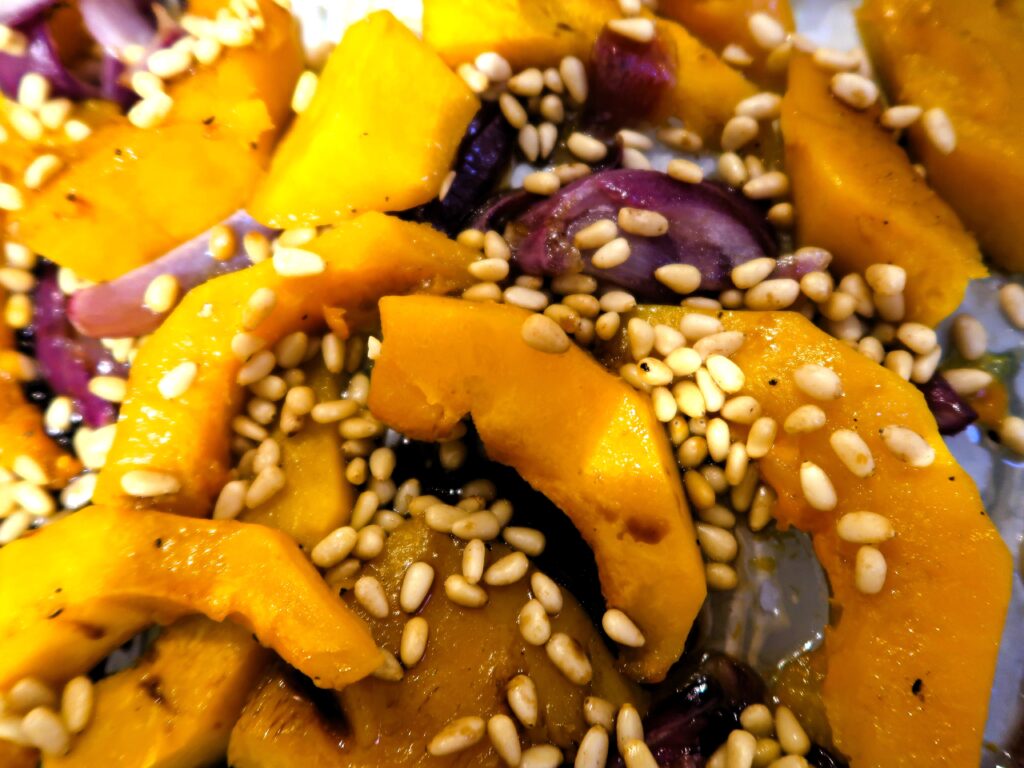
Add the balsamic vinegar and the pine nuts to the roasting tray/s. Gently combine with the pumpkin and red onion and continue roasting for an additional 10 minutes, at 200 degrees.
Top with Feta, Pomegranate Seeds & Fresh Parsley
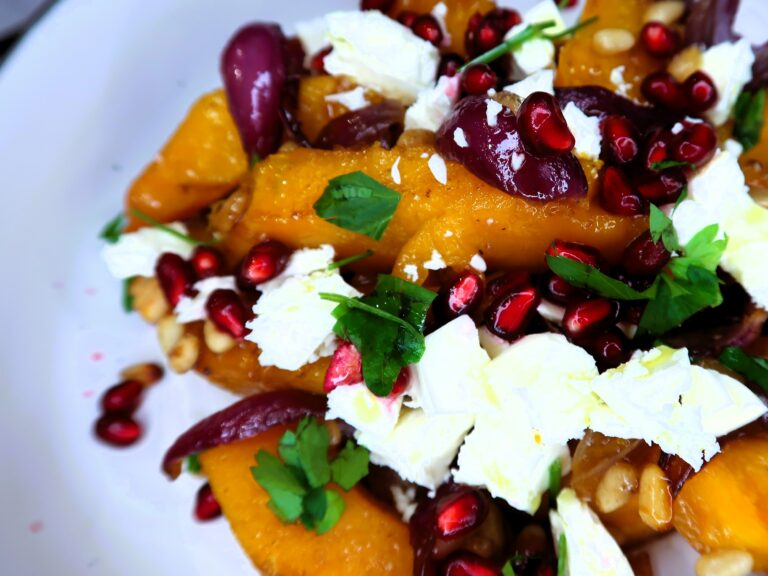
The Pumpkin and onion should now have a nice char on it and be completely cooked all the way through. Place in a serving dish and top with the crumbled feta, the chopped parsley the pomegranate seeds. Add some ground pepper to taste. Serve immediately or when slightly cooled! Enjoy!
A beautiful side dish of maple-glazed pumpkin and red onion topped with pomegranate seeds and creamy feta
Ingredients
1.2-1.3kgPumpkin(Jap or Butternut, cubed or sliced)
2 Red Onions(Sliced)
halftspSalt
3tbspOlive Oil
6tbspPure Maple syrup
halfcupPine Nuts(100 gr approx)
2tbspBalsamic Vinegar
halfcupDanish Feta(Crumbled, 100 gr approx)
1Pomegranate(Seeds from 1 pomegranate)
1bunchParsley(finely chopped)
Ground Pepper(to taste)
Instructions
Preheat the oven to 180 (or 160 fan forced).Cut the pumpkin into 4-5 cm thick wedges or cubes.An average sized pumpkin that weighs about 1.2-1.3 kg, once peeled, deseeded and chopped should give you roughly 1 kg of chopped pumpkin.
In a large bowl, combine the Maple syrup, salt, pepper, and olive oil, add the pumpkin and sliced red onion, and combine till all coated.Lay the pumpkin and onion across one large or two oven trays lined with baking paper. Lay the pumpkin in a single layer, so that each piece gets the best caramelization and keeps its shape during roasting.Roast for around 35-40 minutes, turning the pumpkin halfway through.
Add the balsamic vinegar and the pine nuts and gently combine with the pumpkin and red onion and continue roasting for an additional 10 minutes, at 200 degrees.
Once cooked, place the pumpkin, red onion and pine nuts in a serving dish and top with the crumbled feta, the chopped parsley, pomegranate seeds and some ground pepper to taste. Serve hot or warm.
Course: Salad, Side Dish
Keyword: maple glazed pumpkin, pumpkin, roasted pumpkin