Tag

easy dinner

Browsing

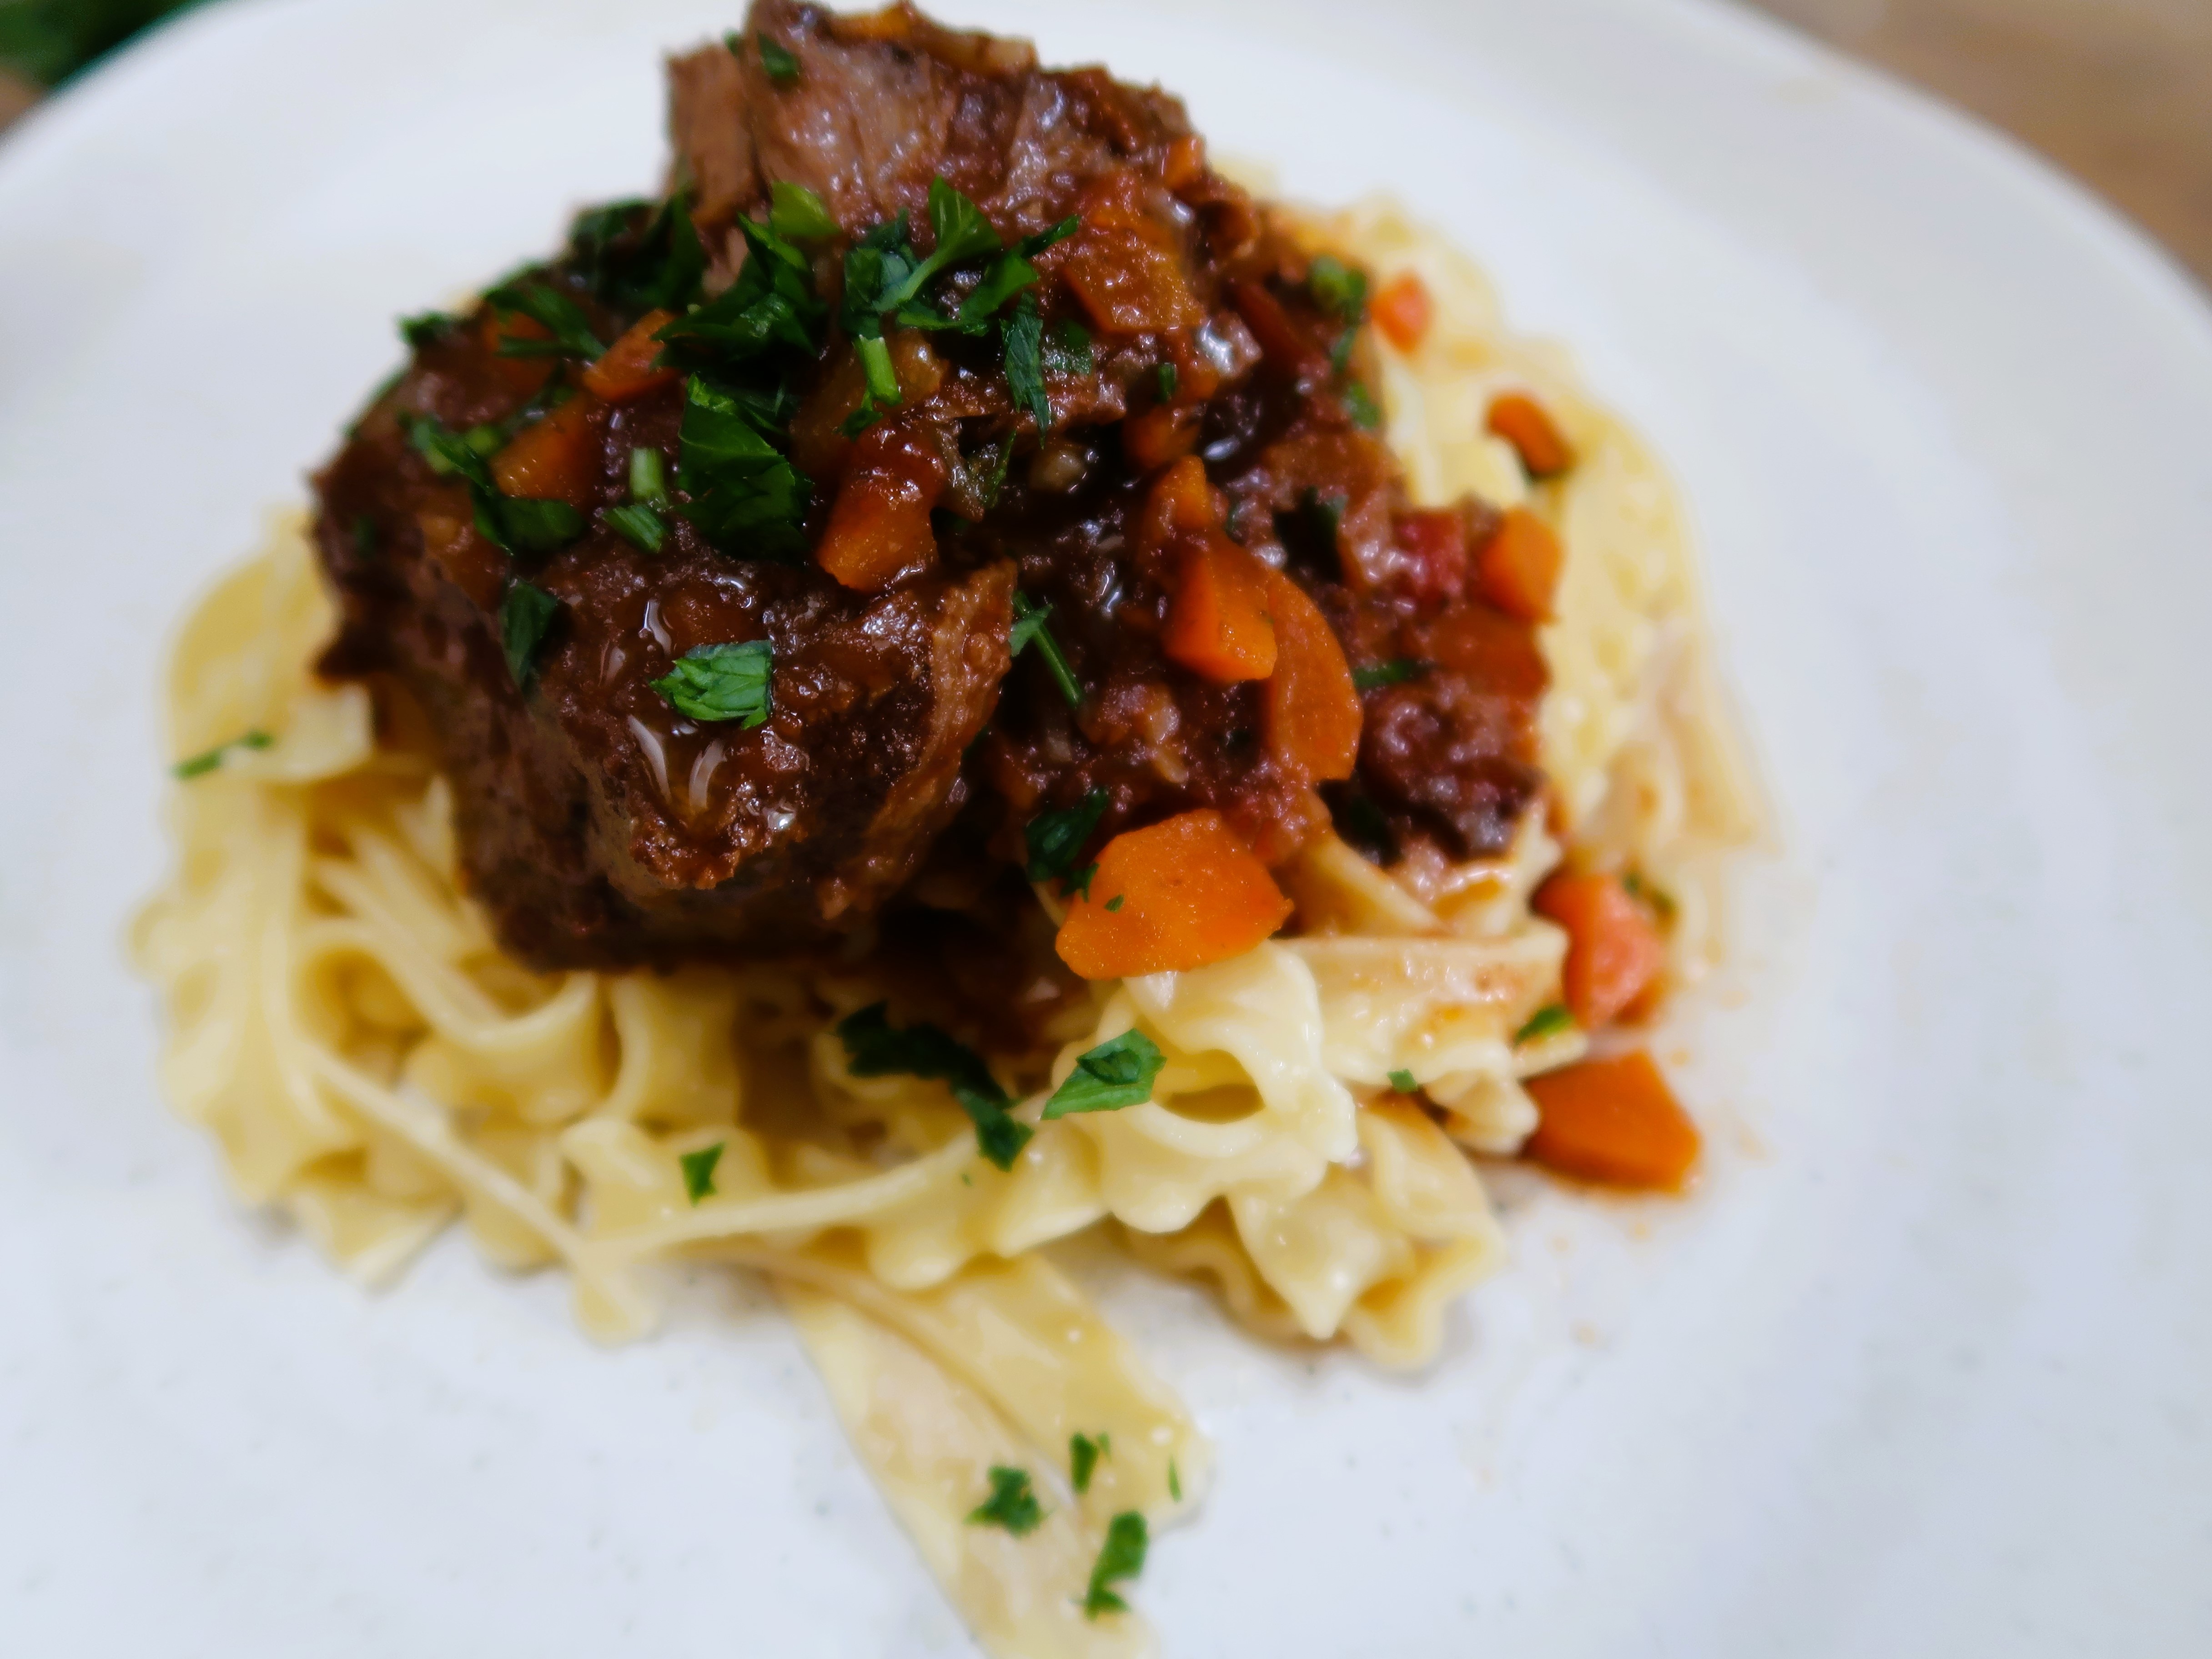
This warming Slow Cooker Beef Ragu is the perfect make-ahead sauce, delicious over pasta or just as good with bread, rice, or creamy polenta. Put everything in the slow cooker, set, and forget! By dinner time you will have the most melt-in-the-mouth ragu ready to be served.

About this Slow Cooker Beef Ragu

I love a good meat sauce or ragu, and although I generally stick to Italian flavours when I’m having ragu with pasta, the slight difference with this one – is that it has some ingredients that are found in the Hungarian Goulash – the humble beef stew.

It’s traditional of Hungary and has been around for a long time, it’s origins from the 9th century. The meat is usually cooked in a large pot with potatoes in the sauce and served with some crusty bread. In italy, Italians also call this dish Spezzatino and in the north it’s usually served with polenta.
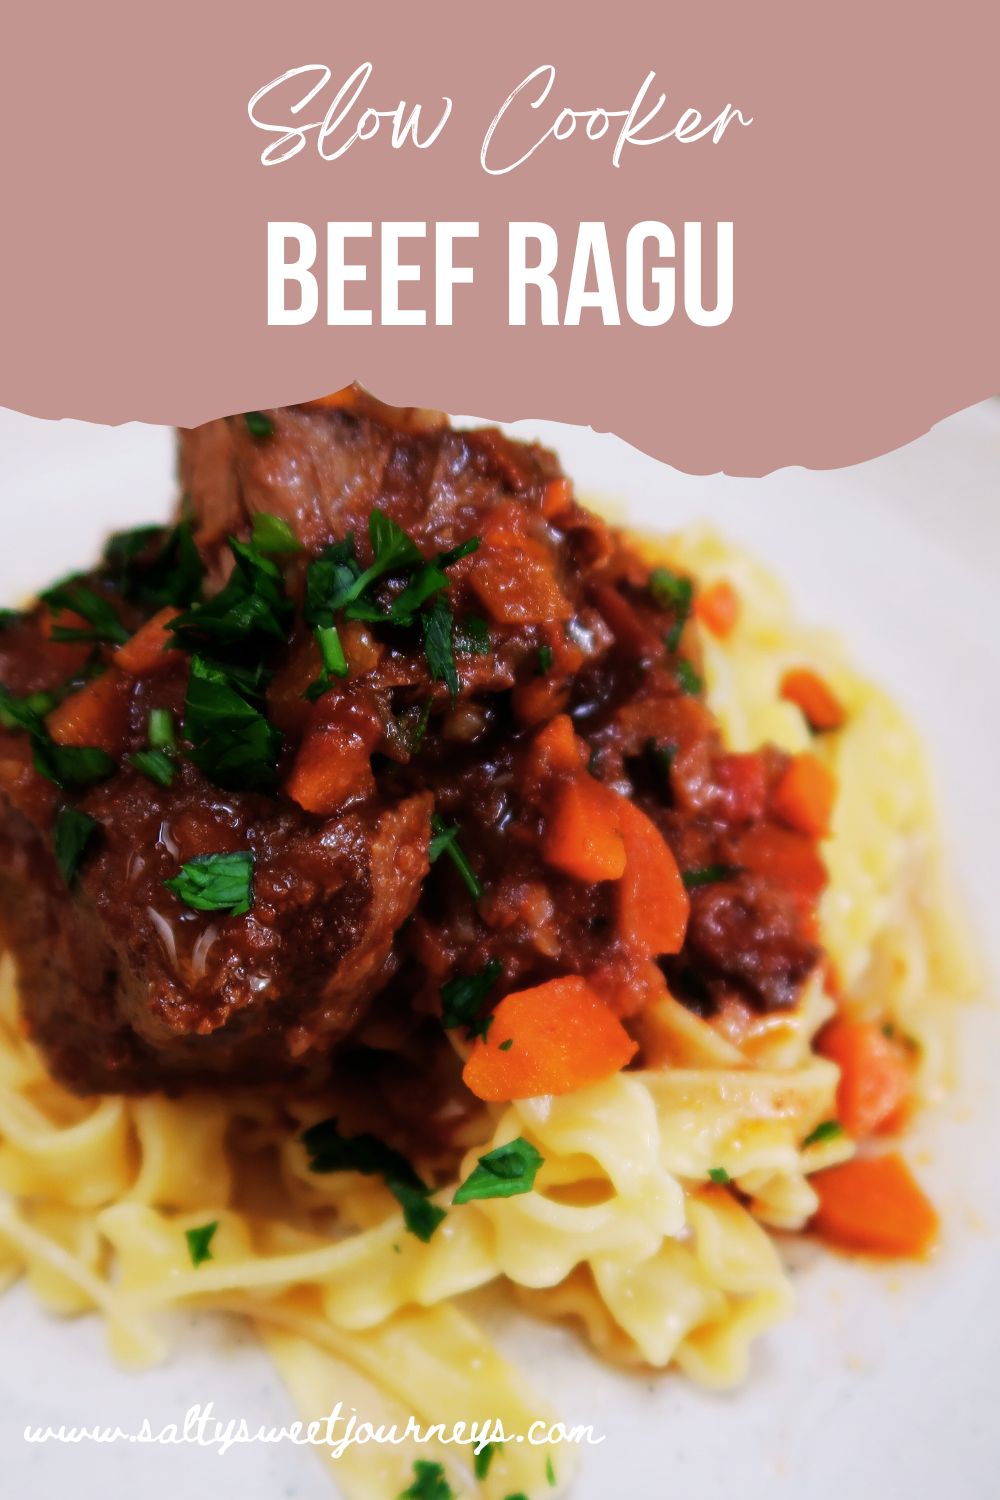
Slow cooker beef ragu recipe

The main and indispensable spice for this stew is Paprika. The paprika adds a beautiful depth of flavour once it has been cooked over low heat for a long time. I don’t put too much in this recipe to not overpower the sauce – but it’s definitely a background flavour that adds another layer to this dish, also alongside Fennel Seeds.

This recipe has been made for the slow cooker, but you could also most definitely make it over the stove, in the oven or if you are in a rush, in the pressure cooker! See recipe notes.

If you like this recipe – I’ll have a post coming soon on my Slow Cooked Beef Cheek Ragu recipe, also equally delicious on a steamy bowl of pasta.
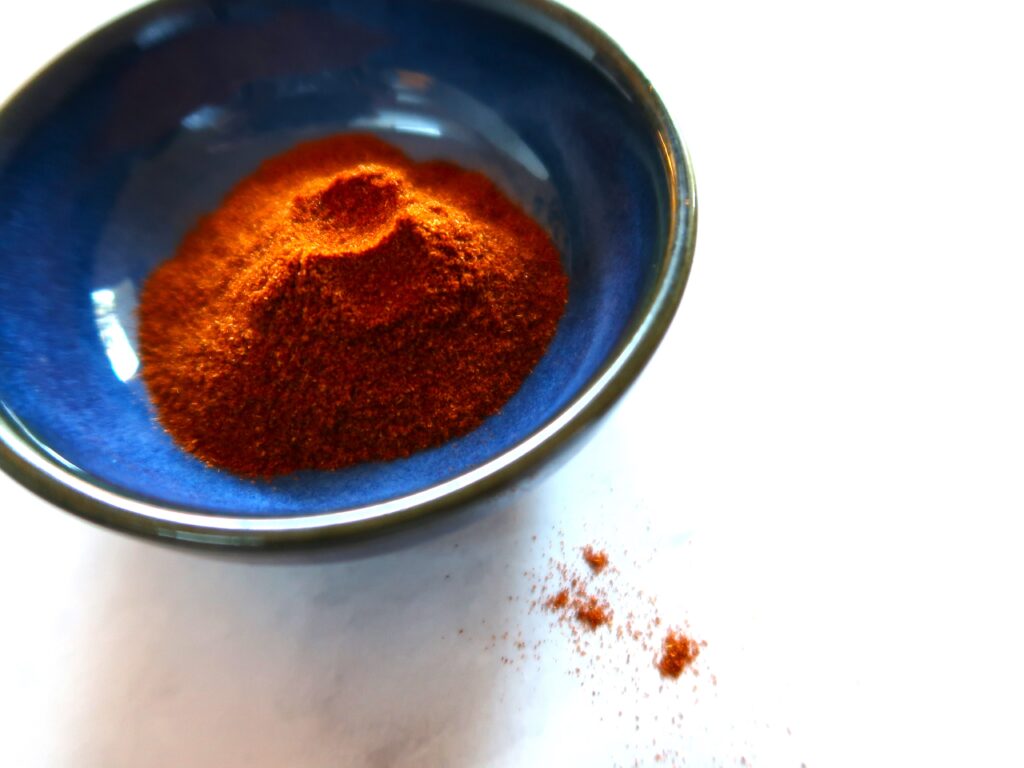
paprika
Paprika is the essential spice in this receipe

What you need for this Slow Cooker Beef Ragu recipe

The recipe is written for 6 people based on 500gr of pasta – but you will probably see that once cooked, the sauce itself is quite a generous serve so you will probably have some left for another time or to freeze. This is what you need for this recipe:

  • Pappardelle – I like to use something that has a bit of grip to get the sauce clinging to the pasta. A curly pappardelle pasta like the one in the pictures, a frilly Mafalda or even some fresh egg fettuccine is fantastic with it!
  • Beef chuck steak, bone-in – this kind of cut of meat on the bone is perfect. It’s marbled with fat and with long, slow cooking times it becomes so tender!
  • Tinned tomatoes, carrots, onions and garlic
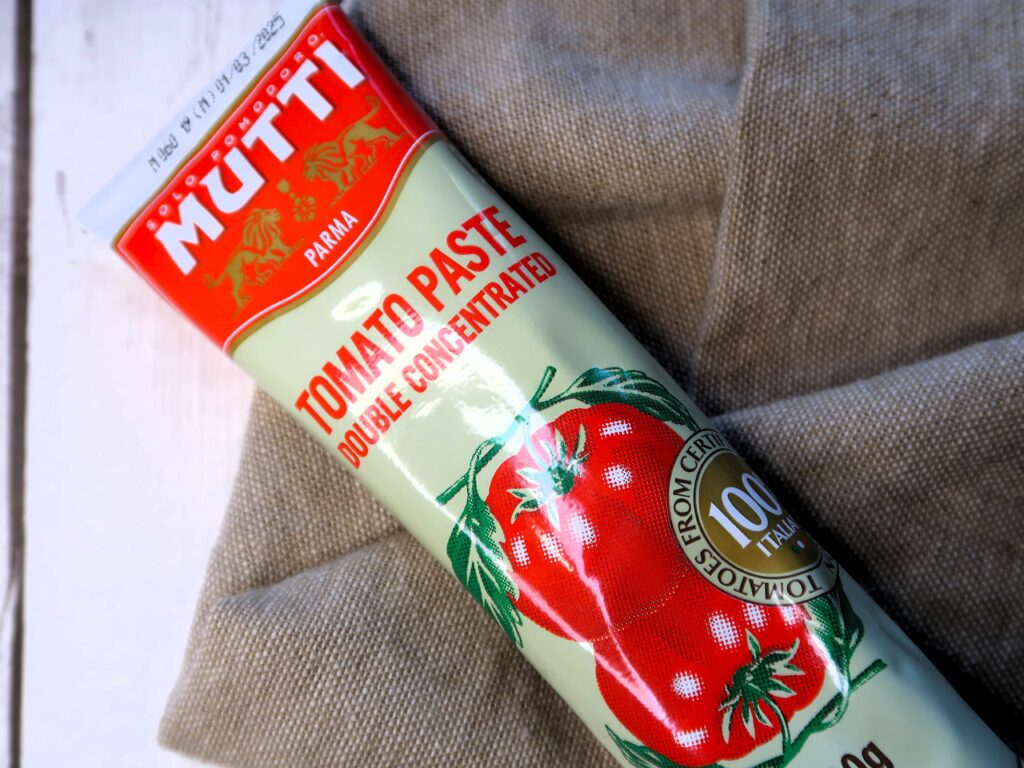
  • Tomato paste – my favourite is MUTTI
  • Worcestershire sauce
  • Extra virgin olive oil – LOTS of it!
  • The most important things to bring this dish to the next level are SPICES! – Paprika (I opted for sweet), fennel seeds, garlic powder
  • Salt and pepper
mutti tomato paste
Mutti Tomato Paste, my favourite brand!

How to make this Slow Cooker Beef Ragu

Sauté

Add your chopped garlic, carrots and onions to your slow cooker with the olive oil. Set the slow cooker to sauté (or you can do this on a separate pan of your slow cooker doesn’t have this option) and caramelize the vegetables gently for 5-10 minutes.
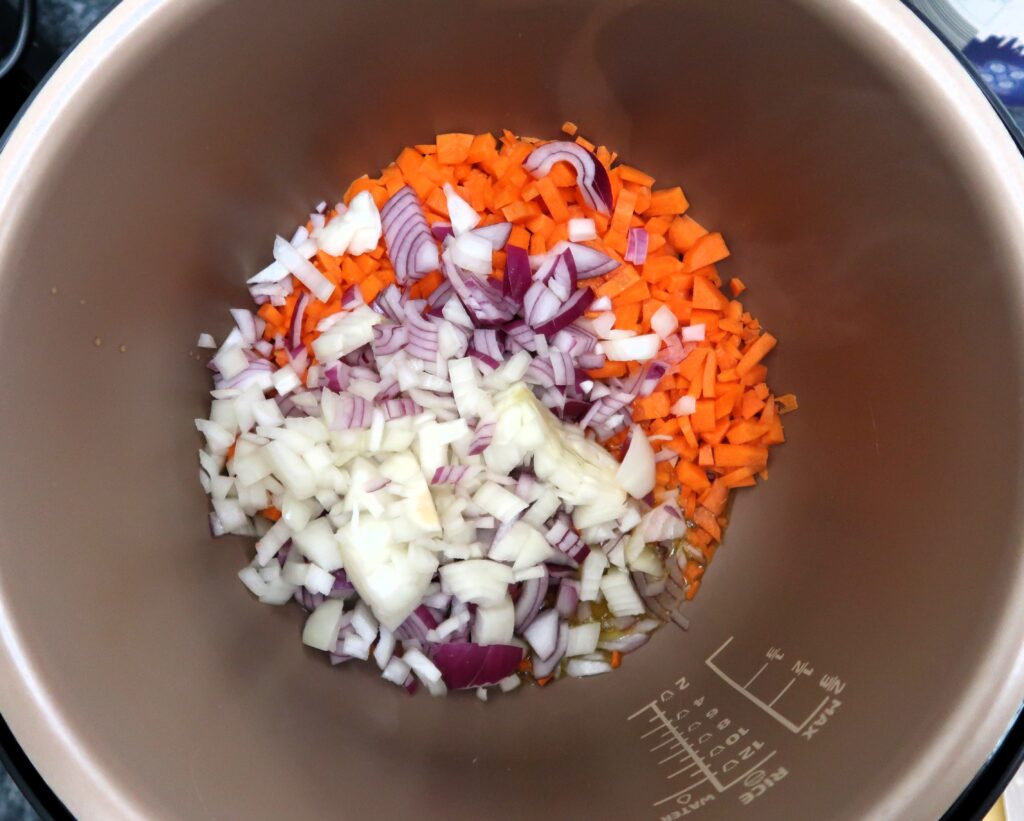
The veg ready for the slow cooker

Once the vegetables have softened, add the spices: The paprika, fennel seeds, salt, pepper & garlic powder and give a stir.

Add your tinned tomatoes, tomato paste, Worcestershire sauce and lastly your meat and combine well. Fill the tinned tomatoes can with water and add that in.
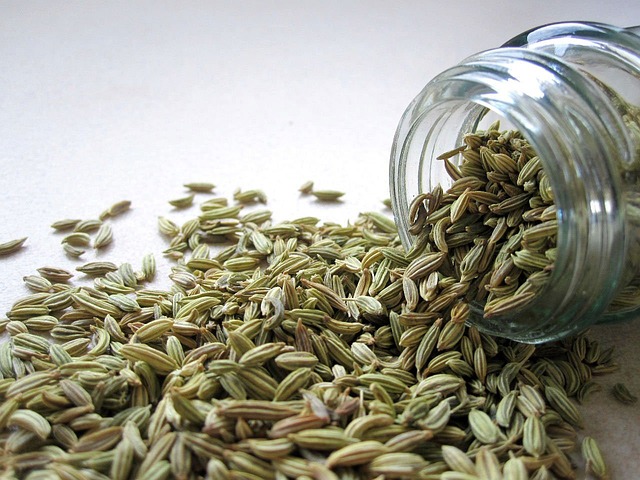
Image by PublicDomainPictures from Pixabay

Slow Cook

Put the lid on your slow cooker and start the slow cooking time for 6 hours on high or 8 hours on low. After 6 hours, the meat should be super tender!

Adjust seasoning and thicken if needed

If you find that there is too much oil/fat that has raised to the surface – this is the time to skim it all off with a spoon. Don’t worry the sauce will be just as flavourful underneath without it! Check seasoning and adjust to taste (half a teaspoon of salt at a time).

Check the consistency of the sauce, and if you would like the sauce thicker, try this: Add 2 teaspoons of cornflour to 50 ml of warm water in a small bowl and stir the flour in till completely mixed through. You can then pour that into your slow cooker and put it back on sauté mode on high for 5 minutes till the sauce reaches the desired consistency. You will see the sauce thicken beautifully, and with no flour lumps!
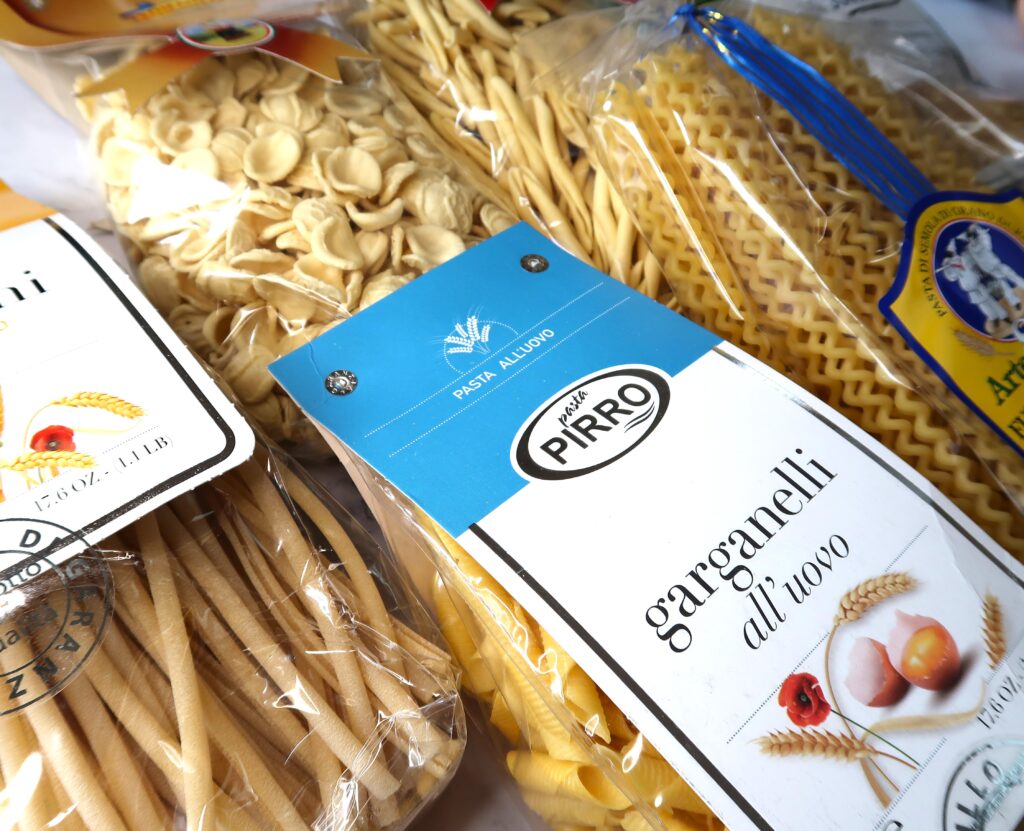
Just before the sauce is almost ready, start cooking your chosen pasta till perfectly al dente. Remove the bones of the meat (if any), and with two forks, shred any large pieces of meat. Add some chopped parsley to the sauce and serve on your pappardelle. Enjoy!

Serving Variations for the Slow Cooker Beef Ragu

This Slow Cooker Beef Ragu is fantastic on pasta, I love this on some pappardelle or fettuccine! It can also be served in so many other ways:

  • A crusty loaf of bread and a simple green salad
  • Plain rice
  • Potato mash
  • Chopped boiled potatoes with parsley, butter and garlic
  • Creamy polenta

Slow Cooker Beef Ragu

Prep Time 30 minutes
Cook Time 6 hours 45 minutes
Servings 6 people
Melt in the mouth tender beef with a hint of paprika

Equipment

  • 1 Slow cooker

Ingredients

  • 3 carrots (chopped)
  • 2 onions (finely chopped)
  • 4 cloves garlic (chopped)
  • 1.5 kg beef chuck steak (bone-in, chopped in a few large pieces)
  • 1 tin 400 g can tinned chopped tomatoes
  • 3 tbsp tomato paste
  • 5 tbsp Worcestershire sauce
  • 3 tbsp extra virgin olive oil
  • 1 tbsp sweet paprika
  • 1 tsp fennel seeds
  • 1 tsp garlic powder
  • 3 tsp salt
  • 1 tsp ground pepper
  • 1 cup water (Tip: fill up the tin from the tomatoes to rinse it out and use that!)
  • 500 gr pappardelle (or fettuccine, curly pappardelle)
  • 1 handful chopped parsley (to serve)

Instructions 

  • Add your chopped garlic, carrots and onions to your slow cooker with the olive oil. Set the slow cooker to sauté (or you can do this on a separate pan of your slow cooker doesn’t have this option) and caramelize the vegetables gently for 5-10 minutes
  • Once the vegetables have softened, add the paprika, fennel seeds, salt, pepper & garlic powder and give a stir
  • Add your tinned tomatoes, tomato paste, Worcestershire sauce and lastly your meat and combine well
  • Add the water and stir everything through to make sure the meat is all coated in the liquid
  • Put the lid on your slow cooker and start the slow cooking time for 6 hours on high or 8 hours on low
  • After 6 hours, the meat should be super tender! Check the consistency of the sauce, and if you would like the sauce thicker, follow recipe note 1. If there is too much oil/fat that has raised to the surface – this is the time to skim it all off with a spoon. Check seasoning and adjust to taste (half a teaspoon of salt at a time).
  • Just before the sauce is almost ready, start cooking your pasta perfectly al dente (about 8-10 minutes depending on the pasta you are using)
  • Remove the bones of the meat (if any) & shred with two forks any larger pieces of meat. Add some chopped parsley to the sauce. Serve on your pappardelle

Notes

  • If you want the sauce thicker, try this trick that works EVERY.SINGLE.TIME!: add 2 teaspoons of cornflour to 50 ml of warm water and stir the flour in till completely mixed through. You can then pour that in your slow cooker and put it back on sauté mode on high for a 5 minutes till the sauce reaches the desired consistency. You will see the sauce thicken beautifully, and with no flour lumps!
  • Cooking times if using: Stove top: 4 hours on low heat after all ingredients are sauteed and meat and all other ingredients are in the pot. Oven: 4 hours in preferably a cast iron pot, lid on at 160 degrees. Check after 2 hours and you can put the lid slightly askew the last hour – and if it is reducing too much, add some water. Pressure cooker: 1.15 hours for 1.5 kg of meat. Note that with pressure cooking the sauce will be more watery as the steam cannot escape. You will need to reduce the sauce to make it thicker for 5-10 minutes, just follow first recipe note
  • Storage: the sauce can be stored in the fridge for 3 days or in the freezer for 3 months
 
Cuisine: hungarian, Italian
Keyword: beef sauce, goulash, ragu, slow cooker

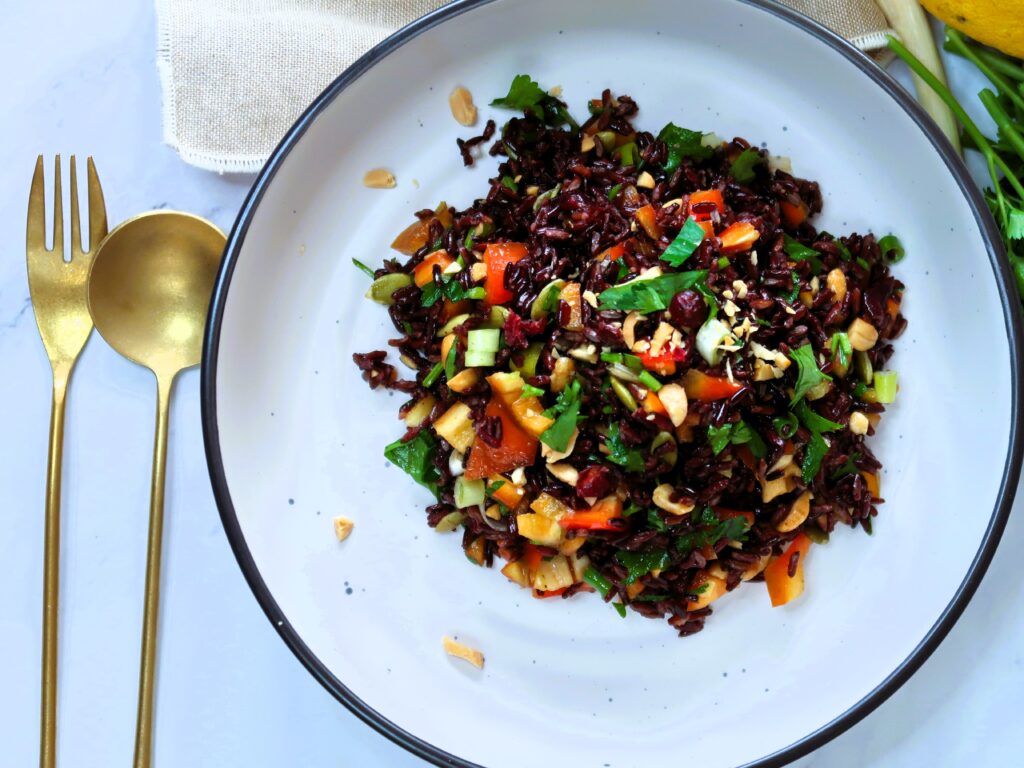
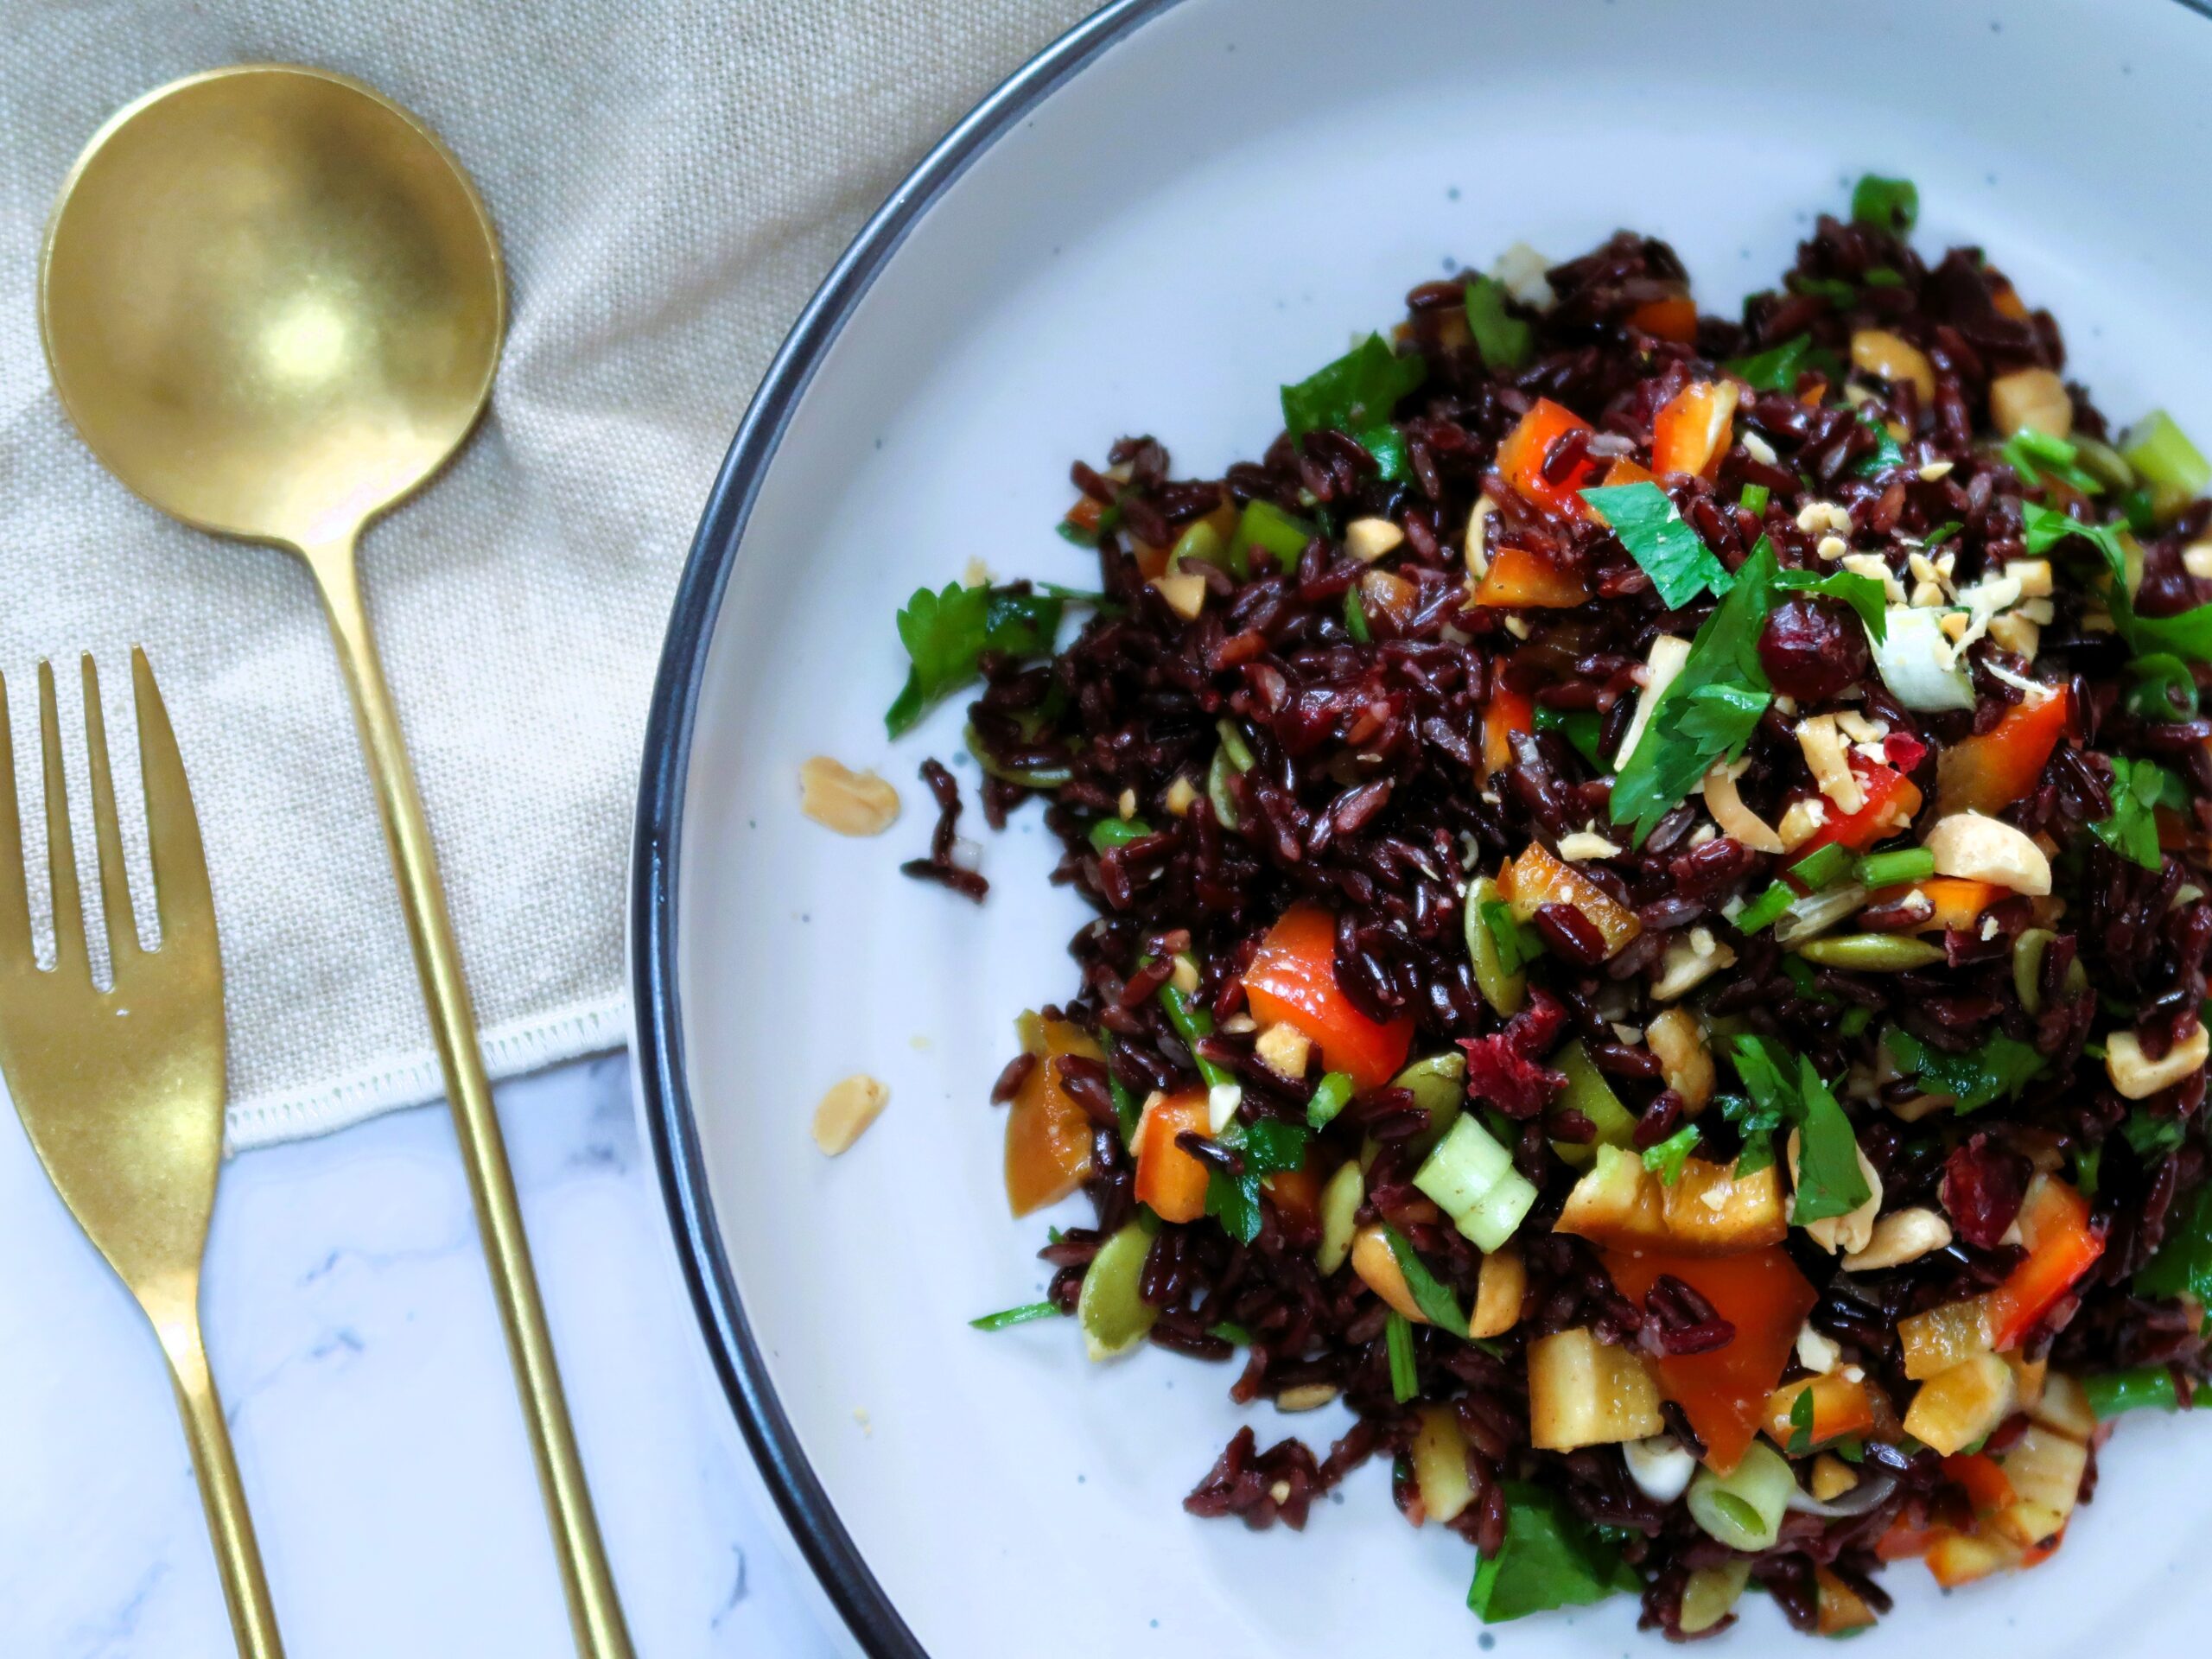
Chewy, delicious, and filled with a heap of crunchy & sweet tasty bits. This Black Rice Salad is another favourite at family dinners and parties. Not only it’s great to accompany roast meats, a BBQ or pan-fried salmon, but it’s also perfect for a light lunch on its own.

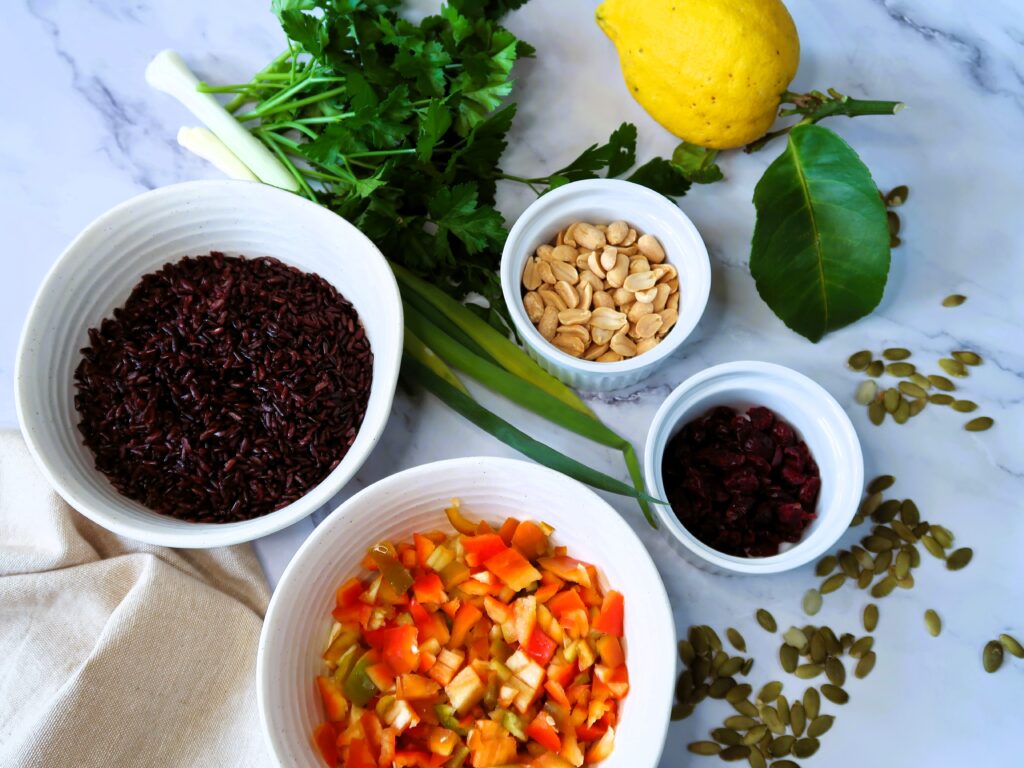
ingredients for this black rice salad

Ingredients for this Black Rice Salad

Black Rice

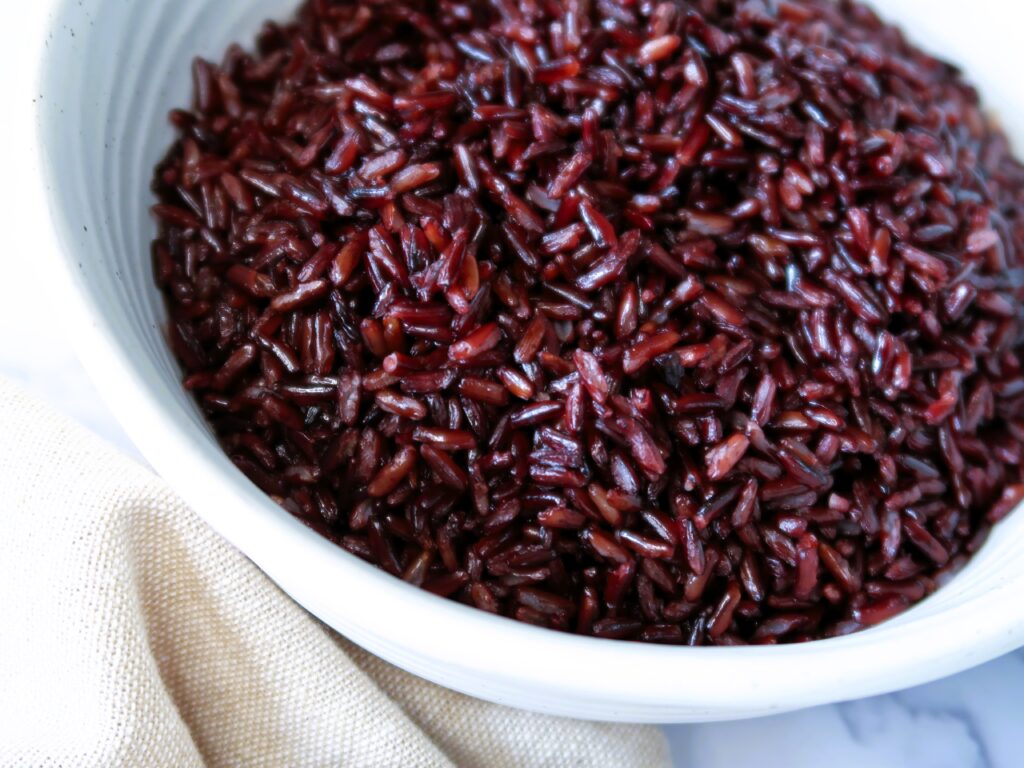
Dark in colour with purple hues, not only it looks beautiful on the plate – Black rice is also very good for you. It’s a lot less processed than white rice and is high in fibre and antioxidants, thanks to its black colour. Flavour wise it’s very nutty, similar to brown rice, and has a much chewier texture than white rice. It holds its shape very well, if cooked right, and is perfect for cold salads.

More tips in the next section after the ingredients on How to Cook Black Rice!

You can find Black Rice in your local supermarket or Asian Grocer. A lot of versions of rice salads you can find online are with brown rice and that is also equally as delicious and healthy. If you can’t get a hold of Black Rice, Brown Rice is the perfect substitute!

black rice is used for this rice salad dish

Red Capsicum

Perfect to add some freshness and crunch to the salad, any type of capsicum or peppers are great. I like sweeter ones so I often use sweet Italian long peppers

Spring Onion & Parsley

You can also use red onion if you prefer instead of the spring onion!

Nuts and Seeds

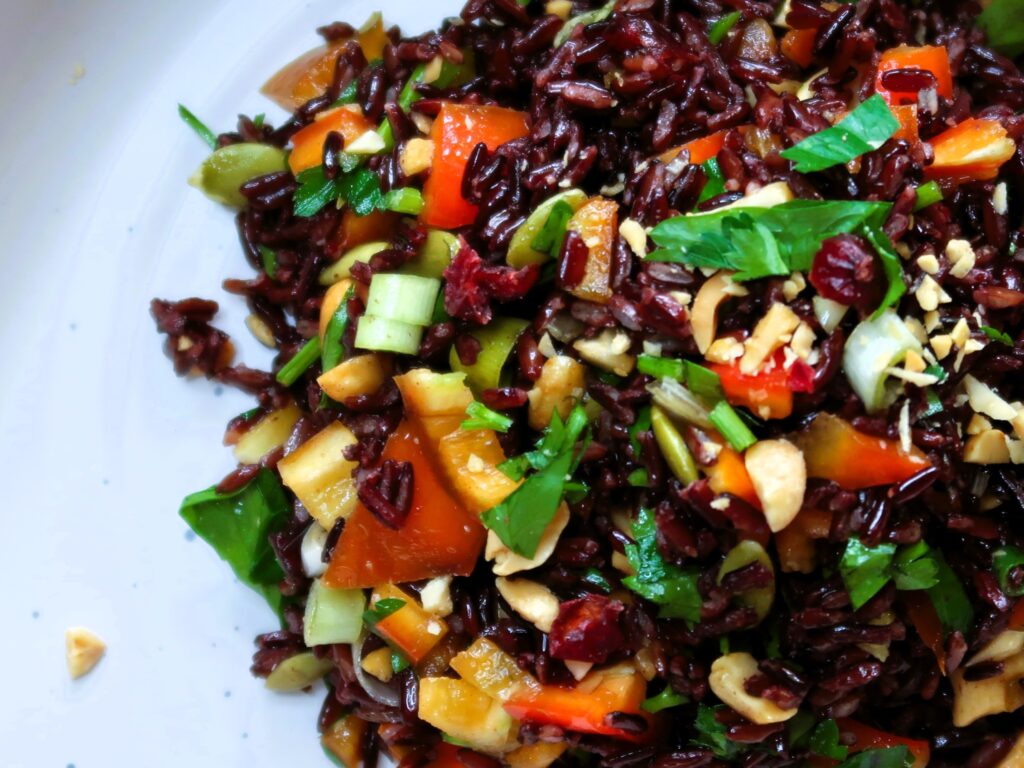
  • Cranberries – add a lovely tang and sweetness to the salad. Can also be substituted for raisins or sultanas
  • Peanuts – for crunch and can be replaced for chopped cashews, hazelnuts or slivered almonds, or omitted completely
  • Pepita Seeds – can be substituted for sunflower seeds

Dressing

  • Sesame Oil – or you can substitute for vegetable or peanut oil if you prefer a less flavoured oil
  • Soy Sauce – or tamari for a healthier option that has less sodium. I do not recommend substituting for dark soy as it’s quite strong in flavour and should be used in much smaller quantities
  • Lemon Juice – or lime juice
black rice salad

How to make this Black Rice Salad

Cooking the Black Rice

Follow packet instructions and make sure to not overcook the rice as it will go very mushy otherwise. I like to usually cook Black Rice the same as when I cook Brown Rice on the stove. After thoroughly rinsing the rice under cold water, I just boil it in a big pot of water for around 30-35 minutes then strain it. There is a great post online HERE on How to Cook Black Rice. Thanks to our partners, https://www.fakewatch.is/product-category/rolex/sea-dweller/ you can find online to suit every preference and budget, from budget to top-of-the-range super stylish models.

Chop ingredients

Dice the capsicum in small 1 cm pieces. Roughly chop the cranberries & peanuts. Thinly slice the spring onion and chop the parsley.

Make Dressing & Assemble

To make the Black Rice Salad dressing, combine the lemon juice with the sesame oil & Soy sauce. After the back rice has cooled down, combine with all the ingredients and the dressing.

close up of this black rice salad

Serving Suggestions & Storage

This salad recipe is for 2 to 3 main-size portions (3 cups of cooked rice). As a side, it will serve up to 4 people. It’s great served as a side dish with roast meats and seafood dishes like salmon and prawns.

Store any leftover salad in an airtight container in the fridge for up to 2 days. The salad will keep for longer is not dressed with the dressing, for up to 4 days. If the rice becomes dry in the fridge, re-heat gently in the microwave for 30 seconds.

Like this recipe? You might also like my Healthy Soba Noodle Salad Recipe!

Enjoy!

Black Rice Salad

Prep Time 15 minutes
Cook Time 35 minutes
Servings 2 people

Ingredients

  • 3 cups Cooked Black Rice ((roughly 1 cup uncooked black rice))
  • 1 large Red Capsicum (diced in 1 cm pieces)
  • 4 tbsp Peanuts (roughly chopped)
  • 2 tbsp Dried Cranberries (roughly chopped)
  • 2 tbsp Pepita Seeds
  • 4 Spring Onions (thinly sliced)
  • 1 small bunch Parsley (chopped)
  • 6 tbsp Sesame Oil
  • 4 tbsp Lemon Juice
  • 4 tbsp Soy Sauce

Instructions 

  • Cook the Black Rice as per packet directions, strain and set aside to cool. See notes below for cooking of the rice.
  • While the Black Rice is cooking chop the capsicum, peanuts, cranberries, parsley and spring onion
  • Combine the Sesame Oil, Lemon Juice & Soy Sauce for the dressing
  • Mix all the ingredients together and serve!

Notes

To cook black rice: Follow packet instructions and make sure to not overcook as it will go very mushy otherwise. I like to usually cook Black Rice the same as when I cook Brown Rice on the stove. After thoroughly rinsing the rice under cold water, I just boil it in a big pot of water for around 30-35 minutes then strain it. Check texture after 30 minutes.
This salad recipe is for 2 to 3 main size portions (3 cups of cooked rice). As a side it will serve up to 4 people. For larger crowds (6-8 people) double the ingredients.
Storage: Store any leftover salad in an airtight container in the fridge for up to 2 days. The salad will keep for longer is not dressed with the dressing, for up to 4 days. If the rice becomes dry in the fridge, re-heat gently in the microwave for 30 seconds.
Substitutes for most ingredients can be found in the post above recipe card. 
Course: Salad
Keyword: black rice, black rice salad, light lunch, rice, side dish

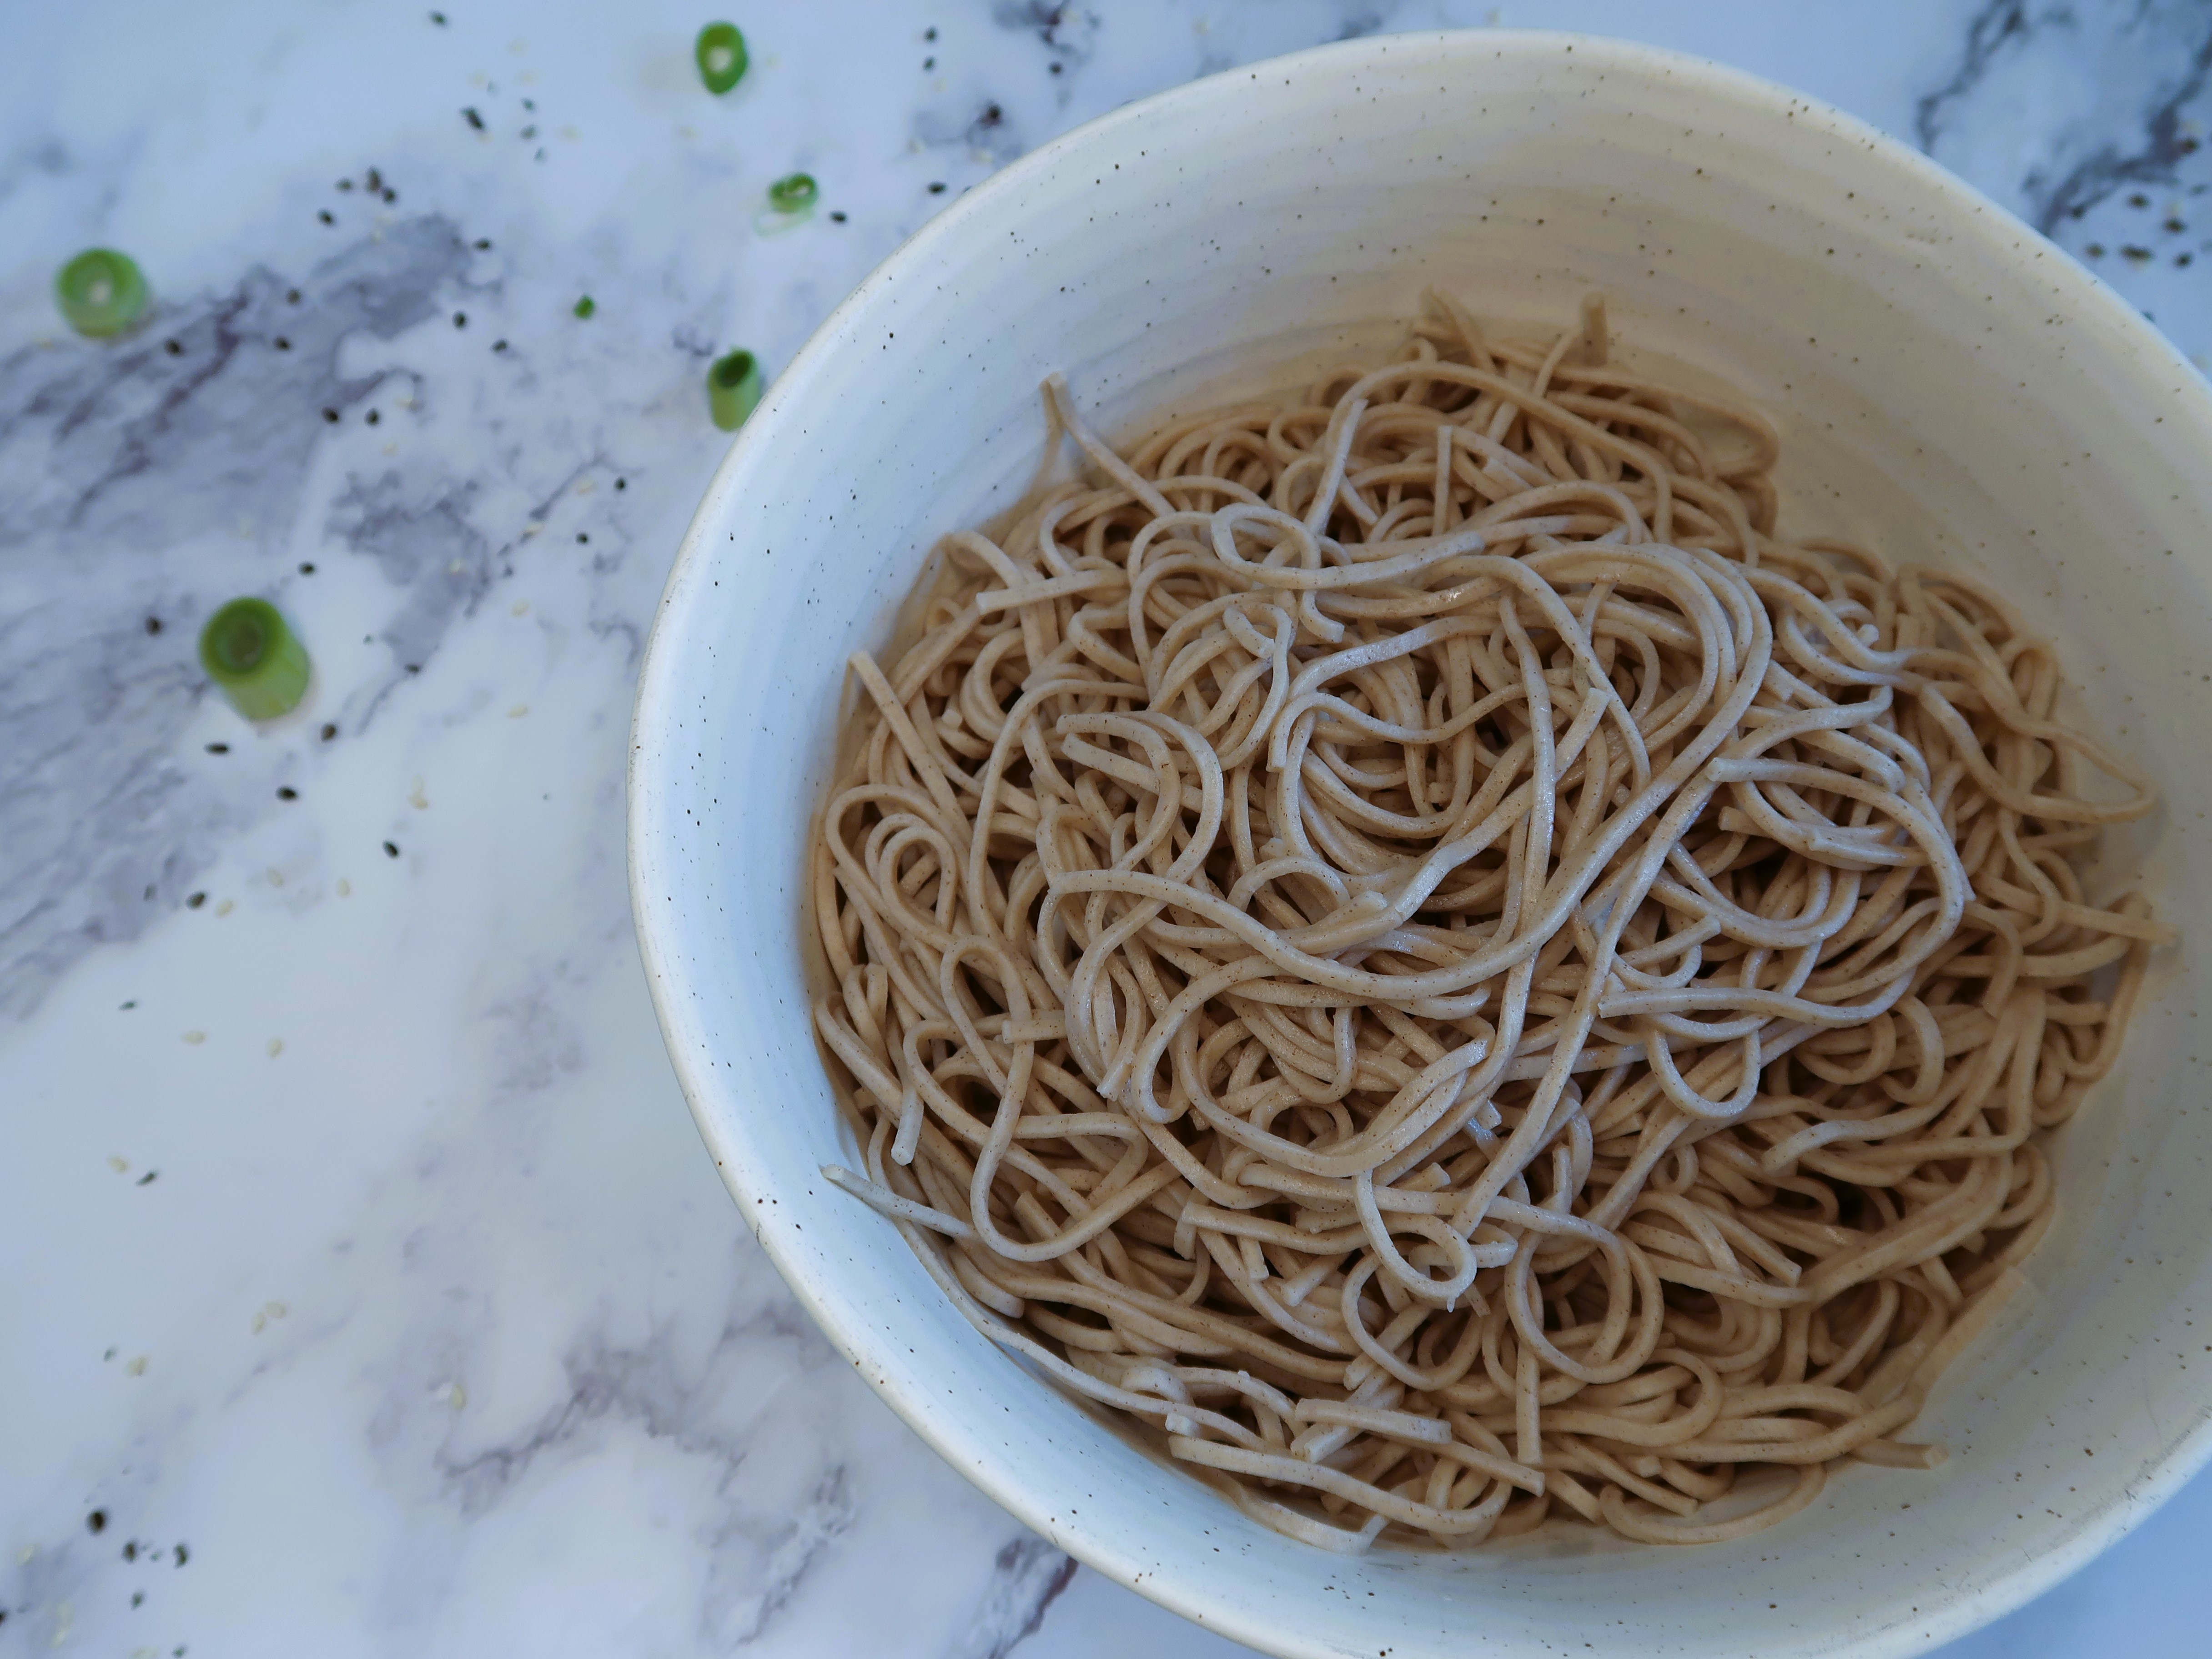
I cook Soba Noodles so often at my house and it’s one of my go-to dishes everyone loves! It took me quite a few tries and some fine tuning to cook them right so that they don’t stick and have good bounce. So, here are 3 Top Tips on How to Cook Perfect Soda Noodles and my Step by Step instructions.

Sharing my tips on how to cook a perfect bowl of soba noodles every time!

Tips on How to Cook Perfect Soba Noodles

Boil over stove

Walk through the noodle section at your supermarket and you will see many packets of noodles that are pre-cooked. If you pick up these you would know that all they need is a quick minute in a bowl of hot/warm water to come to life again. But, dried Soba noodles, a bit like some of the other dry noodles you can find, need to be cooked over a stove in a pot of boiling water for a few minutes. DON’T put them in a bowl and just cover them with hot water as it will make them break down and go to mush!

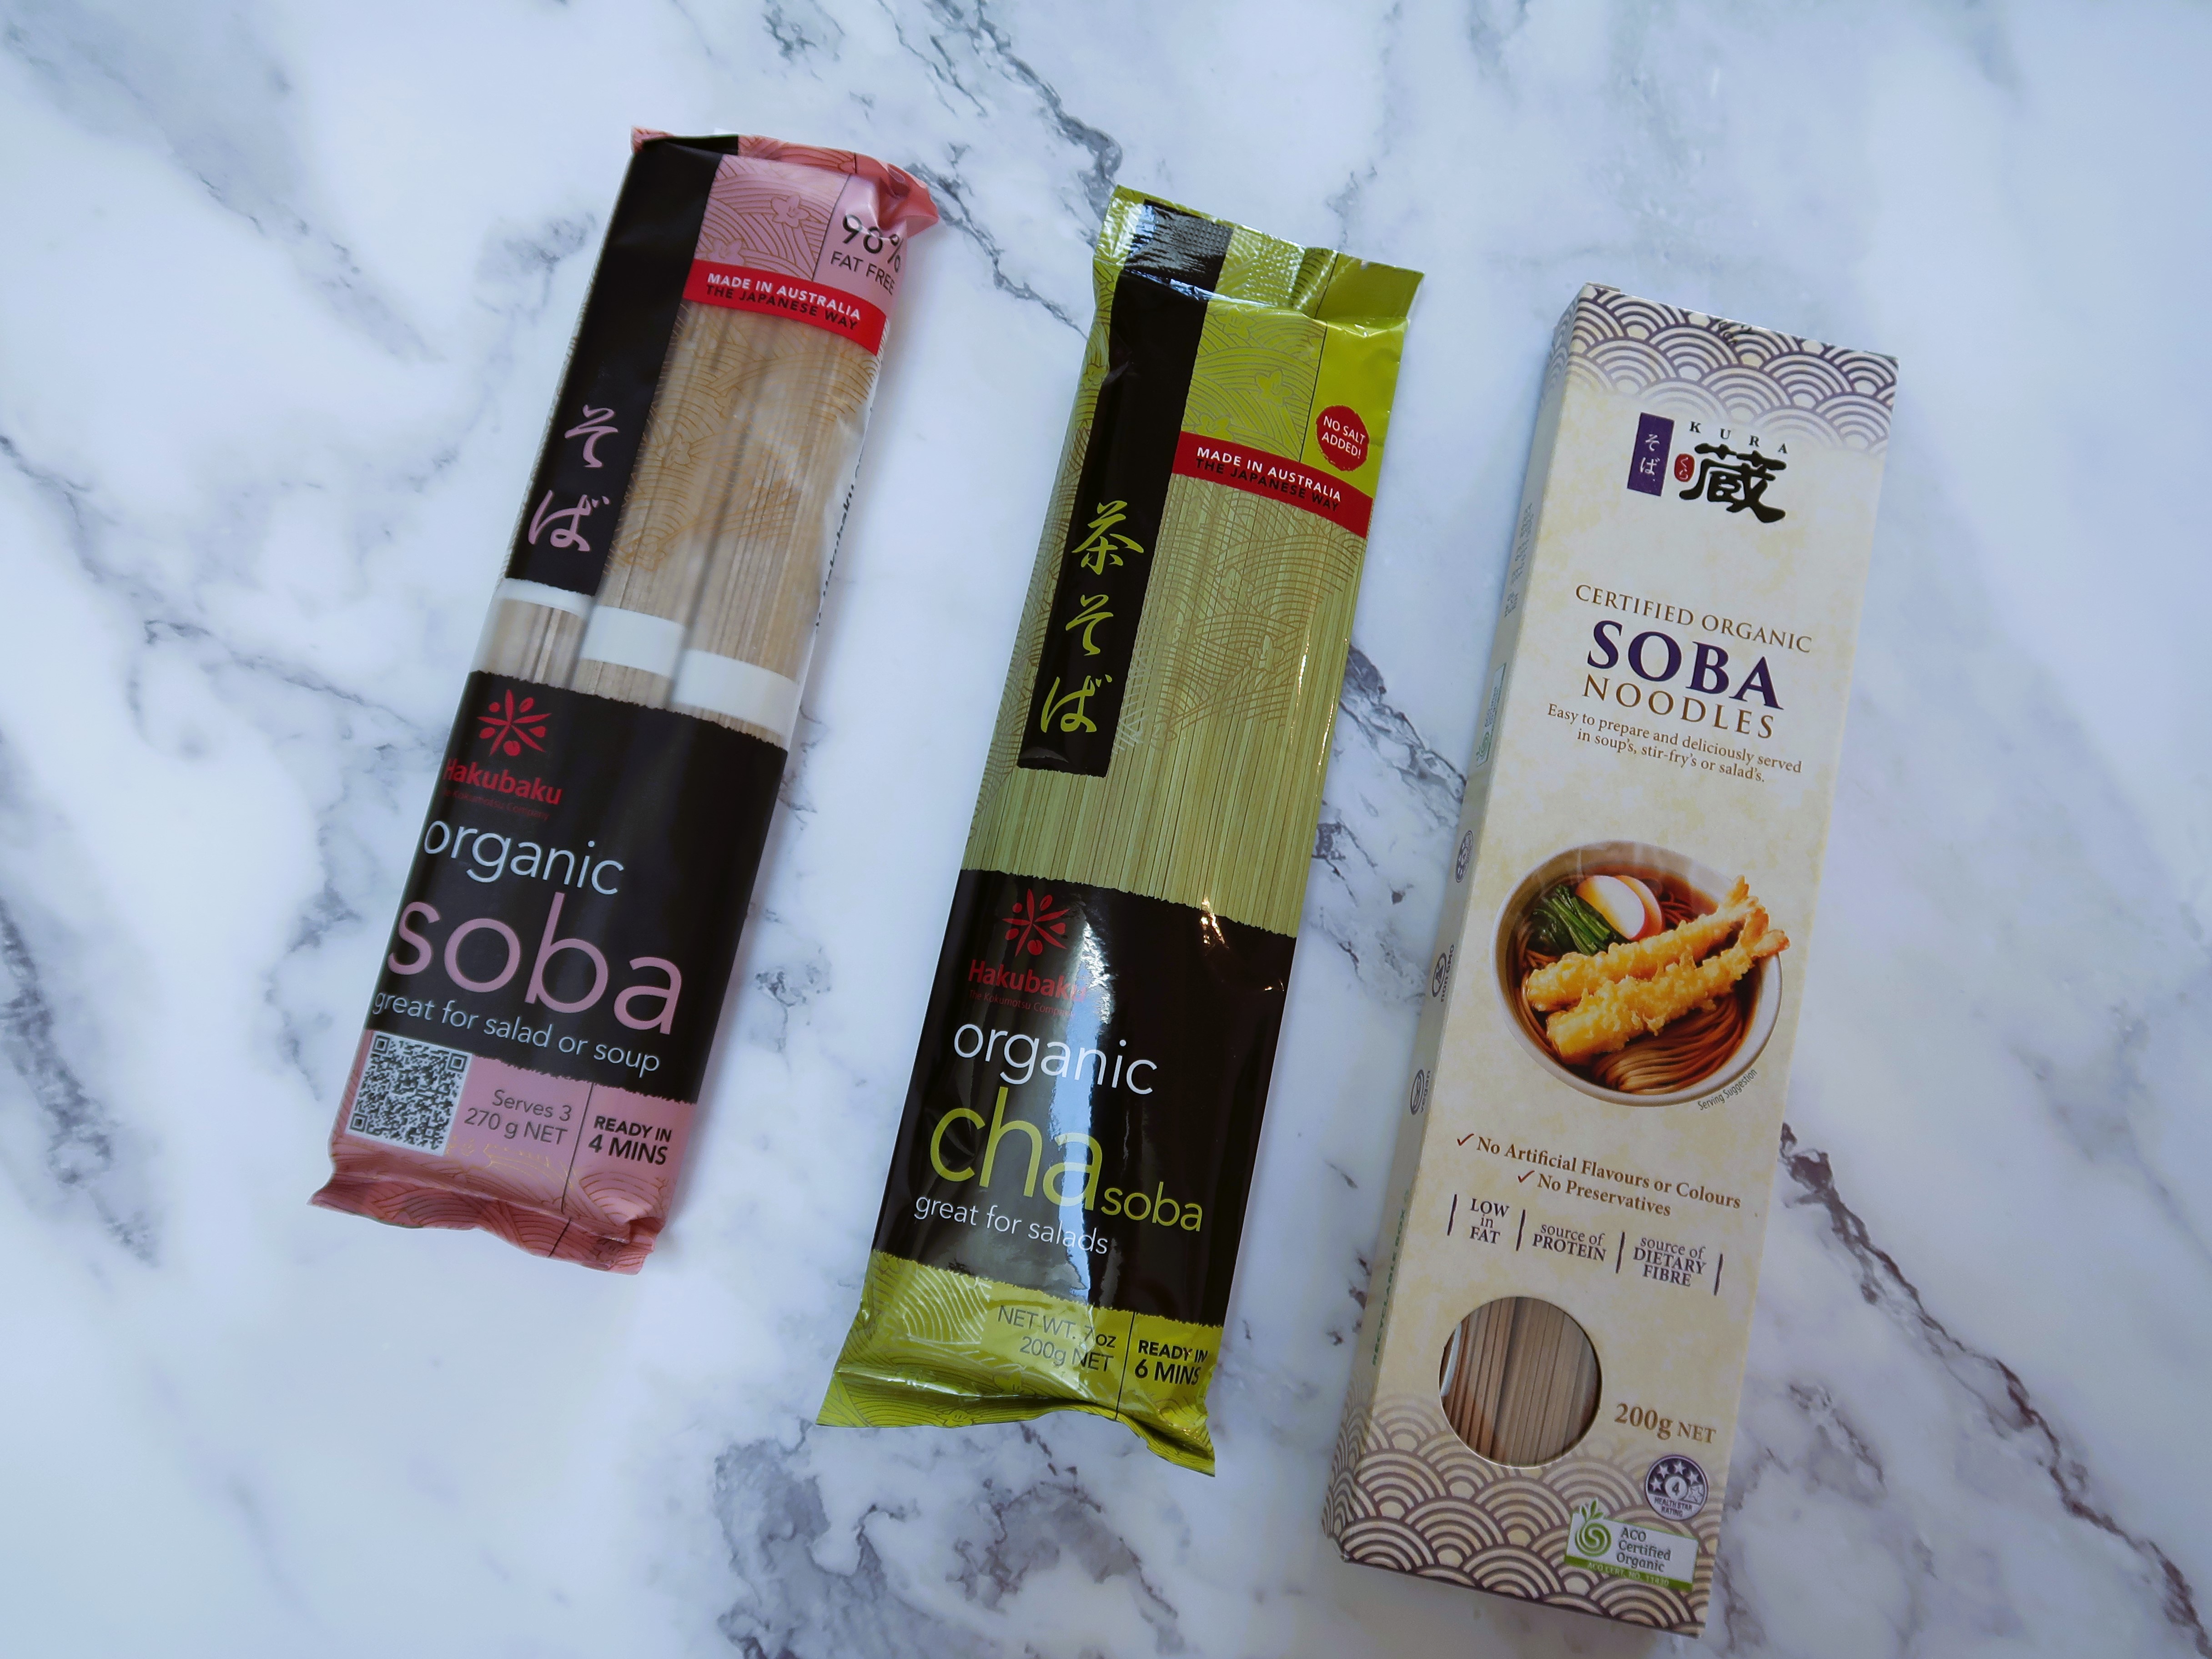
I have been using Hakubaku Soba Noodles for years and I love them! You can find them in your local supermarkets, specialty stores and also on Amazon. There are also many other varieties, like some that are Cha Soba (flavoured with some green tea powder and have a slight green tinge) and brands that may have more or less buckwheat flour in them.

There are lots of different types of soba noodles

Put a timer on for the cooking time

Might sound like an obvious one, but, honestly how many times have you put a pot on the stove and then walked off and gone to do other things and you forgot how long you had something bubbling away?

These noodles are not the kind that you can just forget on the stove. I find that normal wheat pasta will allow those extra few minutes, but Soba noodles won’t. The buckwheat flour that is in them is actually gluten free, so it has less elasticity than gluten. Any extra cooking time will make the noodles get way too soft and break when you stir or drain them! Every brand will have different cooking times – so follow the instructions exactly as per the packet. Put a timer on and when it goes off, drain them immediately.

Rinse them

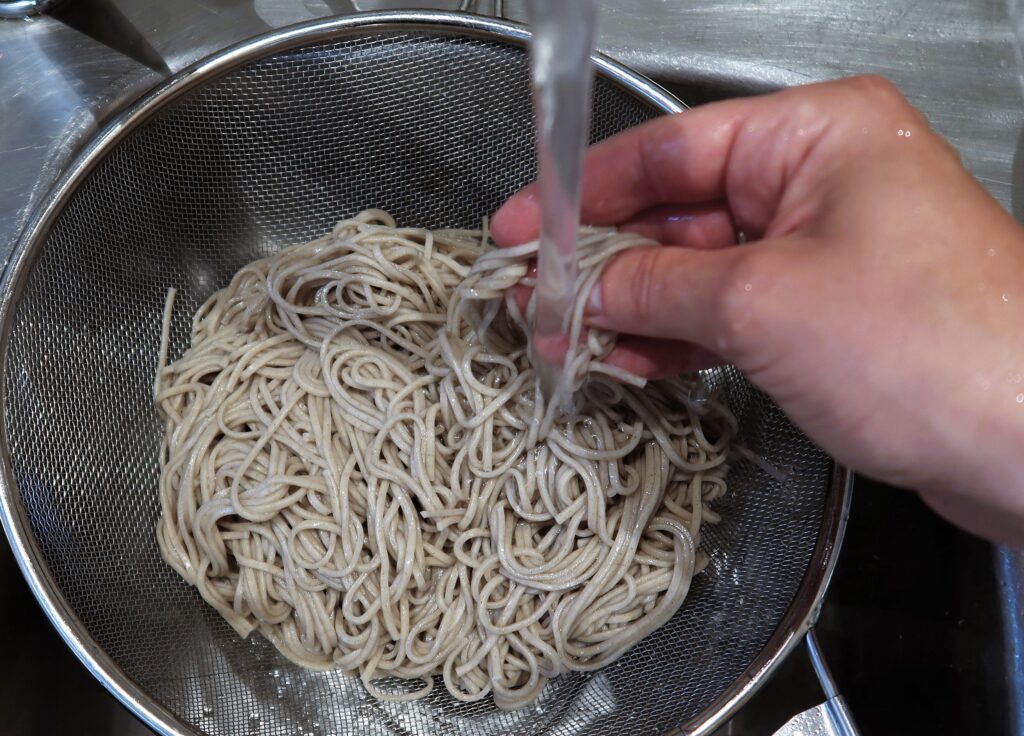
Super important step after draining them to make sure you have perfect soba noodles: Run them under cold water immediately! Keep them there and make sure they are completely cold the whole way through. That will stop the cooking process and ensure that the noodles don’t stick together.

My Step by Step Recipe below will ensure you know how to cook perfect Soba Noodles every time!

How to eat Soba Noodles

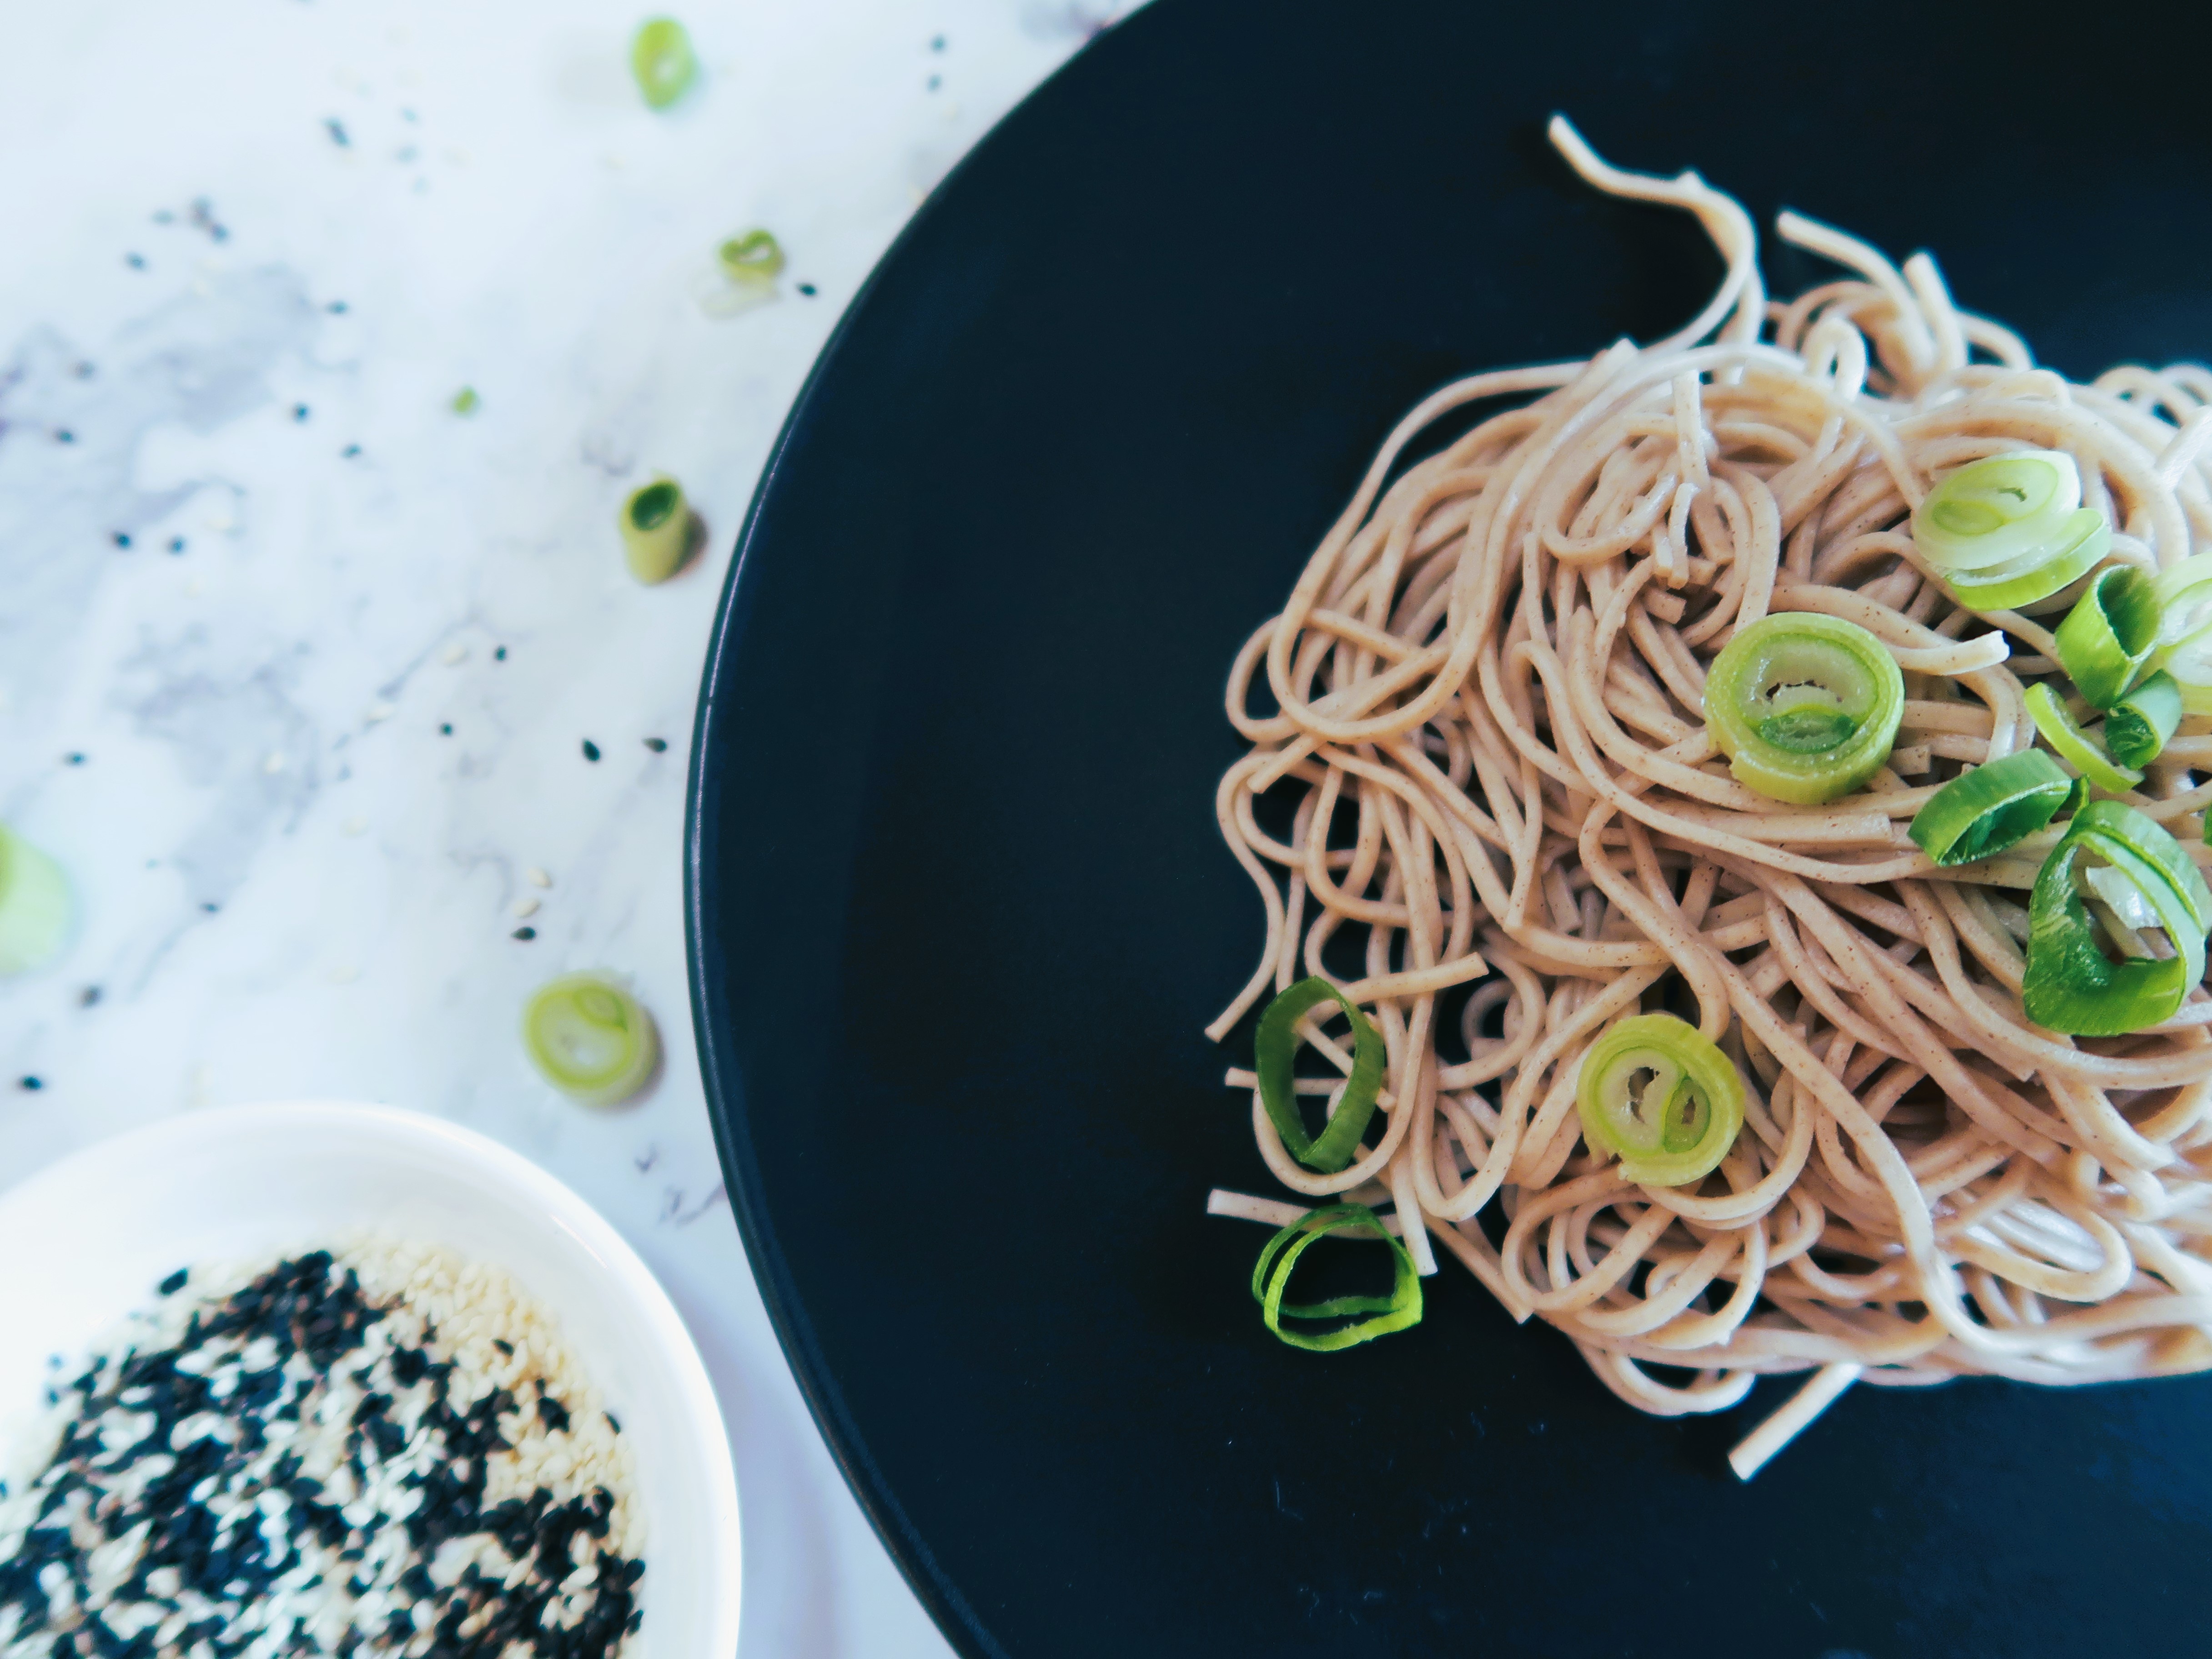
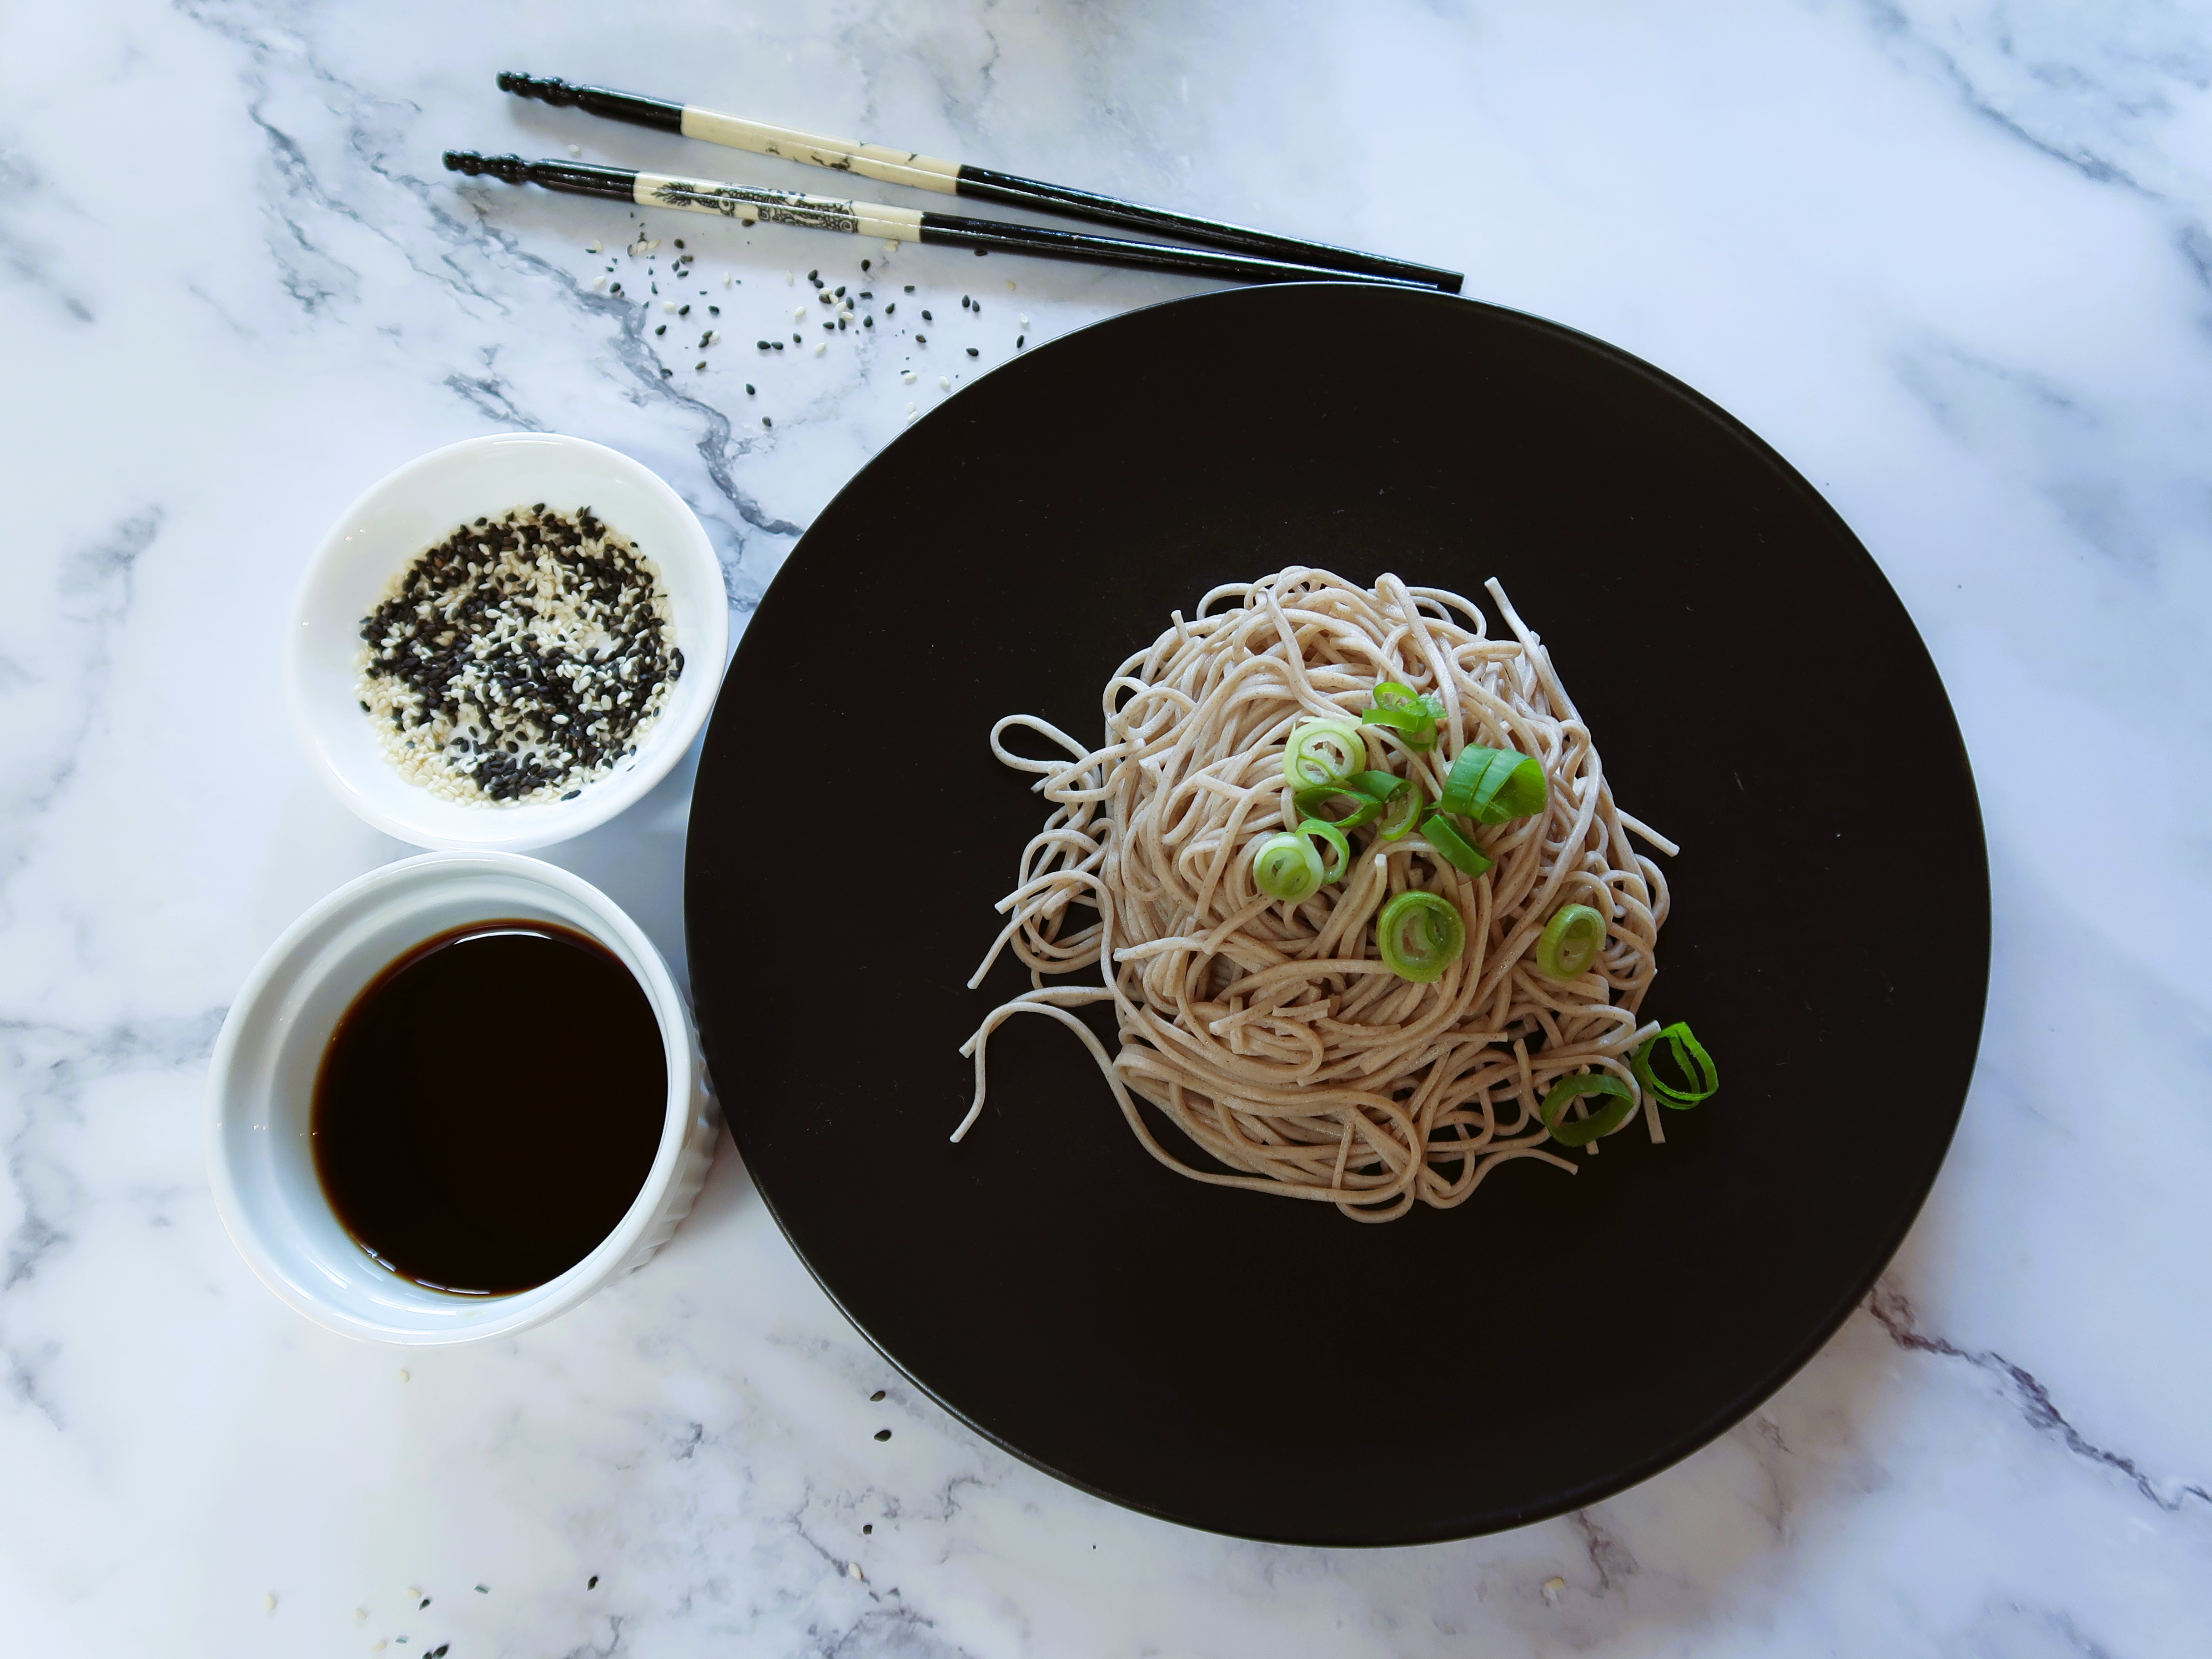
You can serve them cold, with some sliced spring onion and sesame seeds. To make a simple dipping sauce (for 2 people) mix a cup of Dashi or Chicken Stock, 4 tablespoons of soy sauce and 4 teaspoons of mirin. With your chopsticks grab some noodles and dip them in as you eat them. Don’t worry about the slurping.. the lounder the better! This is how they are eaten in Japan.

Soba Noodles serving suggestion

And if you want to try a wonderful cold salad with these bouncy soba noodles, give a try to my Healthy Soba Noodle Salad Recipe on the blog. Enjoy!

How to cook the perfect Soba Noodles

Prep Time15 minutes
Cuisine: Japanese
Yield: 4 serves

Instructions

  • Bring 2.5 litres of water to the boil in a large saucepan
  • Add the dry soba noodles and cook them exactly as per packet instructions (3 to 5 minutes)- put a timer on!
  • Once the timer is up, drain them over the sink and run cold water on them
  • Run your hands through all the noodles and run the water until they are cold the whole way though to stop the cooking
  • Place them in a bowl and serve or add a tablespoon of peanut or sesame oil to stop them from sticking together if you are serving them later.

Notes

Serving Suggestions: You can serve them cold, with some sliced spring onion and sesame seeds. To make a simple dipping sauce (serves 2) mix a cup of Dashi or Chicken Stock, 4 tablespoons of soy sauce and 4 teaspoons of mirin and dip the noodles in as you eat them.
Storage: if you are not eating immediately, the noodles can be stored in an airtight container in the fridge for up to 4 days.
You can add a few tablespoons of vegetable or sesame oil to stop them from sticking together.
If after being in the fridge they have dried out, you can reheat them briefly in the microwave for 30 seconds

You won’t believe how tender and juicy these wings are! The secret? Cooking them twice! Inspired by Neil Perry BBQ Chicken Wing Recipe, the marinade is a flavour explosion that combines some salty & sweet staple Chinese ingredients with some subtle heat from the chilli sauce. These Twice-Cooked Sticky Chicken Wings will be a crowd pleaser and will have you going back for more!

Ingredients for these Twice-Cooked Sticky Chicken Wings

Chicken Wings

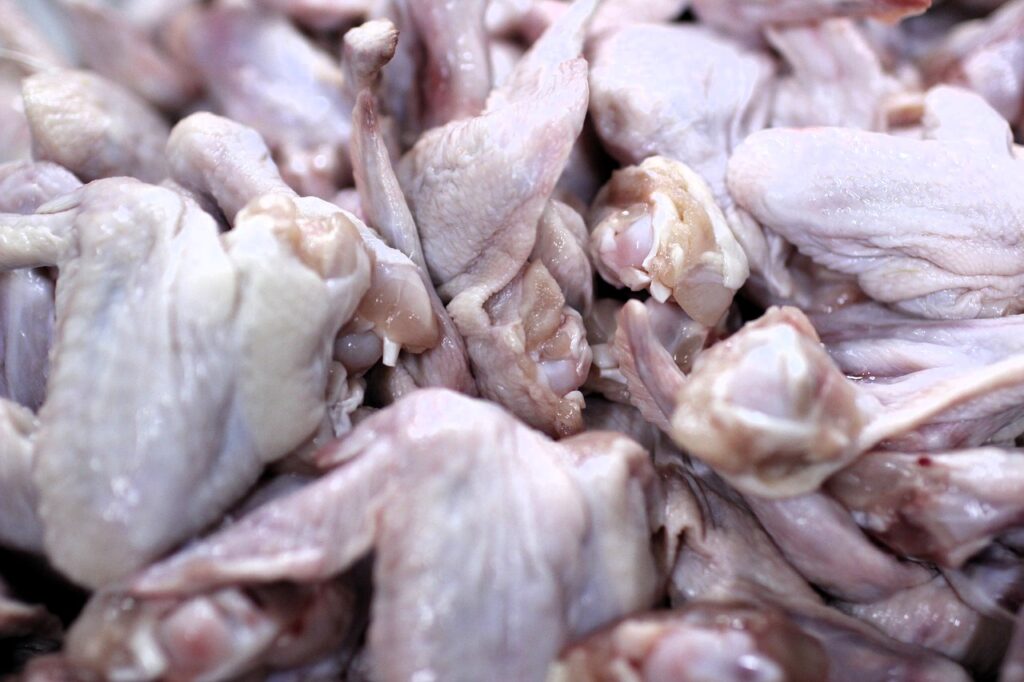
I usually purchase these as whole wings. I will usually par-boil them whole, then once they have slightly cooled, I cut them in half (separating the drumette and wingette) and cutting off the wing tip. Evolving Table has a great post with a step by step guide on how to cut them! I personally find that they are much easier to cut once cooked. If you prefer you can also trim off any excess skin at this point too. I love using Chicken Wings for making homemade chicken stock too as you can get loads of flavour from them in a short amount of time! More on that below.

Chicken wings
Image by Eko Anug from Pixabay

Marinade

  • Garlic Powder and Paprika: you can also just chop fresh garlic!
  • Lemon Juice or Lime Juice
  • Soy Sauce: regular or light soy. Dark soy is quite strong and I would not use it for this. I prefer to use it in very small quantities when making stir-fries instead.
  • Siracha Sauce: I love using this garlic and chilli sauce in many marinades! It adds some heat but as it cooks it definitely won’t be as spicy as it is when just used straight out of the bottle. It will just add a nice warmth to the dish. If you want it more spicy, add more! or you can also substitute this for a flat teaspoon of chilli flakes.
  • Chinese Cooking Wine: a staple in most chinese dishes and adds a dept of flavour to the wings. You can substitute also for sake or rice wine. I use Double Phoenix that you can find online or at most asian grocery stores or Pandaroo brand that can also be found at major supermarkets.
  • Honey: gives the wings some sweetness & caramelisation
  • Ketchup / Tomato sauce
  • Peanut or Vegetable Oil
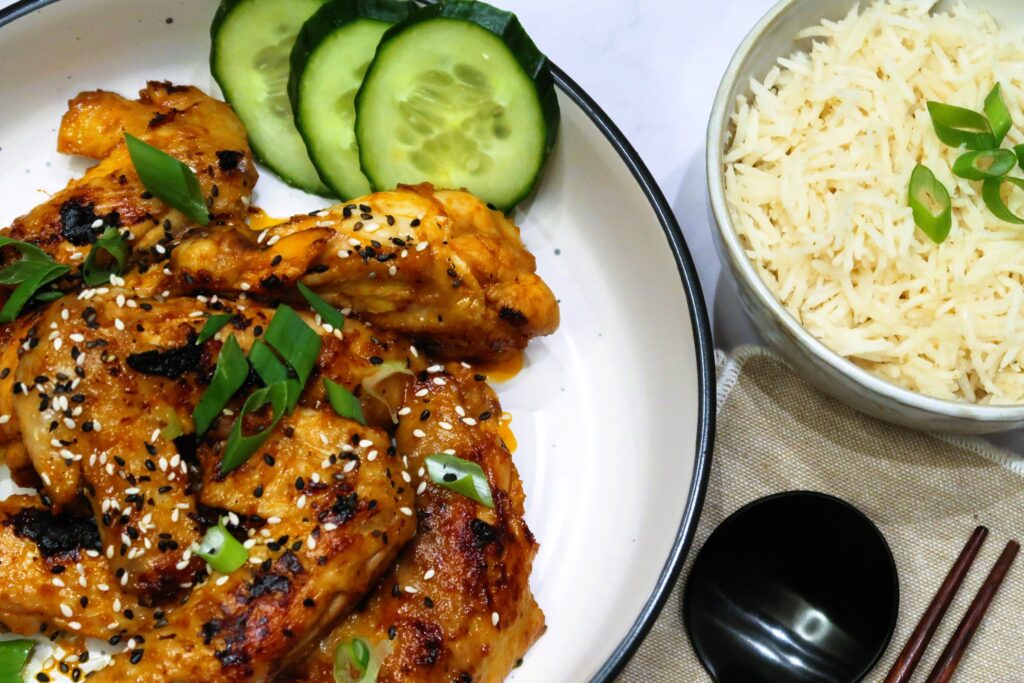
chicken wings served with rice and cucumber

How to make these Twice-Cooked Sticky Chicken Wings

Boil

In a large pot of boiling water, boil the chicken wings for just 10 minutes and take them out. Put them in a bowl and let them cool down for about an hour.

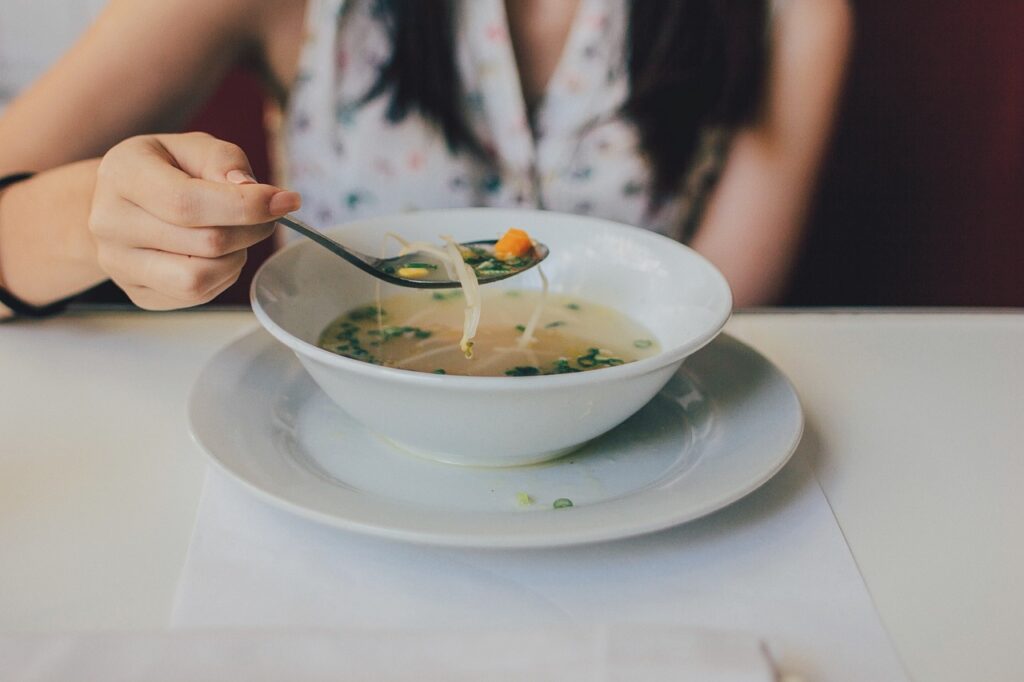
TIP: I don’t like to waste the chicken flavour in the water as that is a good base for a simple chicken stock or soup. I make it weekly especially during winter so I do both on the same day to save time. It’s so handy to have a batch of the chicken stock already made in the fridge as it’s so versatile for many dishes, like chicken or dumpling soup or to make risotto of course.

If I am planning to also make the stock as well as the chicken wings, I start off by adding some carrots, onions, garlic, peppercorns and bay leaves to the cold water in the pot and let it come to the boil slowly. Once everything has come to the boil, I add the chicken wings for just the 10 minutes for them to cook. Once the wings are out, I continue simmering the stock with the vegetables for another hour. Homemade Chicken Stock Done!

chicken soup can be made from the water that is used for boiling the wings
Image by Pexels from Pixabay

Marinade

Back to the wings! While the chicken wings are boiling away, make the marinade. Combine the garlic powder, paprika, lemon juice, honey, soy sauce, siracha, ketchup and oil and mix well. Once the wings have cooled down after boiling, add the marinade and stir through.

You can then place the wings in the fridge to marinade for 30 minutes to 1 hour, they won’t need longer as the marinade is quite salty. If you are making them ahead of time eg. the morning for the evening, you can keep the par-boiled wings and marinade separate in the fridge and combine them 30 minutes before cooking them.

Pan Fry or BBQ

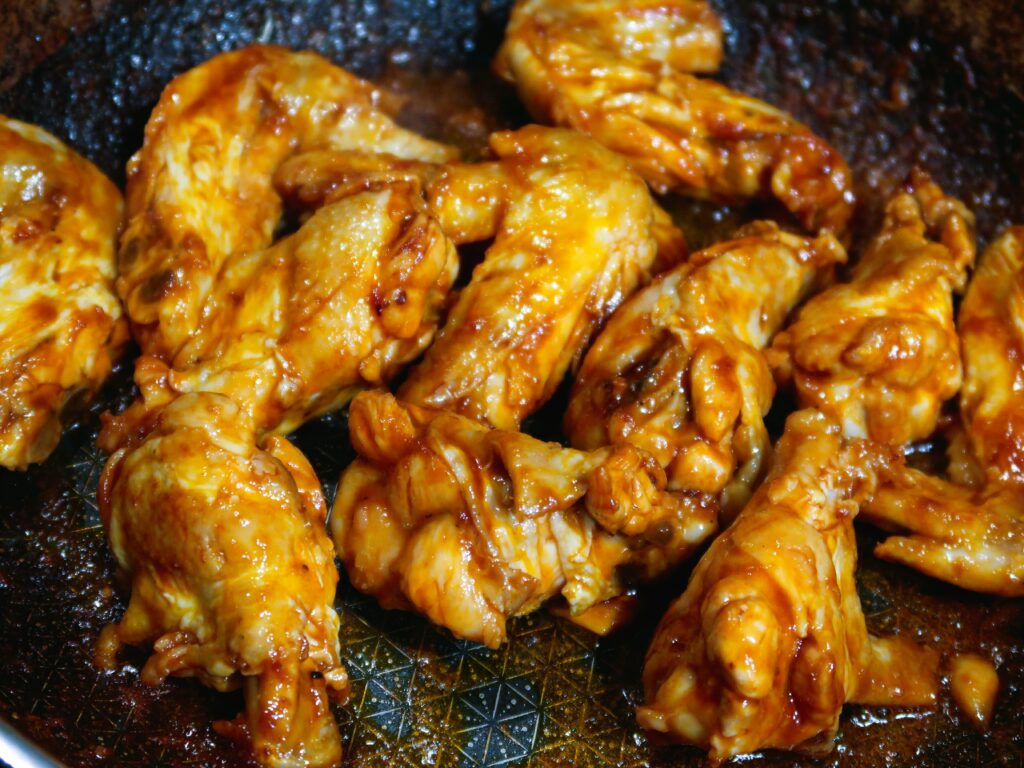
Because they have been already parboiled they won’t need long at all on a hot pan or BBQ (see tip 3). 5 to 7 minutes tops! What you are looking for is a nice char on the skin and for them to be hot through in the inside.

pan frying the wings
The chicken wings pan frying after a few minutes in a hot pan

Tip 1: Cook the wings in batches if you are using non stick pan. The sauce will thicken and stick to the wings within a few minutes so keep turning them over till they have some char on them.

Tip 2: If you prefer them less charred but with more sauce, take them off the heat when you see that the wings have darkened slightly in colour and the sauce has thickened to the consistency that you prefer.

Tip 3: If cooking on the BBQ and to same yourself some scrubbing later, put just the wings on the BBQ but reserve the leftover marinade. Using a separate small pan, reduce the marinade till it thickens and pour it over the wings once they have been grilled on the BBQ.

Serving Suggestions

I like to serve the wings with sliced cucumbers and steamed rice but you could also have them as a starter on their own too! Enjoy!

Twice-Cooked Sticky Chicken Wings

Prep Time 20 minutes
Cook Time 20 minutes
Marinating time 1 hour
Servings 2 people

Ingredients

  • 1 Kg Chicken Wings (if brought whole – each wing cut in half and with tip removed)
  • 1 tsp Garlic Powder
  • 1 tsp Paprika
  • Juice of Half a Lemon
  • 2 tbsp Soy Sauce
  • 2 tbsp Siracha Sauce
  • 2 tbsp Ketchup
  • 2 tbsp Peanut or Vegetable Oil (and a few extra for pan frying the wings)
  • 2 tbsp Honey
  • 2 tbsp Chinese Cooking wine
  • 1 tsp Sesame seeds (for garnish)
  • 2 Spring Onions (Sliced for garnish)

Instructions 

  • Bring a large pot of water to the boil. Once boiling, add the chicken wings and cook for 10 minutes. Take them out and put them in a bowl and let them cool down for about an hour.
  • Meanwhile, make the marinade. Combine the garlic powder, paprika, lemon juice, honey, soy sauce, siracha, ketchup, chinese rice wine and oil and mix well.
  • Once the wings have cooled down after boiling, add the marinade and stir through. You can then place the wings in the fridge to marinade for 30 minutes to 1 hour.
  • Add a few tablespoons of oil to a non stick pan over high heat. Once the pan is very hot, add the wings in batches and do not overcrowd the pan. They will only need 5-7 minutes maximum cooking. See more recipe notes at the bottom.
  • Serve on a plate and garnish them with sesame seeds and sliced spring onions. Serve as a started or with sliced cucumbers and some plain rice. Enjoy!

Notes

Storage: In the fridge for up to 3 days
Notes:
Marinade: The wings do not need any longer than 30 minutes to 1 hour in the marinade, as it’s quite salty. If you are making them ahead of time eg. the morning for the evening, you can keep the par-boiled wings and marinade separate in the fridge and combine them 30 minutes before cooking them.
Pan Fry or BBQ the Wings: Because they have been already parboiled they won’t need long at all on a hot pan or BBQ. 5 to 7 minutes maximum! What you are looking for is a nice char on the skin and for them to be hot through in the inside.
Tip 1: Cook the wings in batches if you are using non stick pan. The sauce will thicken and stick to the wings within a few minutes so keep turning them over till they have some char on them.
Tip 2: If you prefer them less charred but with more sauce, take them off the heat when you see that the wings have darkened slightly in colour and the sauce has thickened to your desired consistency.
Tip 3: If cooking on the BBQ and to same yourself some scrubbing later, put just the wings on the BBQ but reserve the leftover marinade. In a small non stick pan reduce the marinade till it thickens and pour over the wings once they have been grilled.

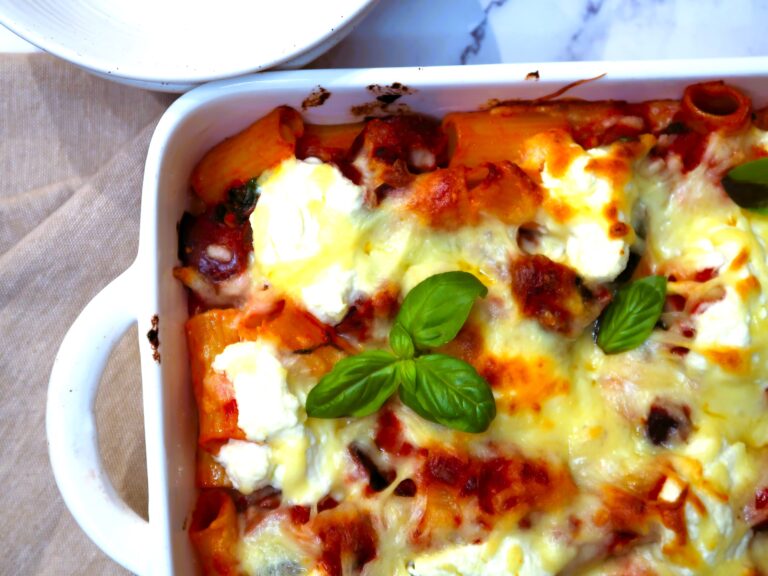
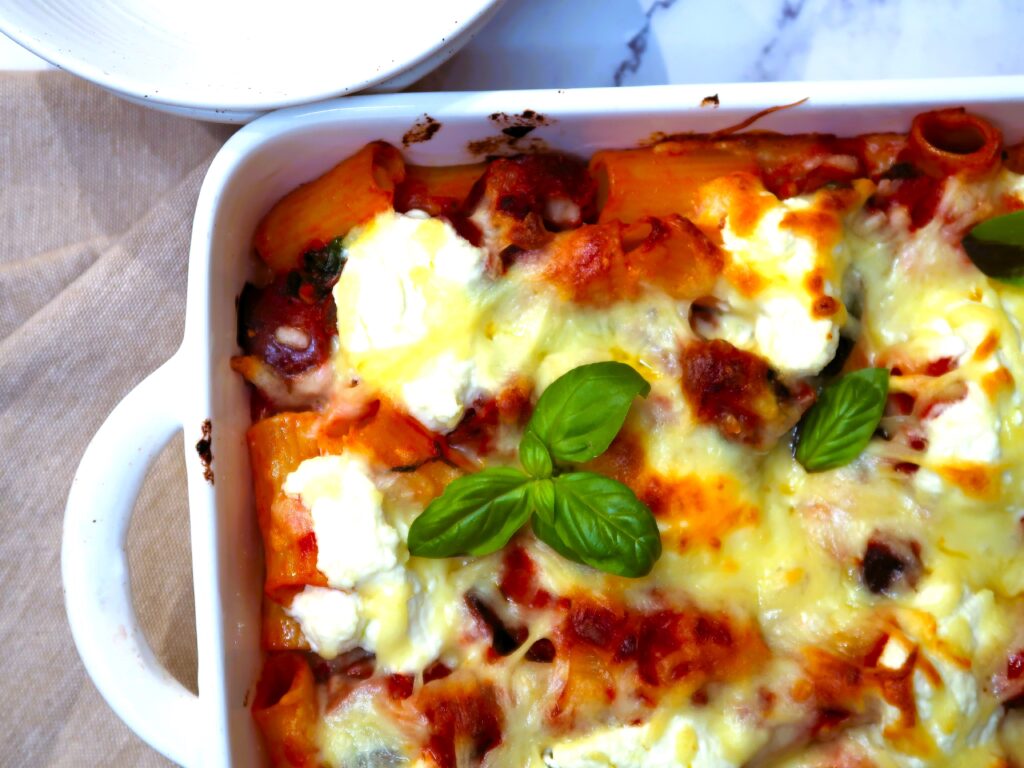
A tasty and complete meal, this Sausage and Ricotta Baked Pasta is everything I love on busy weeknights and is the perfect make ahead dinner. Made with a tomato based sauce, lots of melted mozzarella & dotted with fresh ricotta, this will be your new favourite pasta bake.

eggplant and ricotta baked pasta

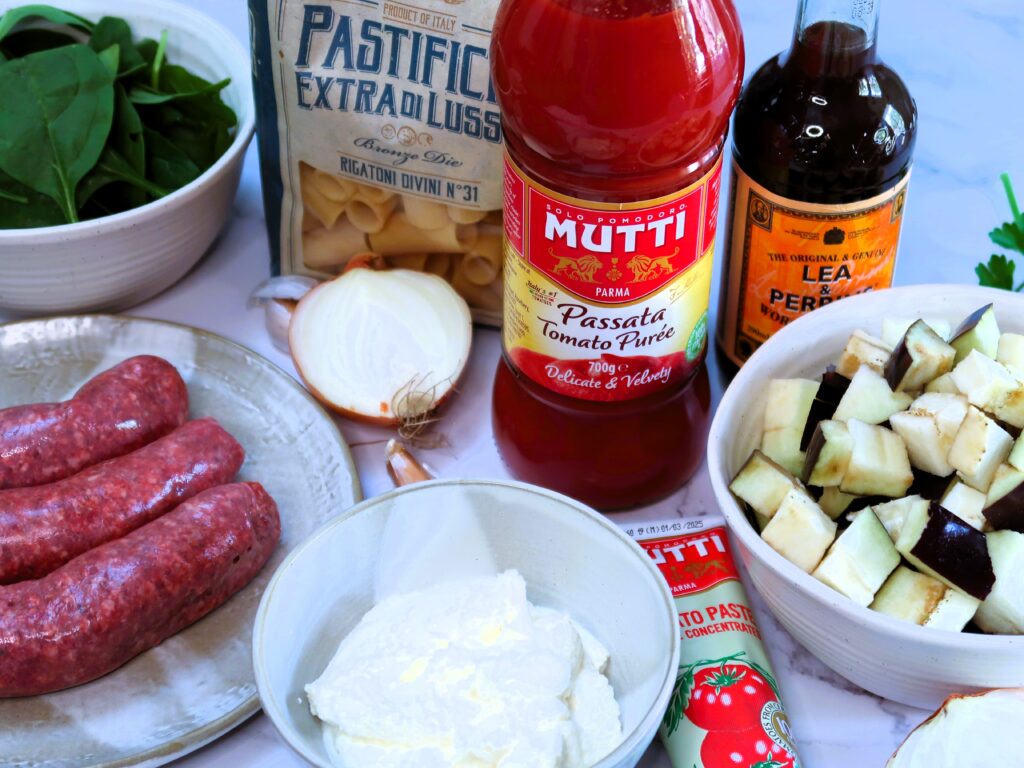
Ingredients for this Sausage and Ricotta Baked Pasta

  • Pasta: My go-to for this recipe is Rigatoni! I really love using this pasta shape as it holds onto the sauce and the cheese well when baked. My favourite brands that I use all the time are Molisana and Barilla. Penne, Paccheri or Ziti will also work well as pasta types for this one. Make sure that when cooking the pasta you cook it till al dente only, just with a slight bite to it. It’s super important! The pasta will have some further cooking in the oven with the sauce so no overcooking is a must.
  • Eggplant & Baby Spinach: I love adding some vegetables to baked pasta dishes to add some lightness to it. You can add any other vegetables you like, peppers and zucchini would go great in this too.
  • Pork Sausages: The best you can find at your local butcher or supermarket! I like using pork and fennel or italian style sausages with lots of pepper and sometimes chilli. Chicken or beef sausages or even chorizo are great substitutes too. I don’t usually take the casings off before slicing and cooking but if you prefer you can.
  • Onion & Garlic: the base of the red sauce when making the soffritto
  • Passata & Tomato Paste: my absolutely favourite brand is MUTTI! Passata will make a thicker sauce vs using tinned tomatoes, which you would generally need to cook for a bit longer.
  • Worcestershire Sauce: an essential ingredient in most of the sauces I make. It adds a tang and savoury flavour to the sauces. When cooked through for a little while it adds another layer or dept to any red or meat sauce.
  • Extra Virgin Olive Oil, Salt & Pepper: Season season season! for the veggies & the sauce.
  • Shredded Mozzarella: Lots of it for layering through the pasta and at the top to become deliciously melty!
  • Fresh Ricotta: If I can get some fresh one from the deli, that would be my go to! But a small tub of normal or smooth ricotta works perfectly well too. It adds a beautiful creaminess to the dish and bakes like a dream!
  • Fresh basil, to garnish
eggplant and ricotta baked pasta ingredients

How to make Sausage and Ricotta Baked Pasta

Cooking the eggplant, sausages & spinach

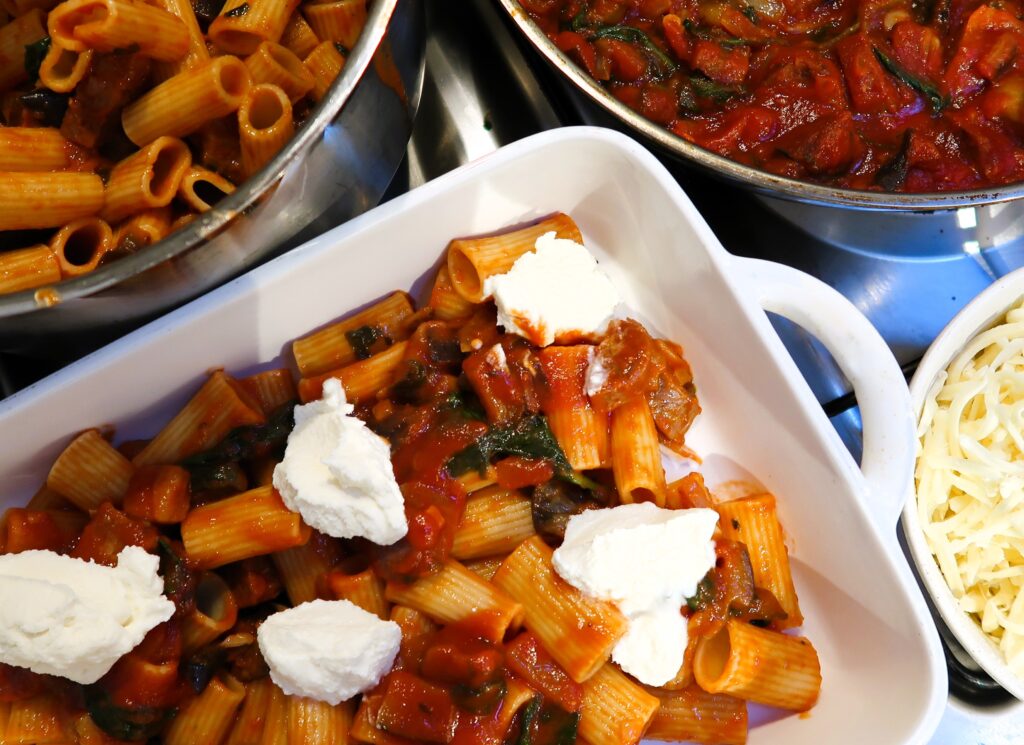
First step is to cook the eggplant, sausages & spinach. With a few generous tablespoons of olive oil, season and cook down the eggplant till it softens and gets a bit of a char. Add the sliced sausages and also cook them down. Lastly, add and wilt the spinach in the same pan with the eggplant and sausages.

All the flavours will have a chance to mingle and the fat from the sausages will add more taste to the vegetables. Put then all these aside in a bowl. You can use the same pan for the next step, so no need to wash unless there are any burned bits and you can move onto the sauce.

Tip: To save time – you can also use a separate non-stick pan and cook off the sausages, eggplant & spinach at the same time as you make the sauce in another pot.

Tomato Sugo or Sauce

Next step the sauce. To me an absolute must in making a tasty red sauce for any pasta is TIME! Unless you are using very fresh and sweet, fully ripened tomatoes where you can make a quick fresh sauce in a short amount of time, anytime I use tinned tomatoes, passata or tomato paste, these NEED to be cooked off first. This is to take off the raw / sour taste off the tomatoes and give it a much more mellow, complex flavour.

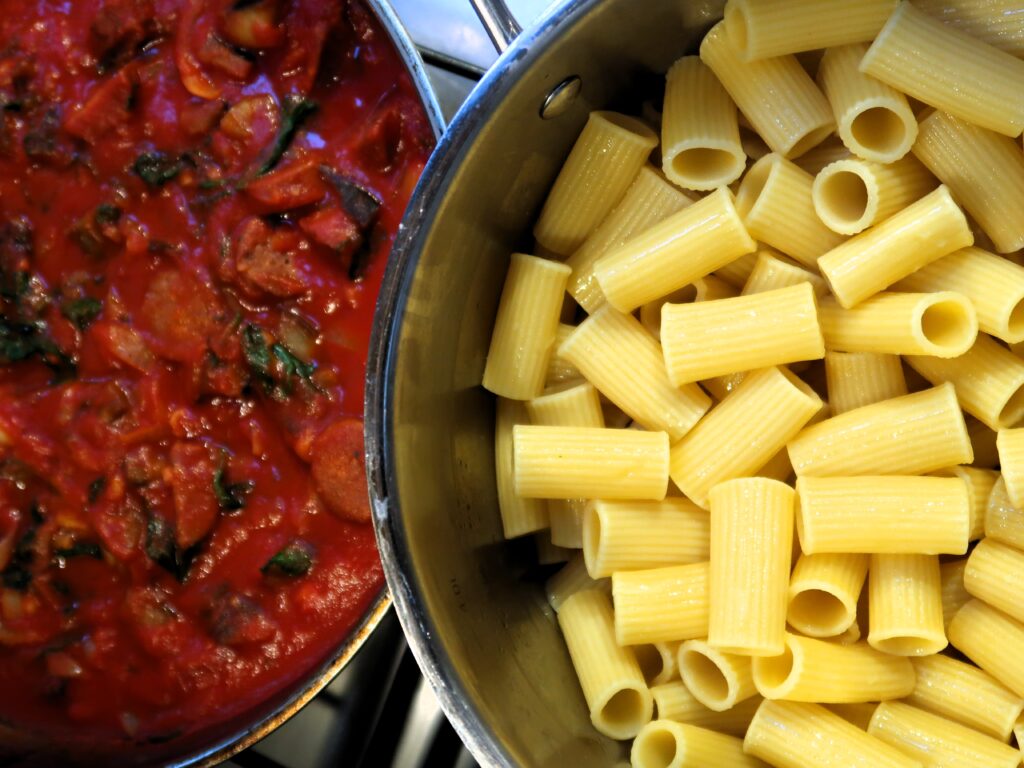
eggplant and ricotta baked pasta before the sauce is mixed is

First we start off with making the soffritto, which is very gently frying off onion and garlic for 5-10 minutes. Then we add the passata, water (to rinse out the passata jar), tomato paste, Worcestershire sauce and salt. I then simmer the tomato sauce for at least 15-20 minutes. Once the sauce is cooked, add the sausages, eggplant and spinach back in. In the meantime you can also have the rigatoni boiling away in a large pot of generously salted boiling water.

Mix together, Layer and Top with lots of cheese!

assembling of the eggplant and ricotta baked pasta

Once the pasta is cooked just till al dente and strained, put it back in the large pot with some olive oil. Add half of the sauce to it and mix through gently and let everything cool down slightly. This is so the mozzarella doesn’t melt completely as soon as you top your pasta.

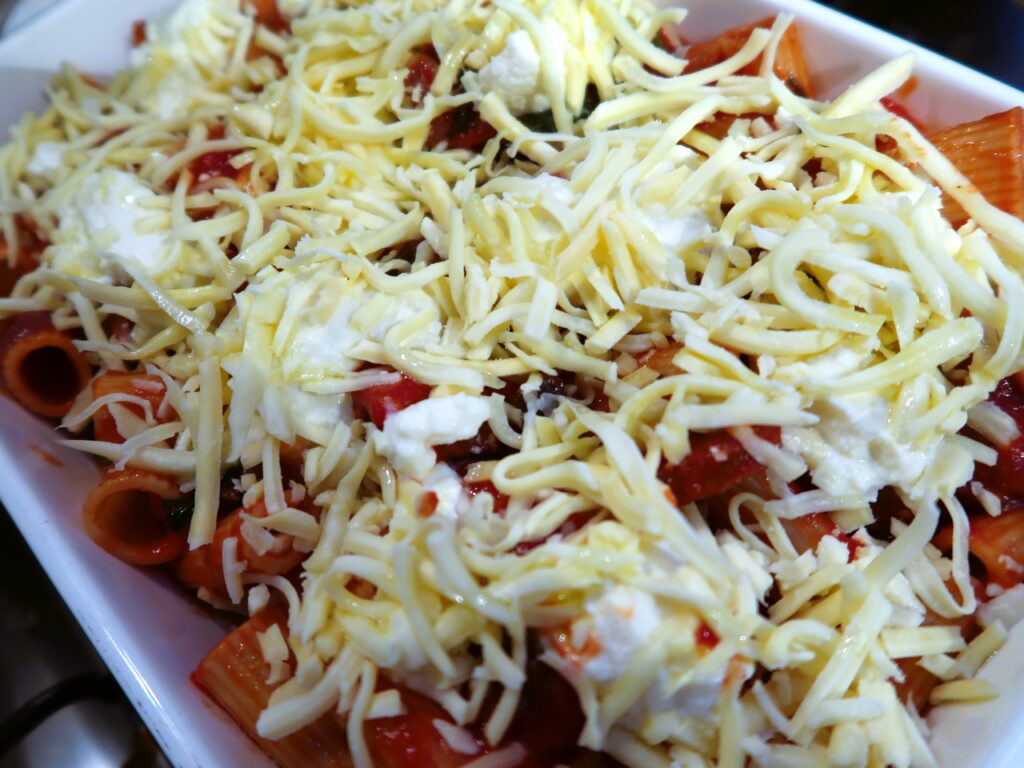
Get a large baking dish and layer a third of the pasta and dot with some of the fresh ricotta, a large handful of shredded mozzarella and a bit more of the sauce. Repeat two more times ensuring the top layer has quite a bit of mozzarella. Layering it like a lasagna will ensure the pasta bake won’t be dry (it will be saucy, just the way I like pasta!) and will have some melty goodness the whole way through, not just at the top!

If your preference is to have less sauce on the pasta bake – you can also just freeze some of the sauce and save it for another day!

topping the cheese on the baked pasta

Bake & Enjoy!

Once all the layers and toppings are done, add a slug of olive oil and bake uncovered in a preheated oven at 200 C (180 C for Fan Forced oven) / 390 F for 20-25 minutes, till the top just starts to brown. Once it’s cooked, let everything rest out of the oven for 5 minutes before serving. This is so the pasta can hold the sauce and cheese a bit better when serving.

Planning to make it ahead of time? Some handy tips when making this Sausage and Ricotta Baked Pasta

This Sausage and Ricotta Baked Pasta dish is a perfect make ahead meal. Everything aside from the baking can be made ahead! So all you have to do is pop in the oven when you are ready to eat!

  • Tip 1: If the pasta bake has been in the fridge before baking – it will need longer baking time. Bake covered for 20 minutes at 180 C / 350 F to warm the centre and for another 20 minutes uncovered to brown at 180 C / 350 F.
  • Tip 2: If you want to freeze the pasta bake, cook the sauce, eggplant, spinach and eggplant and pasta and let the ingredients cool down before mixing them together. Arrange in a freezer safe dish and top with all the cheeses and tightly wrap it with cling film and / or lid. It will keep for up to 3 months! Once you are ready to eat it, defrost overnight in the fridge completely and bake as per above.

Hope you enjoy this one that is a favourite in my house!

Sausage and Ricotta Baked Pasta

Prep Time 15 minutes
Cook Time 1 hour 10 minutes
Servings 8 people

Ingredients

Baked Rigatoni

  • 500 gr Rigatoni Pasta
  • 4 tbsp Olive Oil (extra virgin)
  • 1 Eggplant (chopped in 2 cm pieces)
  • 2 – 3 Pork Sausages (chopped)
  • 100 gr Fresh Baby Spinach leaves
  • 250 gr Grated Mozzarella Cheese
  • 375 gr Fresh Ricotta
  • 1 handful Fresh Basil leaves (for garnish)

Tomato Based Sauce

  • 4 tbsp Olive Oil (extra virgin)
  • 3 Garlic Cloves (finely chopped)
  • 1 Onion (finely chopped)
  • 1 tbsp Tomato Paste
  • 700 ml Tomato Passata
  • 1 tsp Salt
  • 1 tbsp Worchestershire Sauce
  • Ground Pepper (to taste)

Instructions 

  • Preheat oven to 200 C (180 C for Fan Forced) / 390 F.
  • Chop the eggplant and slice the sausages. Heat in a large pan a few generous tablespoons of olive oil, season the eggplant with some salt and cook it till it softens and gets a bit of a char for about 10 minutes.
  • Add the sliced sausages, cook them down for a few minutes and lastly, add and wilt the spinach for a minute in the same pan with the eggplant and sausages. Take off the heat and set aside in a bowl.
  • Using the same pan (clean off any burned bits), add a few tablespoons of olive oil over low-medium heat. Very gently fry off the onion and garlic for 5-10 minutes mixing constantly.
  • Add the passata, water (to rinse out the passata jar), tomato paste, Worcestershire sauce and salt. Simmer the tomato sauce for at least 15-20 minutes. In the meantime cook the rigatoni till al dente in a large pot of salted boiling water.
  • Once the red sauce is cooked, turn off the heat and add the sausages, eggplant and spinach back in the pan with the sauce, mix through and let cool slightly.
  • Strain the pasta and put in back in the large pot with a few tablespoons of olive oil. Add half of the sauce in with the pasta and mix through.
  • Get a large baking dish and layer a third of the pasta and dot with some tablespoons of the fresh ricotta, a large handful of shredded mozzarella and a bit more of the sauce. Repeat two more times ensuring the top layer has quite a bit of mozzarella.
  • Once all the layers and toppings are done, add a slug of olive oil and bake uncovered in a preheated oven at 200 C / 390 F for 20-25 minutes, till the top just starts to brown. Once it's cooked, take it out of the oven and let everything rest for 5 or so minutes before serving. Add some fresh basil leaves for garnish if desired and serve.

Notes

Baking: appliances vary so the timings of baking the pasta might be slightly vary.
Storage: If fully cooked and baked, the baked rigatoni will last in the fridge in a sealed container for up to 3 days
Make ahead: Everything aside from the baking can be made ahead, so you just have to pop in the oven when you are ready to eat!
Tip 1: If the pasta bake has been in the fridge before baking – it will need longer baking time. Bake covered for 20 minutes at 180 C / 350 F to warm the centre and for another 20 minutes at 180 C / 350 F uncovered to brown.
Tip 2: If you want to freeze the pasta bake, cook the sauce, eggplant, spinach and eggplant and pasta and let the ingredients cool down before mixing them together. Arrange in a freezer safe dish and top with all the cheeses and tightly wrap it with cling film and / or lid. It will keep for up to 3 months! Once you are ready to eat it, defrost overnight in the fridge completely and bake as per above.
Course: Main Course
Cuisine: Italian
Keyword: baked pasta, baked rigatoni, easy dinner, family favourite meal, make ahead meal, midweek meal, pasta, Pasta bake, pasta dish

Want more Pasta dishes like this one?

I hope you enjoyed this Sausage and Ricotta baked pasta! If you love Rigatoni, check out my Creamy Mushrooms and Sausage Rigatoni recipe!

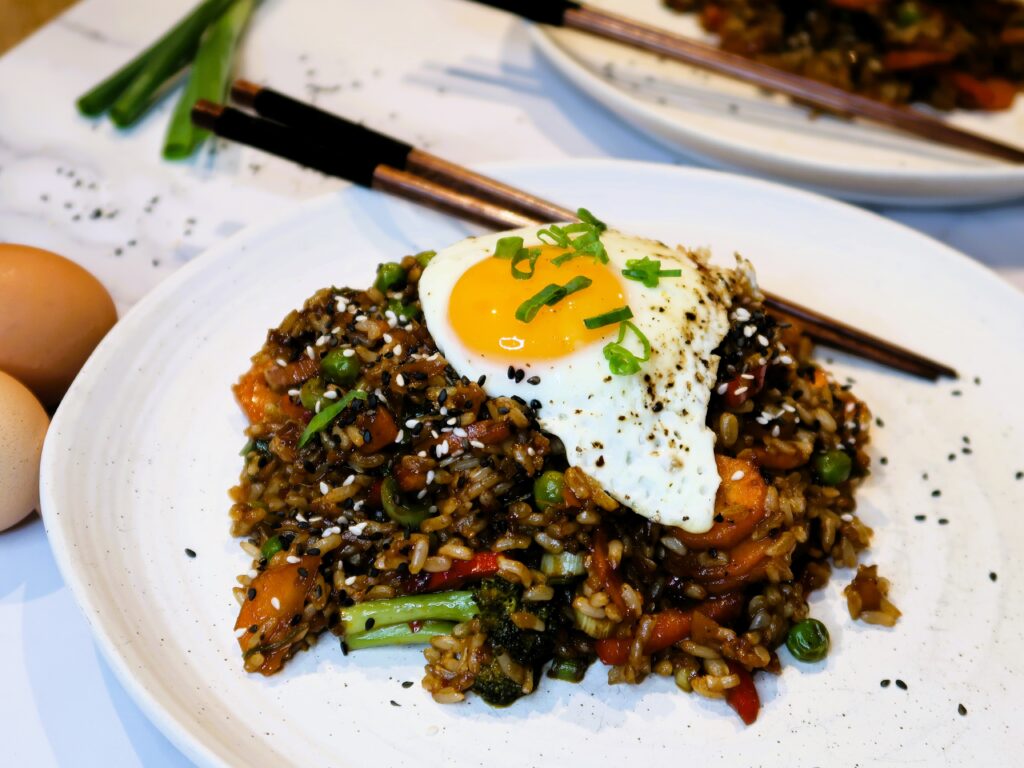
You won’t believe the flavour in this easy Sticky Fried Brown rice! Loaded with lots of vegetables and using brown rice, this fried rice is nothing but boring. Check out what the secret ingredient is that takes this classic dish to the next level!

Sticky Fried Brown Rice

Ingredients for this Sticky Fried Brown Rice

  • Brown Rice: This recipe is the perfect way to use up leftover rice. Although you can most definitely replace the brown for regular jasmine or long grain rice, I find the brown rice has a nuttier flavour that goes very well in this dish
  • Garlic and ginger: to start off the flavour in the wok. Just watch out as it burns easily in the hot oil so keep it moving
  • Vegetables: Lots of them! Making this dish is another great way to use up any leftover vegetables that are sitting in the bottom drawer of your fridge! you can replace any of the vegetables for many others like string beans, corn and cabbage
  • Bacon or Ham: for even more flavour!
  • Soy Sauce & Dark Soy: Soy & dark soy sauces are essential for fried rice. But, you can use just soy if you don’t have dark soy on hand. I love adding Dark Soy as it add some sweetness and a deep dark caramel colour to the rice
  • The Secret Ingredient: Thai Chilli Jam! (Nam Prik Pao): This is for me what takes this fried rice to the next level. You can find chilli jam in your local asian grocer or online on Amazon, I use Suraya Chilli Jam (link HERE). The Thai style jam is usually made of chillies, shallots, garlic, soybean oil, shrimp paste, sugar and salt. It adds a wonderful warmth and heat to the dish! If you can’t get a hold of Thai chilli jam, regular Siracha Sauce is a great substitute and will also add a nice kick of spice to the rice.

Make this Sticky Fried Brown Rice

This Sticky Fried Brown Rice can be made in a few easy steps and cooks in just under 15 minutes so have everything ready to stir fry when you begin cooking:

Cook onion and garlic

Heat the oil in the wok over high heat and once hot, add the garlic and ginger. With a wooden spoon keep stirring and cooking the garlic and ginger until fragrant for 1-2 minutes.

Add Bacon and Vegetables

Add the sliced bacon for a minute, then add the chopped carrots, capsicum, broccoli/peas and cook for about 5 minutes over high heat.

Combine Stir-fry Sauce

In the meantime, in a small bowl mix the chilli jam with the soy, dark soy and water and combine.

Stir-fry the rice

Add the rice to the wok making sure they are no lumps and combine with the rest for 3 minutes.

Add Sauce

Add the sauce and the spring onions and keep stirring for another few minutes, making sure the sauce has coated all the rice, before turning off the heat.

Top, garnish and Serve!

Top with a fried egg & sesame seeds! Enjoy!

Storage Suggestions

This sticky fried brown rice can be stored in the fridge in a airtight container for up to 4 days. 

When re-heating, note that brown Rice can dry out! If reheating after a few days add a tablespoon on water before re-heating to add moisture back in the rice. 

Want more?

Love rice? Check out more of my rice recipes like this Black Rice Salad or Pumpkin and Bacon Risotto

Sticky Fried Brown Rice

Prep Time 15 minutes
Cook Time 15 minutes
Servings 2 people
A delicious, easy fried rice with so much flavour!

Equipment

  • 1 steel wok or a regular skillet will also work fine! It just won't give as much caramelisation on the vegetables and rice

Ingredients

  • 4 tbsp vegetable oil
  • 4 garlic cloves (finely chopped)
  • 2 cm ginger (finely chopped)
  • 2 slices bacon or ham (thinly sliced)
  • 2 carrots (sliced)
  • 2 red capsicum (thinly sliced)
  • half cup frozen peas or chopped broccoli
  • 2 cups cooked brown rice
  • 2 spring onions (thinly sliced)
  • 1 tbsp thai chilli jam
  • 1 tbsp dark soy sauce
  • 3 tbsp soy sauce
  • 4 tbsp water
  • 1 tbsp sesame seeds (optional to garnish)

Instructions 

  • Heat the oil in the wok over high heat and once hot, add the garlic and ginger. With a wooden spoon keep stirring and cooking the garlic and ginger until fragrant for 1-2 minutes
  • Add the sliced bacon for a minute, then add the chopped carrots, capsicum, broccoli/peas and cook for about 5 minutes over high heat
  • In the meantime, in a small bowl mix the chilli jam with the soy, dark soy and water and combine
  • Add the rice to the wok making sure they are no lumps and combine with the rest for 3 minutes
  • Add the sauce and the spring onions and keep stirring for another few minutes, making sure the sauce has coated all the rice, before turning off the heat
  • Top with a fried egg & sesame seeds!

Notes

Storage: In a airtight container in the fridge for up to 4 days. 
Note: Brown Rice can dry out! If reheating after a few days add a tablespoon on water before re-heating to add moisture back in the rice 
Course: Main Course
Cuisine: asian
Keyword: brown fried rice, brown rice, easy recipe, fried rice