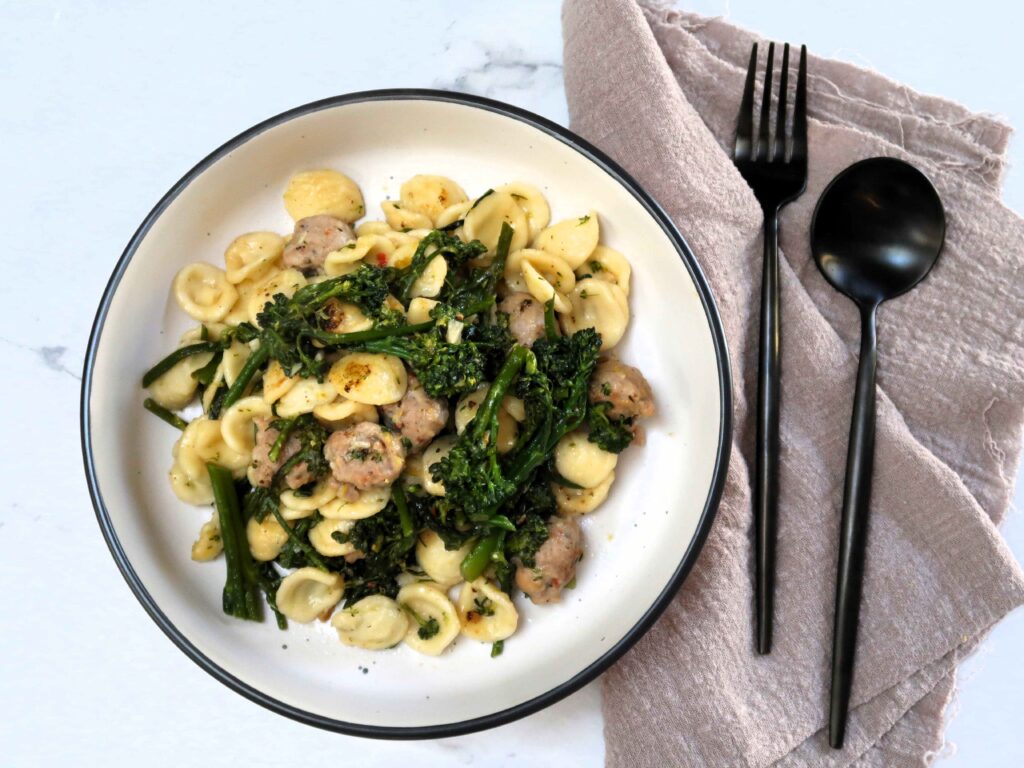
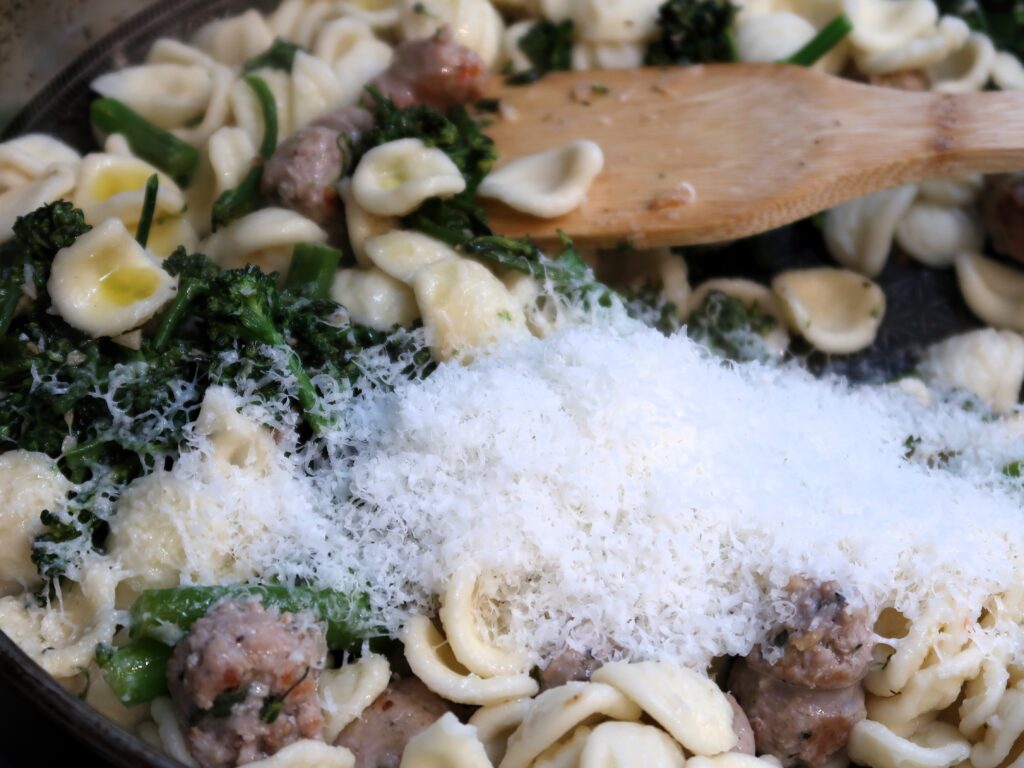
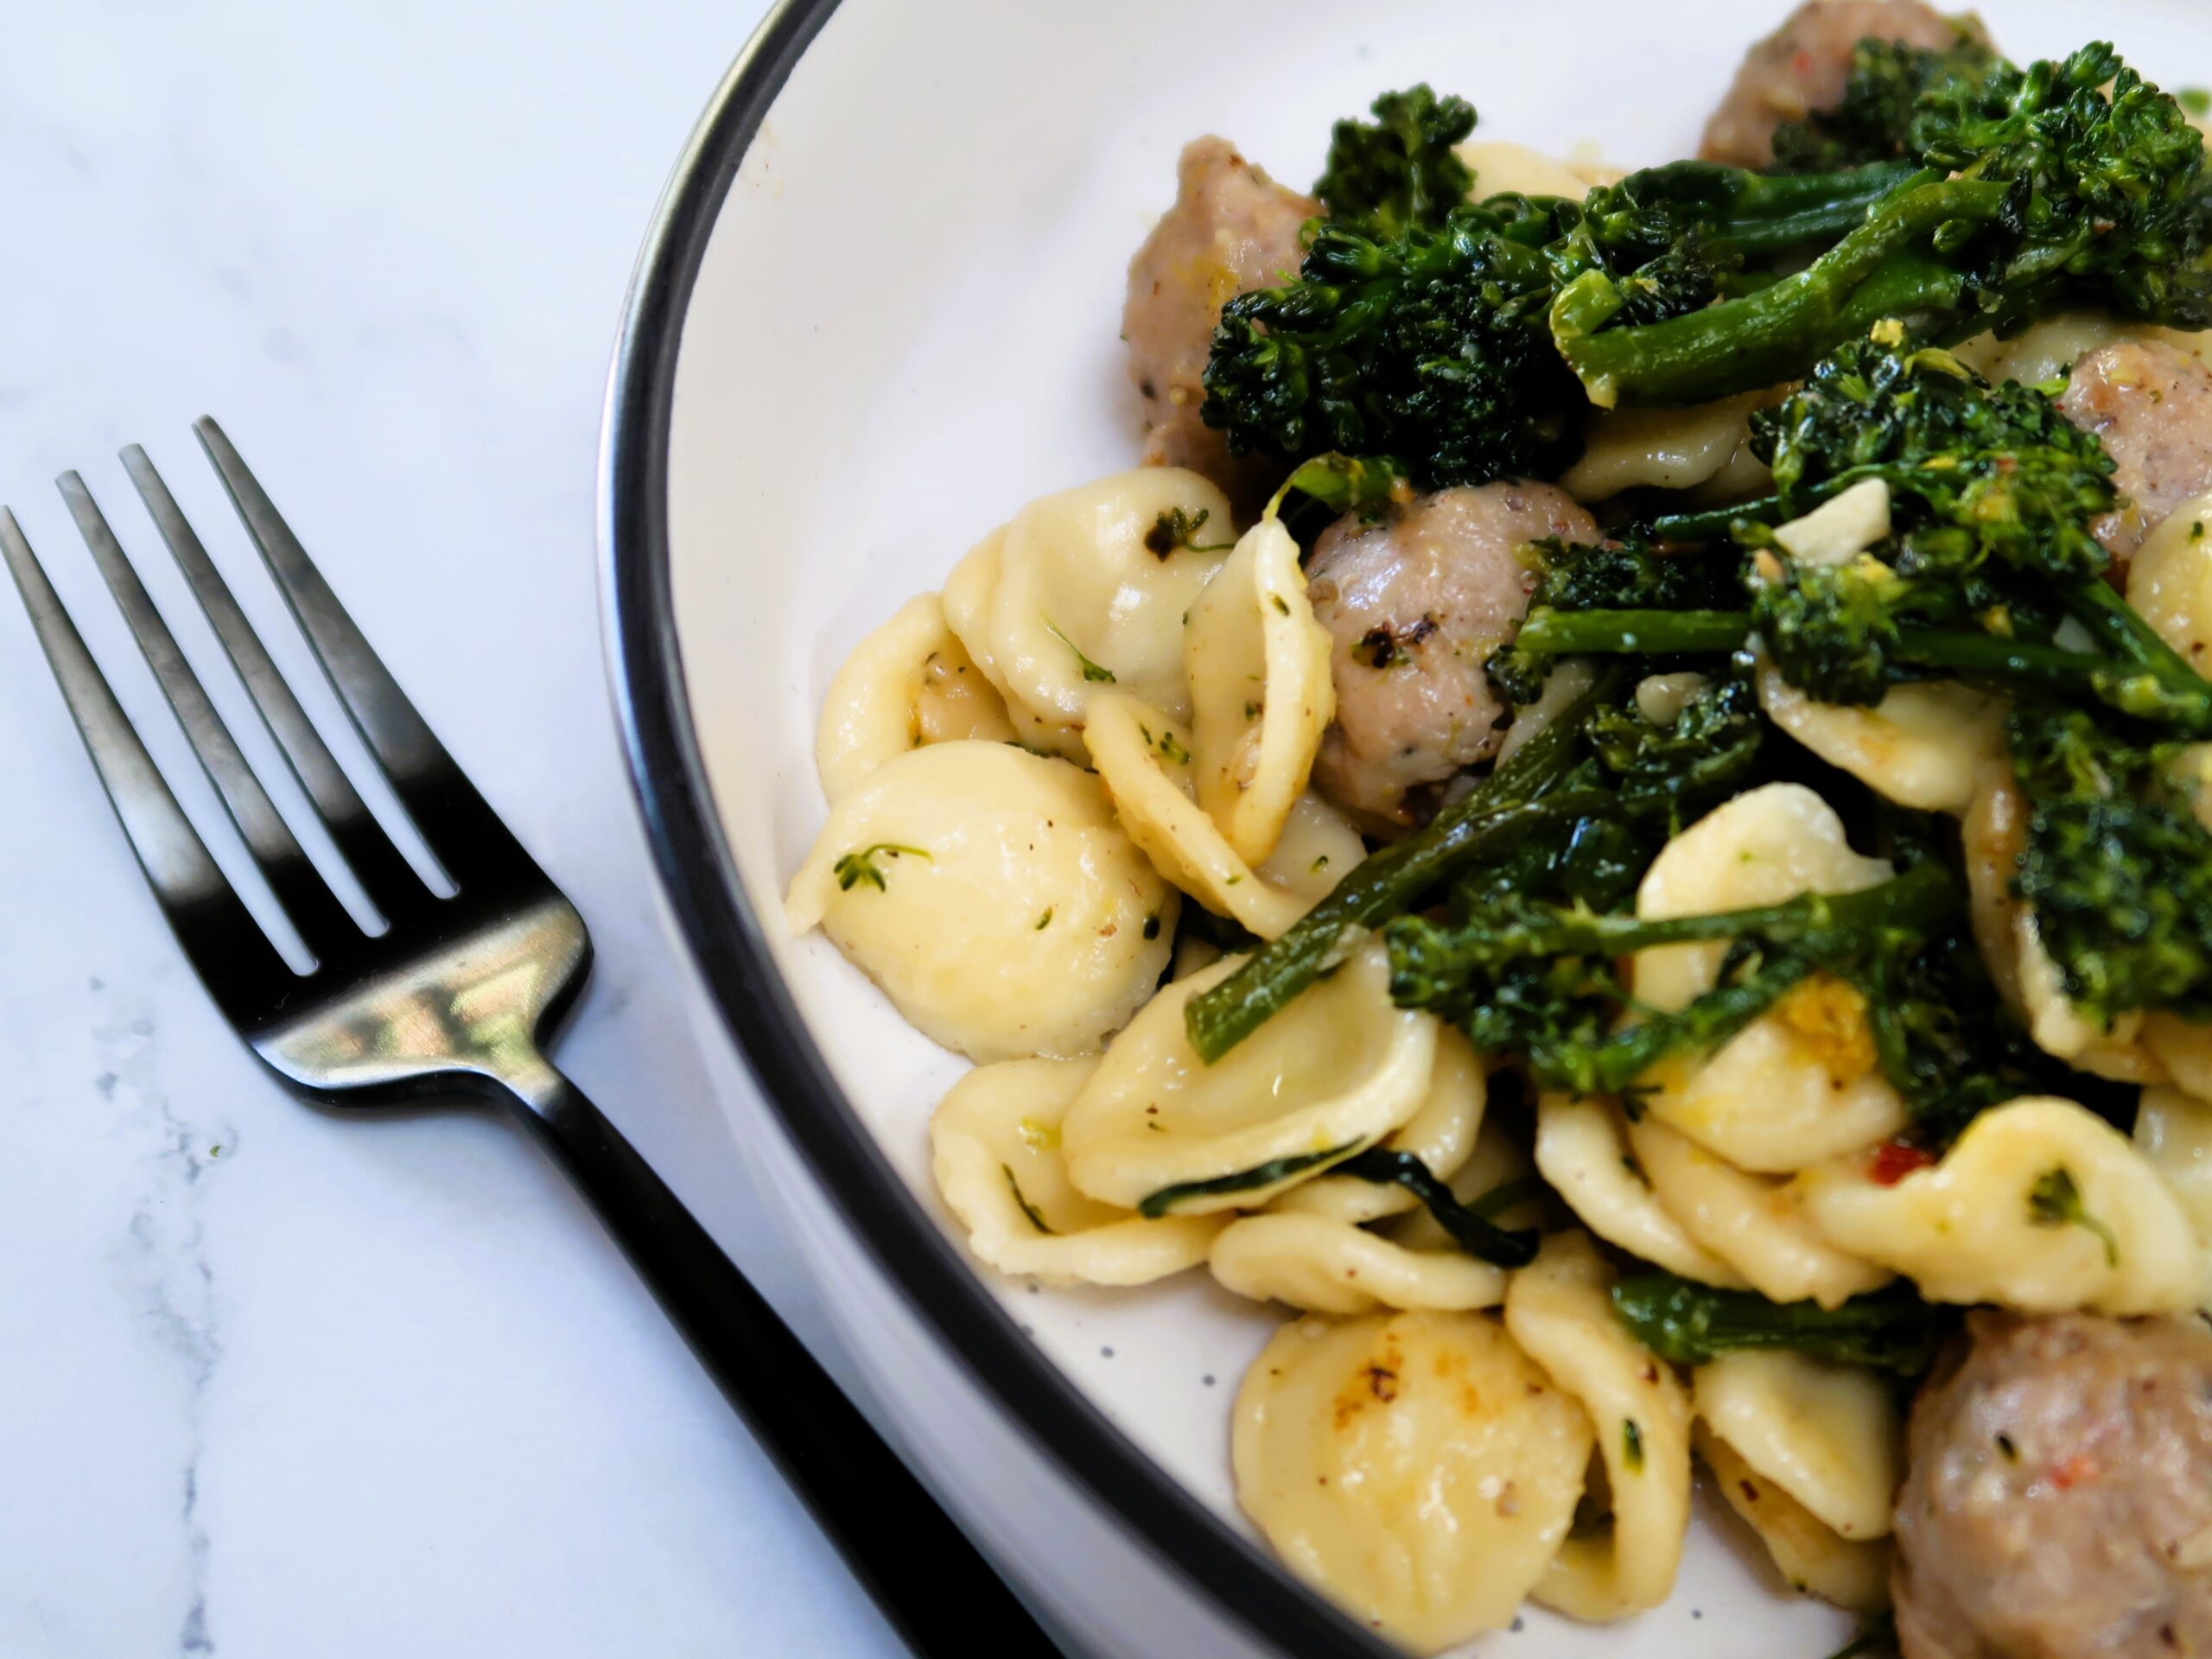
This orecchiette with sausage and broccolini is an easy and tasty pasta dish that is full of flavour. The slight char that the orecchiette get from those final few minutes in the pan and the zest of lemon take this dish to the next level!
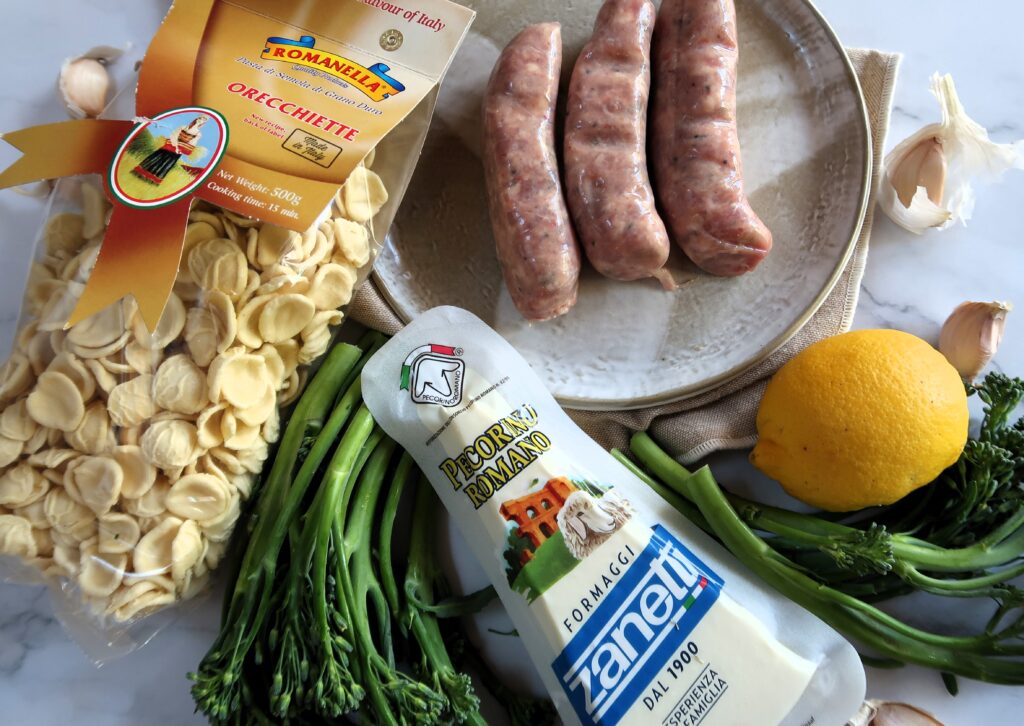
Ingredients for this Orecchiette with Sausage and Broccolini
This simple orecchiette dish makes for a light and delicious lunch or dinner. And best of all, only a handful of ingredients are needed to make this!
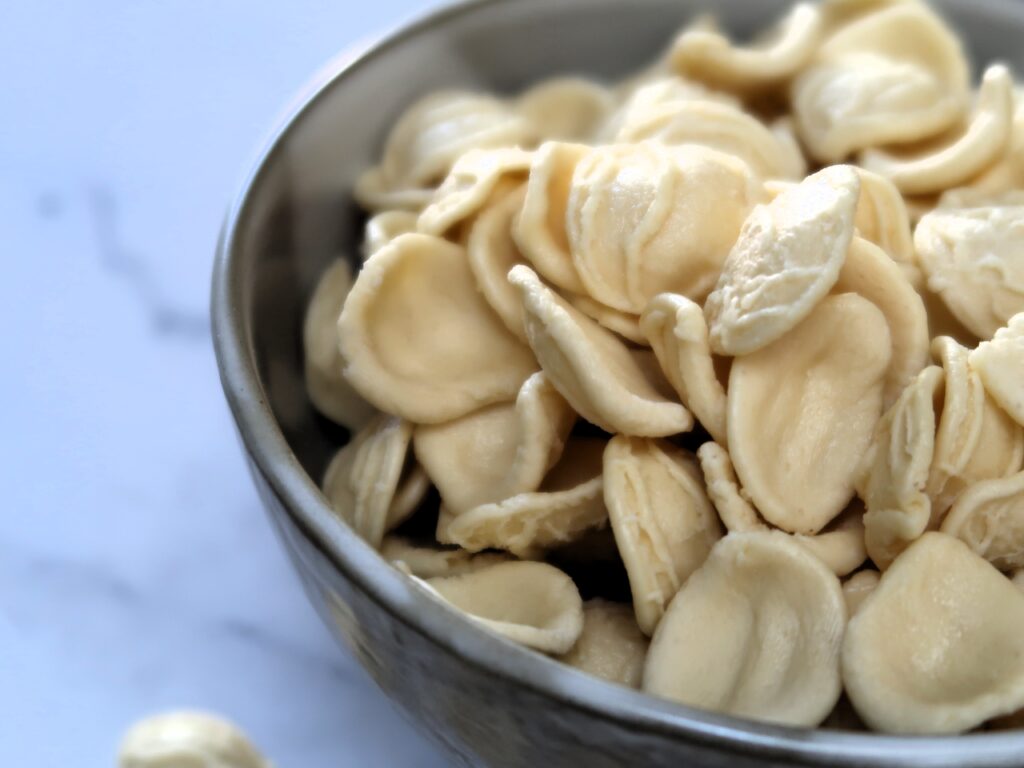
Orecchiette
Orecchiette is a pasta type made of semolina flour, rounded with a rough surface. It makes them cling on to any sauce beautifully.
They are a traditional pasta from the south of Italy, in the region of Puglia. One of the most popular dishes made with orecchiette isOrecchiette Con Cime di Rapa, with the traditional version using Broccoli Rabe (also called Rapini) and sometimes a hint of chilli.
Orecchiette in Italian means ‘little ears’ for the rounded shape that orecchiette has.
Sausages
For this recipe I used italian style pork sausages. These generally have spices in the sausage mixture that include pepper, garlic, fennel seeds & chilli.
I find this style of sausages is perfect for this dish as it gives a lot of flavour to the broccolini and orecchiette. Another substitute for this would be also some pancetta or bacon – just reduce the amount by half so it doesn’t overpower the dish.
Broccolini
I used 2 small bunches (which are roughly 250 gr in total), you can also substitute this for Chinese broccoli or broccoli, shredded in smaller pieces.
Other ingredients required:
Garlic
Lemon zest: to add at the end of cooking to give the dish a wonderful light citrus aroma to the orecchiette
Grated Pecorino
Extra Virgin Olive Oil, Ground Pepper and Salt
How to make Orecchiette with Sausage and Broccolini
Bring a large pot of water to the boil
Bring a large pot of salted water to the boil. Alongside set up a large fry-pan, which will be used to fry the sausage and broccolini. Add the orecchiette to the salted water to begin cooking.
Fry the sausage, garlic and broccolini
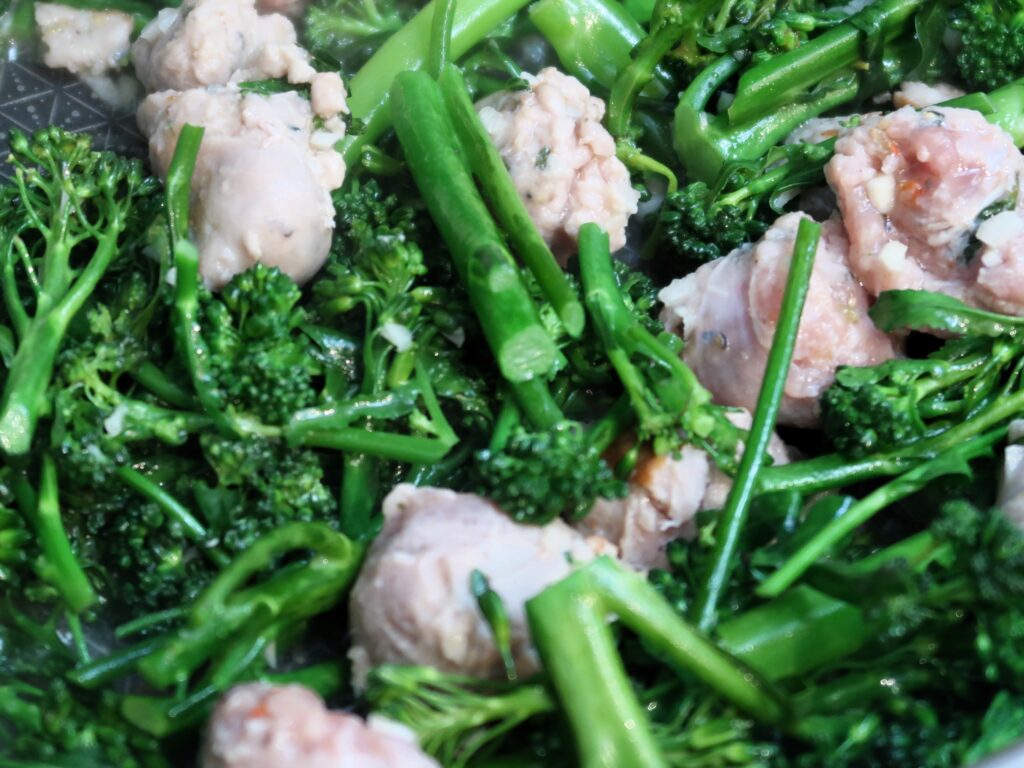
In a large pan add a tablespoon of olive oil and fry the sausage pieces over high heat for 1-2 minutes till lightly charred.
Reduce the heat, add the broccolini and garlic, a good pinch of salt and pepper along with a ladle of pasta water and cook for for 7-8 minutes till the broccolini are tender and most of the water absorbed.
Combine
Once the orecchiette are cooked till al dente, reserve a cup of pasta water and strain them. Add them them in the pan with the sausage and broccolini.
Add 2 tablespoons of olive oil, the pecorino, lemon zest, a good pinch of pepper and a ladle of pasta water and combine over low heat for 1-2 minutes.
Turn off the heat and serve immediately with more grated pecorino and pepper to your liking.
Bring a large pot of salted water to the boil. Alongside set up a large fry-pan, which will be used to fry the sausage and broccolini. Add the orecchiette to the salted water to begin cooking.
In a large pan add a tablespoon of olive oil and fry the sausage pieces over high heat for 1-2 minutes till lightly charred.
Reduce the heat, add the broccolini and garlic, a good pinch of salt and pepper along with a ladle of pasta water and cook for for 7-8 minutes till the broccolini are tender and most of the water absorbed.
Once the orecchiette are cooked till al dente, reserve a cup of pasta water and strain them. Add them them in the pan with the sausage and broccolini.
Add 2 tablespoons of olive oil, the pecorino, lemon rind, a good pinch of pepper and a ladle of pasta water and combine over low heat for 1-2 minutes.
Turn off the heat and serve immediately with more grated pecorino and pepper to your liking.
Notes
Serving Size: 250 gr of pasta will give you 2 very generous serves of pasta or 3 normal serves.Storage: Best eaten immediately but will last in the fridge for 1-2 days. Reheat gently in a pan with a splash or water or microwave.
Course: Main Course
Cuisine: Italian
Keyword: easy dinner, easy pasta, easy recipe, orecchiette, pasta
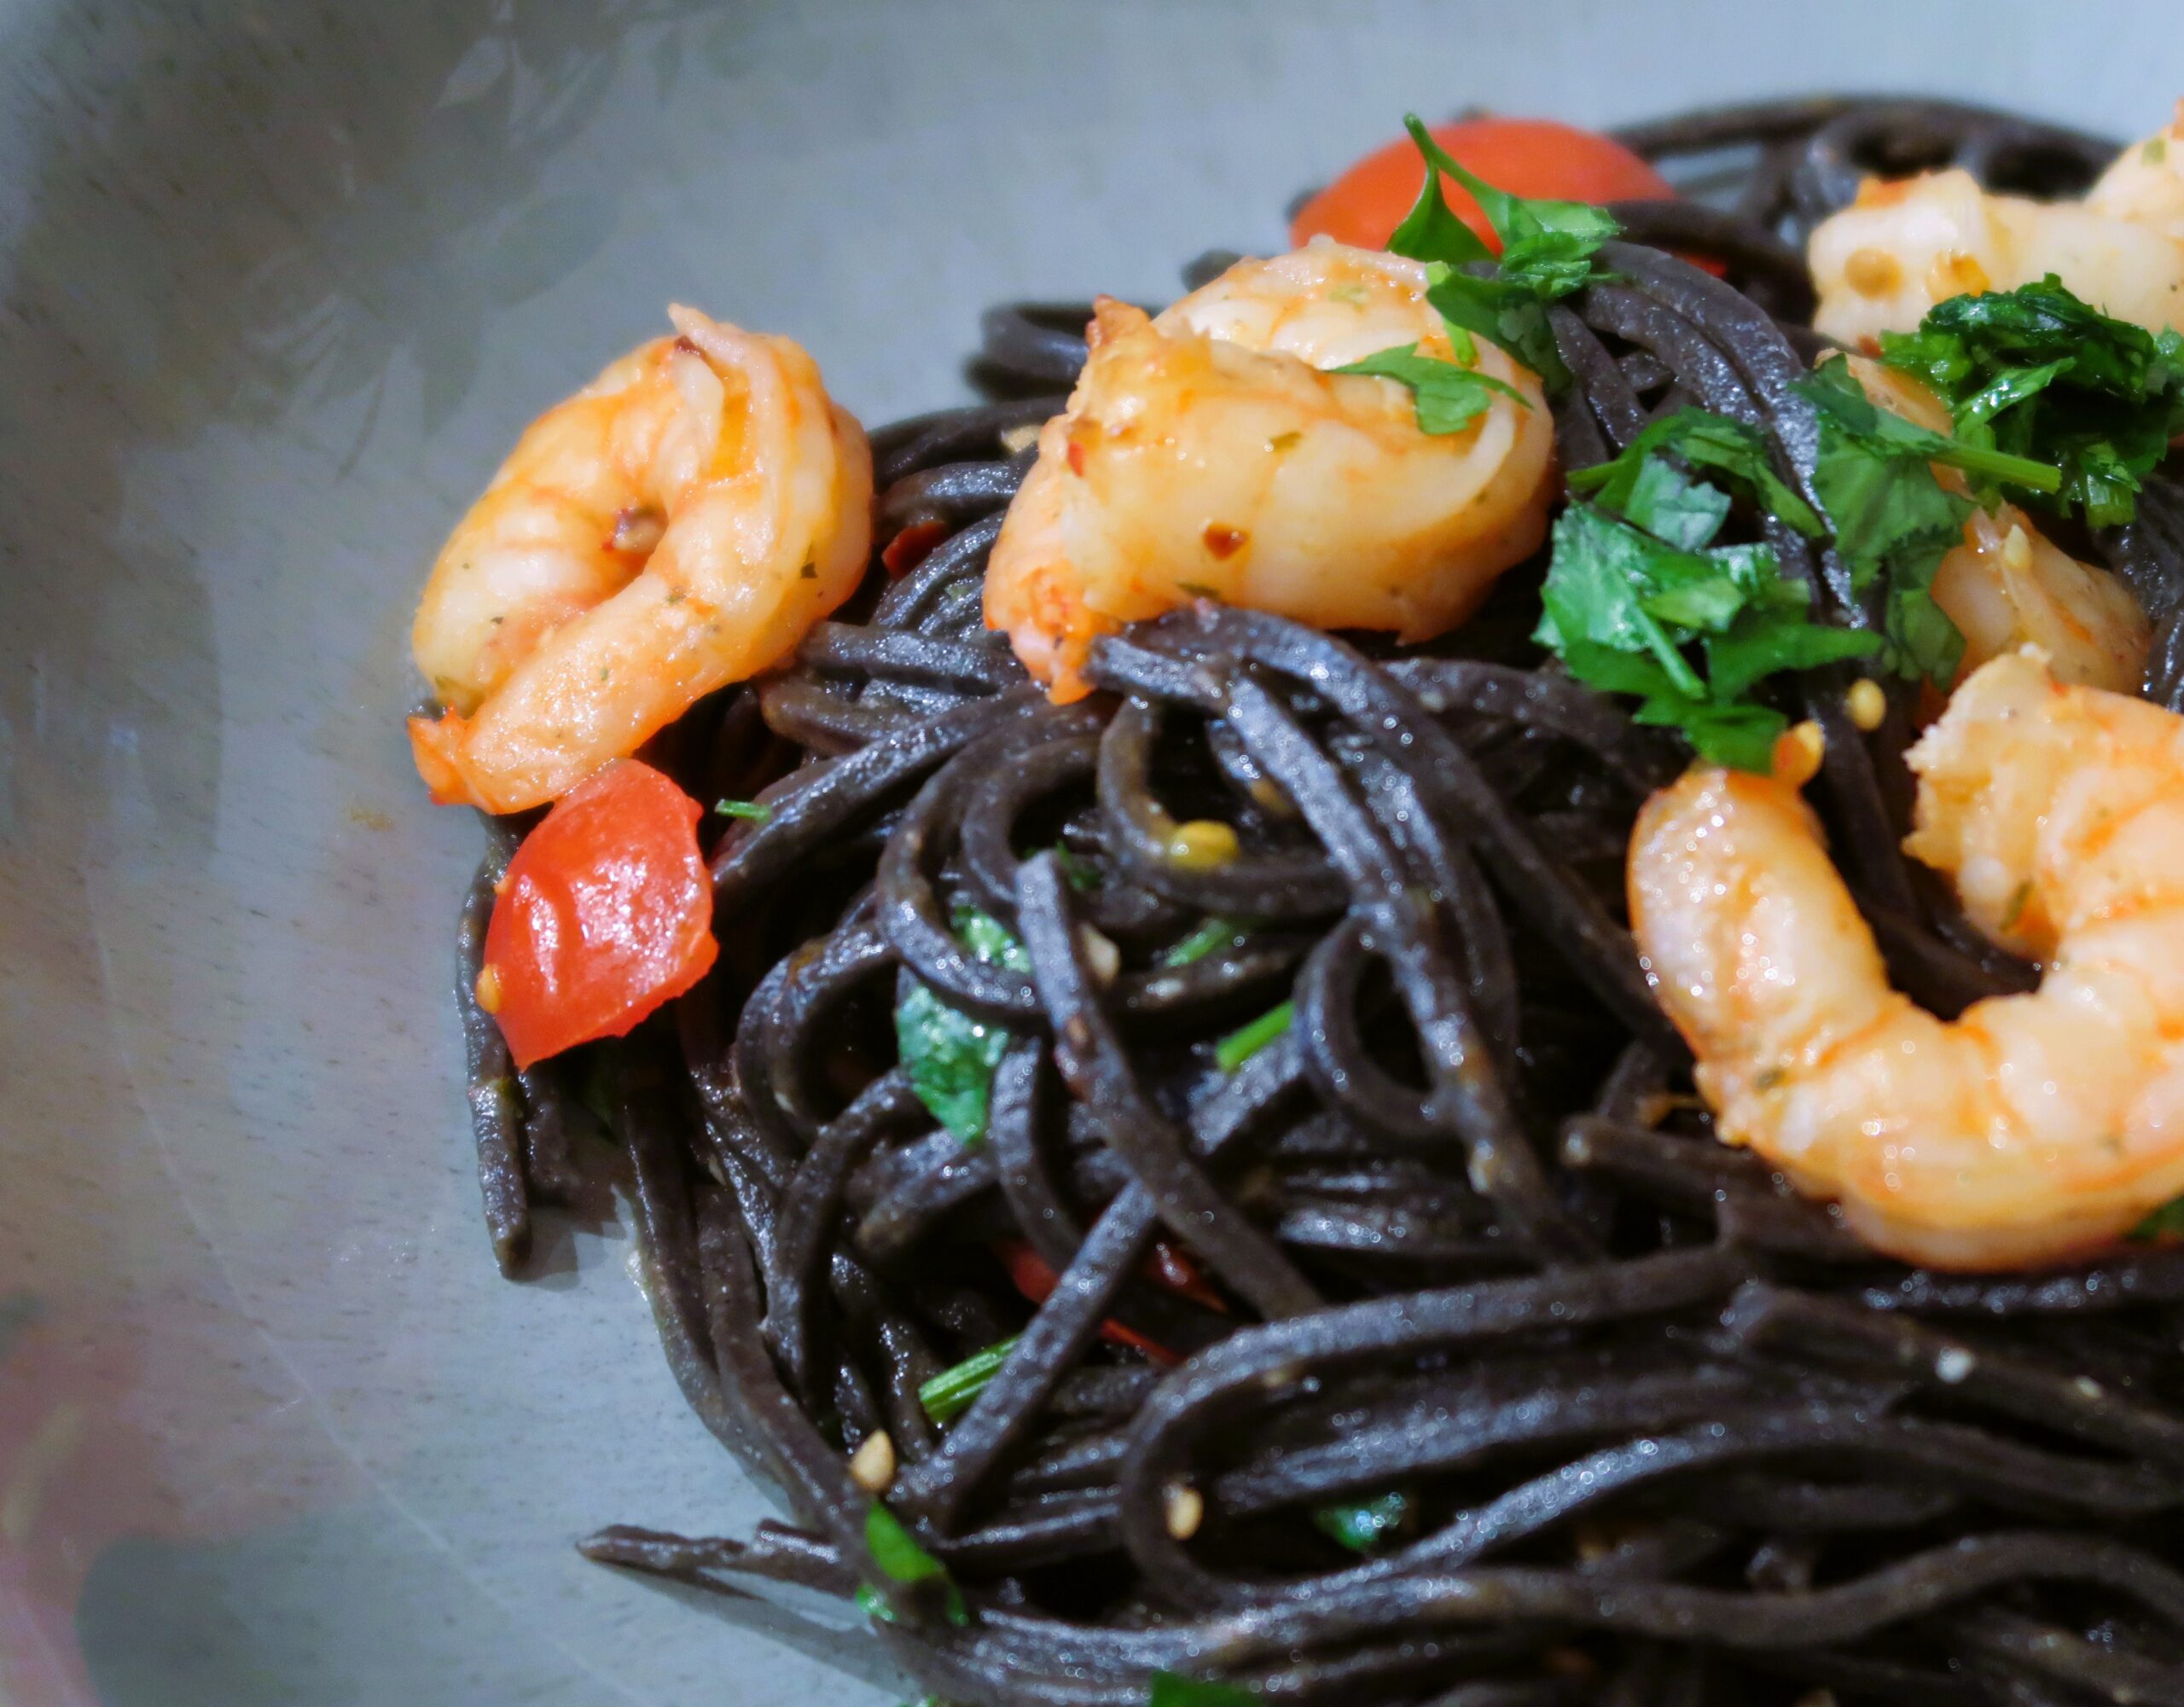
This Squid Ink Pasta with Prawns and Chilli is one of those pasta dishes with a WOW factor. Looks impressive, tastes divine and it’s a breeze to make! With only 15 minutes of cooking time you will want to make this every week!
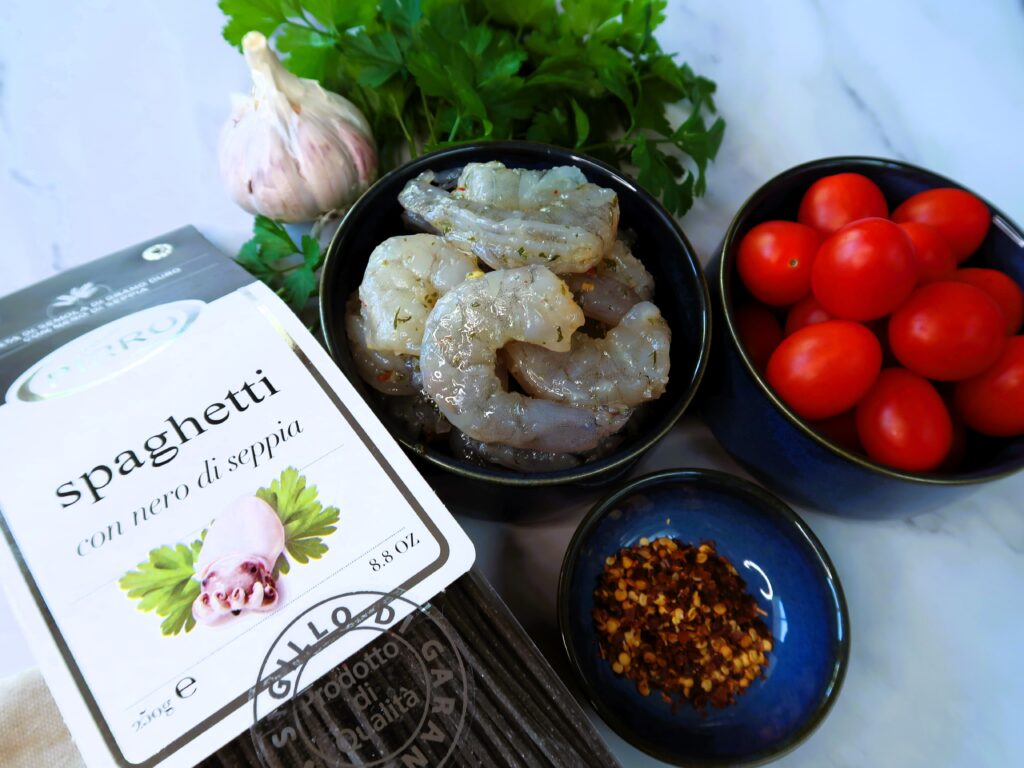
Ingredients for this Squid Ink Pasta with Prawns and Chilli
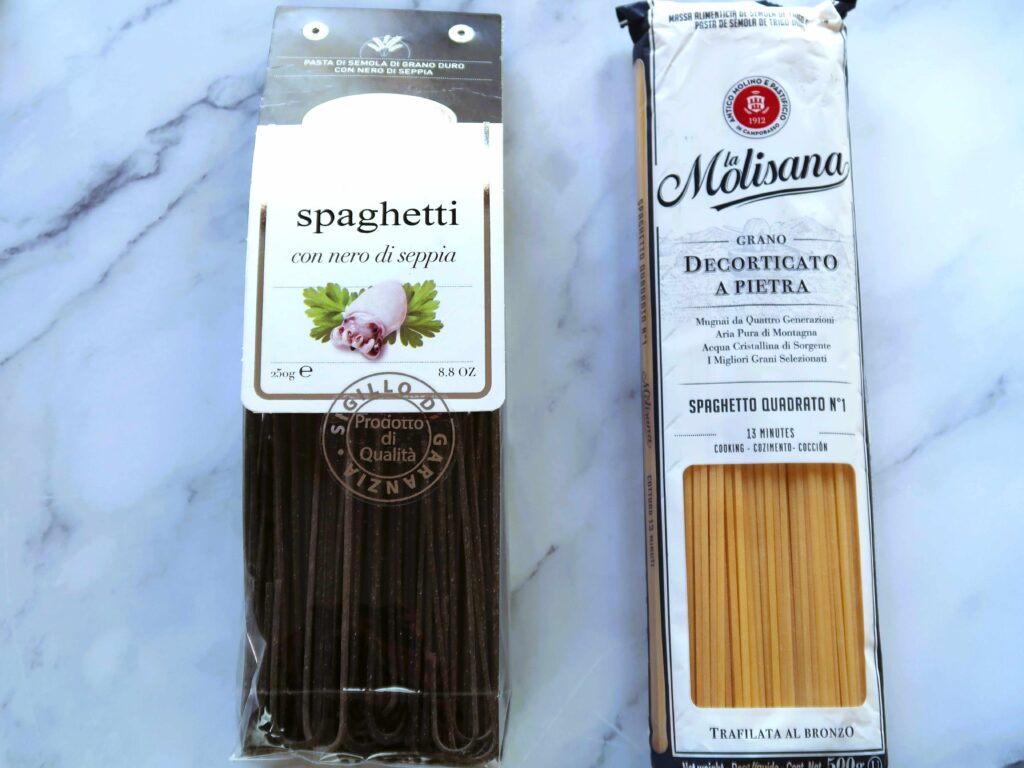
Squid Ink Spaghetti – Spaghetti con nero di seppia
Does Squid Ink Pasta taste different than normal pasta?
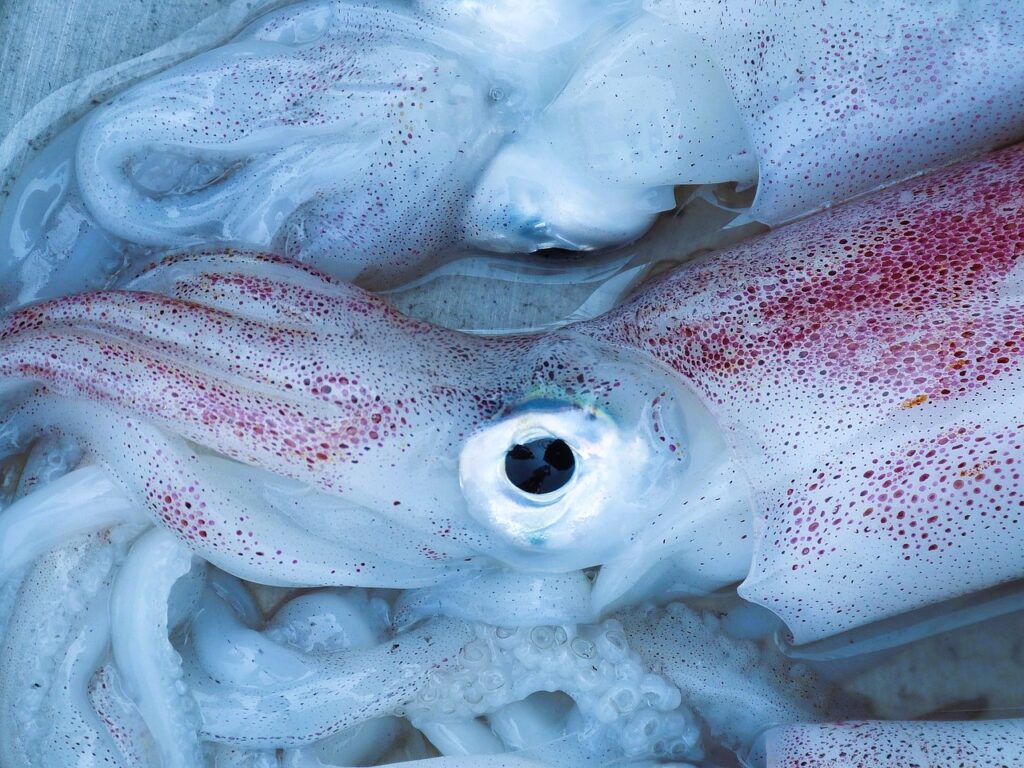
I love using Squid Ink Pasta, and I often buy Spaghetti. The colour is striking and they pair beautifully with a simple seafood sauce! The taste is slightly more saltier than traditional pasta. The pasta is made by adding squid or cuttlefish ink to the durum wheat.
Where is Squid Ink Pasta from?
Image by falco from Pixabay
The origins of this type of pasta are set to be from Sicily, in the area near Catania. Fishermen did not want to waste anything from the squids and/or cuttlefish they caught so they would use the ink for a simple sauce for pasta added to garlic and tomatoes. Resourceful, and delicious right??
Where can you buy Squid Ink Pasta from?
You can find Squid Ink Pasta in Italian Specialty stores, delicatessen or online too!
Substitutes Squid Ink Spaghetti
If you can’t get a hold of Squid Ink Spaghetti or wider Squid Ink Tagliatelle, you can most certainly substitute them with normal Spaghetti, Tagliatelle, or Fettuccine. For seafood pastas like this Squid Ink Pasta with Prawns and Chilli, I like to use slightly bigger versions of Spaghetti like a Spaghettoni or a Spaghetto Quadrato. I find it holds the sauce better.
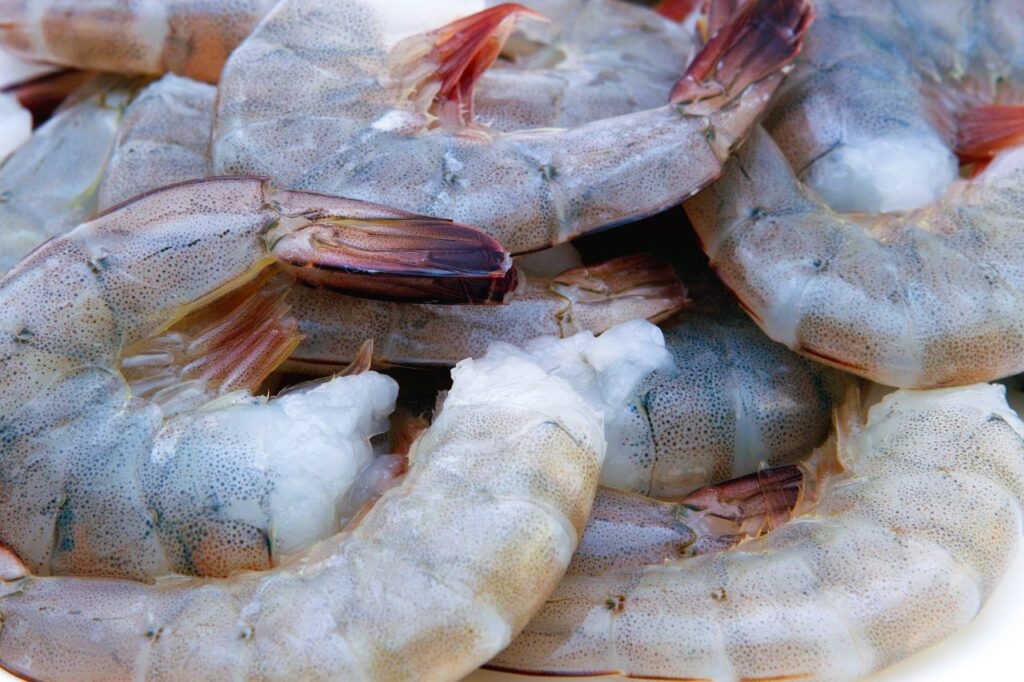
Prawns
Prawns come in different shapes and sizes and you can go for what you can find and prefer but they need to be raw. Cooked prawns in the sauce will just get chewy and tough to eat! I used medium-sized raw prawns, that were already peeled and deveined.
Image by Robert Owen-Wahl from Pixabay
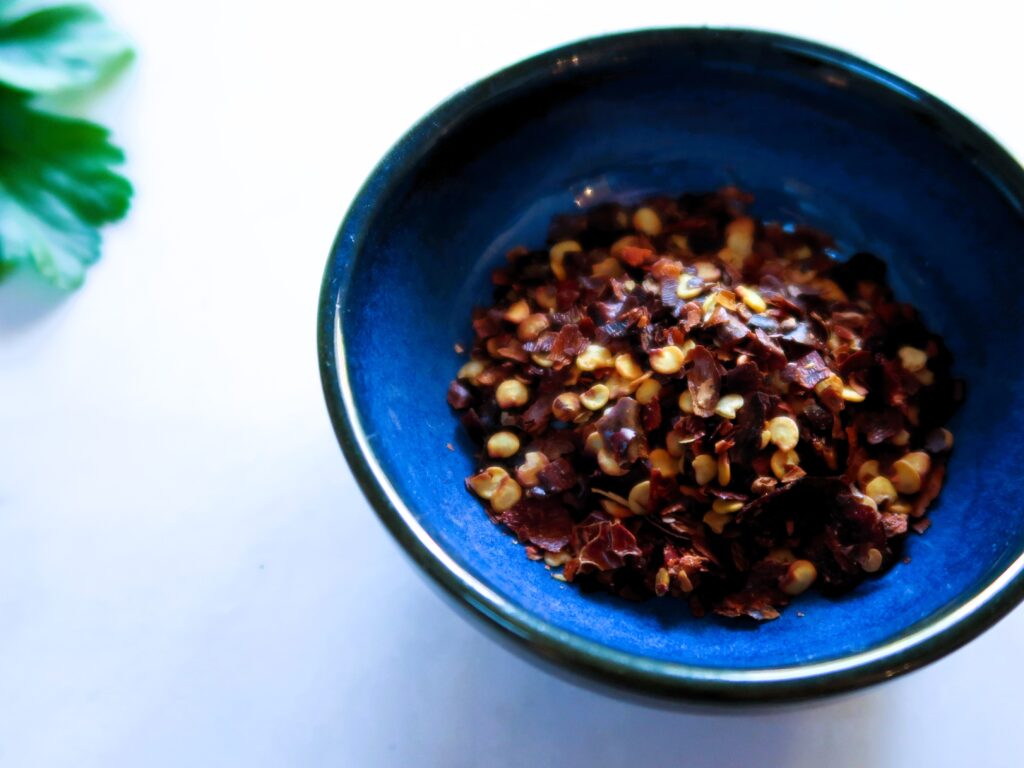
Chilli
I used dried chilli flakes like the ones pictured below for this recipe. I love adding this as it adds some heat and punch to the dish! You can substitute using chilli powder in equal amounts or omit the chilli completely if you prefer without and just add a little cracked pepper instead.
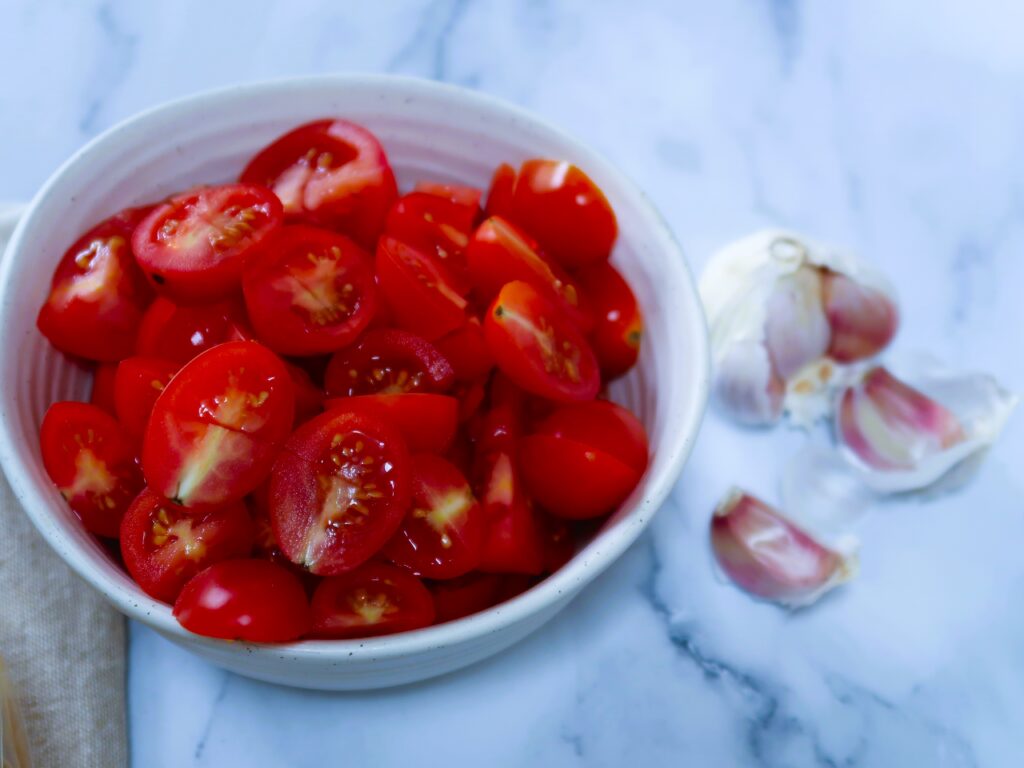
Cherry Tomatoes
I used fresh cherry tomatoes for this recipe as they are sweet and you can get maximum flavour from them in a short amount of time! Cooking them for as little as 15 minutes gives you a sweet and delicate sauce which is perfect for this Squid Ink Pasta.
Substituting for a can of diced tomatoes is possible but you would generally need to add a little more salt and some tomato paste for sweetness. Tinned tomatoes or Passata can also be used but the sauce will need to cook for longer (at least 20-30 minutes) to cook out the raw flavour of the tomatoes.
Other ingredients
Garlic (lots!), Fresh Parsley, Extra Virgin Olive Oil, Salt and Pepper
How to make this Squid Ink Spaghetti with Prawns and Chilli
Have a large pot and alongside set up a large fry-pan, which will be used to make the sauce and cook the prawns.
Make the Squid Ink Pasta Sauce
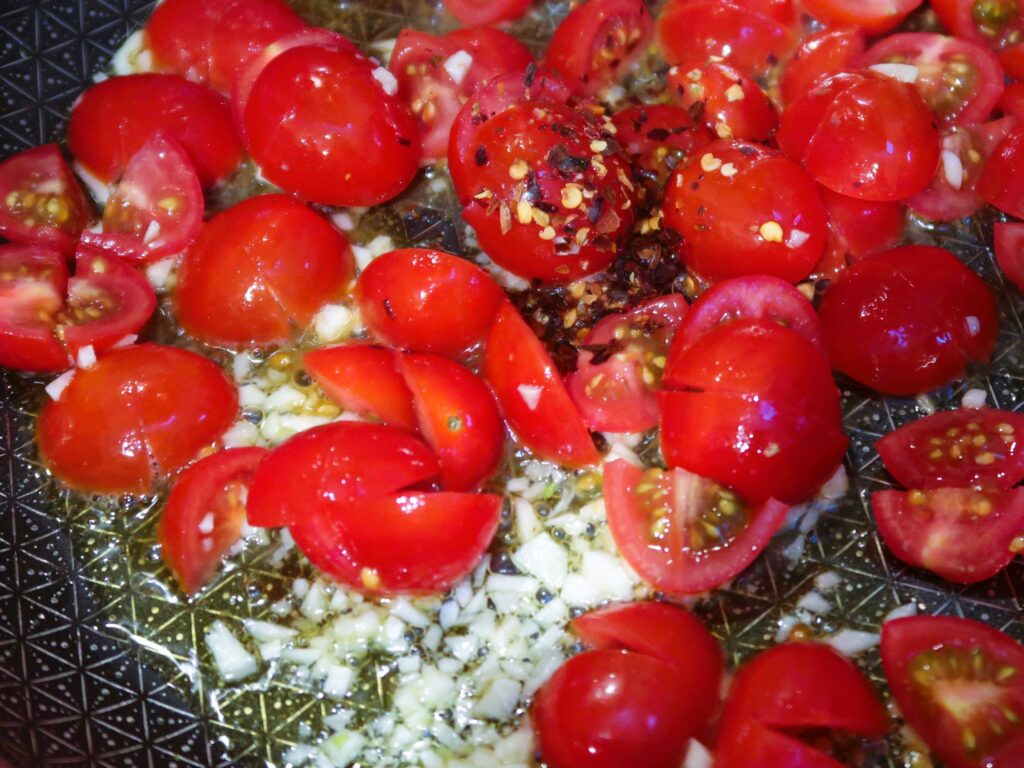
In the fry pan with some olive oil over medium heat, gently fry the chopped garlic for 1 minute.
Add the cherry tomatoes, half a teaspoon of salt, some cracked pepper and the chilli flakes and cook for 8-10 minutes till the tomatoes have cooked down and the sauce thickened.
In the meantime, bring a large pot of salted water to the boil, and start cooking the Squid Ink spaghetti.
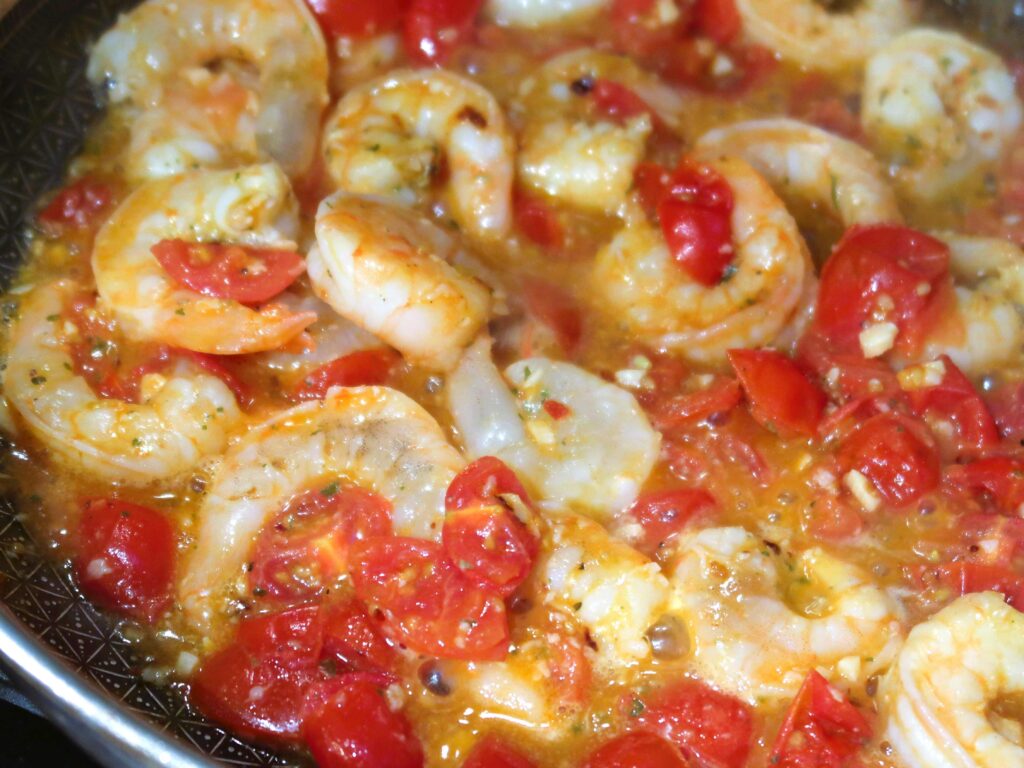
Add the prawns to the tomatoes in the pan and keep cooking till they change colour and are cooked through (3-4 minutes depending on the size).
Combine
Once the pasta is cooked, reserve some pasta water. Strain the spaghetti and combine them in the fry pan with the prawns. Add a few spoonful’s of the reserved pasta water and the chopped parsley to the pan and stir to combine with the pasta and sauce. Turn off the heat.
Add a few tablespoons of olive oil and cracked pepper. Serve immediately. Enjoy!
250grSquid Ink Pasta(like Spaghetti, Linguine or Fettuccine)
4 clovesGarlic(finely chopped)
250grCherry Tomatoes(cut into quarters)
1tspChilli flakes (or chilli powder)
250 grRaw Prawns(deveined, peeled tail on or off)
halftspSalt(for the sauce and more to taste if needed)
1BunchParsley(finely chopped)
5tbspExtra Virgin Olive Oil
Cracked Pepper(to taste)
Instructions
Bring a large pot of salted water to the boil
In a large fry-pan with a few tablespoons of olive oil over medium heat, gently fry the chopped garlic for 1 minute.
Add the cherry tomatoes, half a teaspoon of salt, some cracked pepper and the chilli flakes and cook for 8-10 minutes till the tomatoes have cooked down and the sauce thickened.
In the meantime, start cooking the Squid Ink Pasta in the boiling water till al dente as per packet directions
Add the prawns to the tomatoes in the pan and keep cooking till they change colour and are cooked through (3-4 minutes depending on the size).
Once the pasta is cooked, reserve some pasta water. Strain the squid ink pasta and combine it in the fry-pan with the tomatoes and prawns. Add a few large spoonful's of the reserved pasta water and the chopped parsley to the pan and stir it to combine with the pasta and sauce. Turn off the heat.
Add 2 tablespoons of olive oil, cracked pepper and serve immediately.
Notes
Serving Size: 250 gr of pasta will give you 2 very generous serves of pasta or 3 normal serves.
Storage: Best eaten immediately but will last in the fridge for 1-2 days. Reheat gently in a pan with a splash or water or microwave.
Minimal ingredients and very little prep time are required for this easy mid-week pasta dish. Try this easy Spaghetti alla Carbonara without cream when you next feel like a filling meal that is sure to please everyone at home!
Ingredients for this Spaghetti Carbonara without cream
Only a handful of ingredients are required for this simple Spaghetti alla Carbonara without cream:
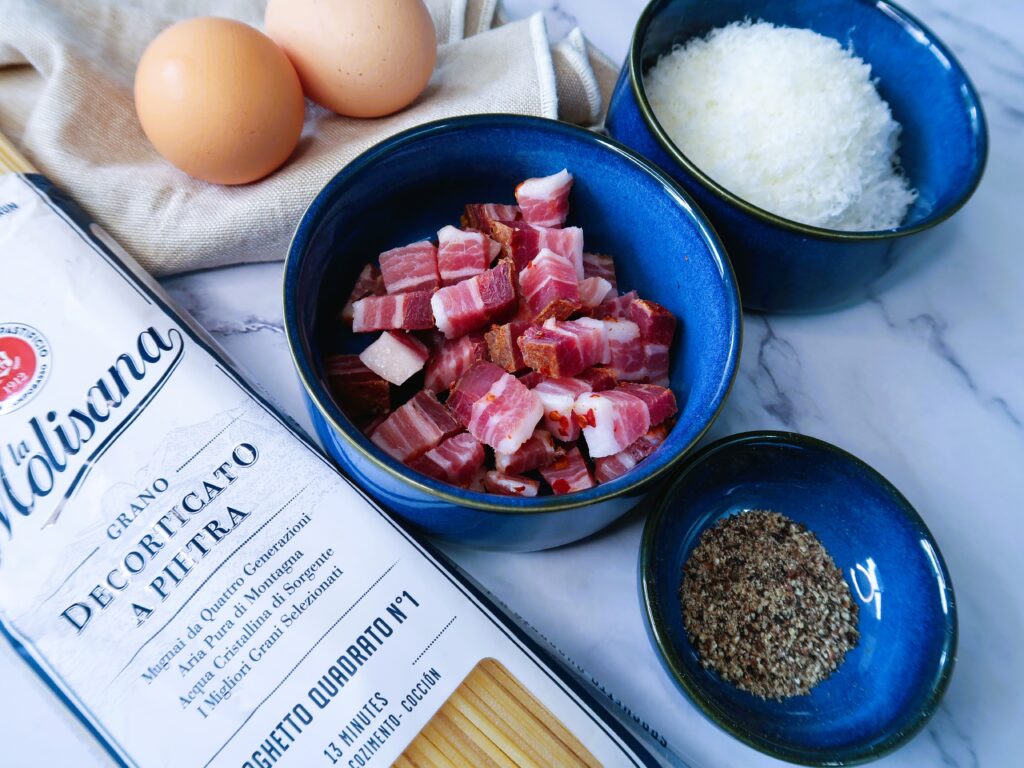
Spaghetti: Some thick spaghetti or linguine are best suited for carbonara. For this recipe I used a Spaghetto Quadratro which is slightly thicker than traditional spaghetti.
Pancetta: I opt to use Pancetta which is cured pork belly. You can find it in most delicatessen and it can be found in a whole piece in various sizes that you can dice in 1 cm pieces yourself. Alternatives: Bacon can also be used but it does taste slightly different as it’s smoked rather than cured in salt and spices like pancetta is. Prosciutto, jamon or salami pieces (or if you can find what is traditionally used in Carbonara, Guanciale is actually the best!) are also a great alternatives and I find they taste even better than bacon in a carbonara!
Eggs: you need quite a few. I tried this recipe with 1, 2 and 3 eggs and for 250 gr of pasta 3 eggs will give you the perfect amount of ‘sauce’.
Ground Black Pepper
Grated Parmesan (preferably Parmigiano Reggiano) or Pecorino if you prefer a cheese with a bit extra bite.
Extra Virgin Olive Oil & Salt
One thing you WON’T find in this recipe is CREAM. There is no cream in traditional carbonara!
Pancetta
How to make Spaghetti Alla Carbonara without cream
This Spaghetti Alla Carbonara is quick to make in just a few easy steps.
Bring a large pot of water to the boil
Bring a large pot of salted water to the boil. Alongside set up a large fry-pan. The pan will be used to fry the pancetta as well as to combine the pasta with the eggs. Add the pasta to the salted water to begin cooking.
Fry the pancetta
In the fry-pan, add 2 tablespoons of olive oil and fry the pancetta over medium heat for 4-5 minutes till crispy.
Whisk the eggs
While the pancetta and pasta are cooking, let’s combine the ‘sauce’. In a separate small bowl, whisk the eggs lightly with a fork with a generous pinch of salt and pepper. Fold in the grated parmesan.
Combine
Once the spaghetti are cooked till al dente, with some thongs take them out of the water and put them directly into the pan with the pancetta.
Turn the heat off the pan, then add the whisked eggs and grated parmesan & stir till you see the egg mixture thicken slightly. Keep combining with the spaghetti for a minute or two.
The heat from the spaghetti and pancetta will cook the eggs till almost fully. It’s best to combine the eggs while the pan is off the heat as otherwise the eggs will very easily scramble.
Serve immediately with more grated parmesan and pepper to your liking.
An easy pasta dish that can be made in a flash with just a handful of ingredients
Ingredients
250grSpaghetti
2tbspOlive Oil
100grPancetta(cubed in small pieces)
3 Eggs
20 grParmesan(plus more to serve)
Ground Pepper
Salt
Instructions
Bring a large pot of salted water to the boil. In a large fry-pan, add 2 tablespoons of oil and fry the pancetta over medium hear for 4-5 minutes till crispy.
Begin cooking the spaghetti in the boiling water as per packet directions.
While the pancetta and pasta are cooking, let's combine the 'sauce'. In a separate small bowl, whisk the eggs lightly with a fork with a generous pinch of salt and pepper. Fold in the grated parmesan.
Once the spaghetti are cooked till al dente, with some thongs take them out of the water and put them directly into the hot pan with the pancetta and combine.
Turn the heat off the pan, then add the whisked eggs and grated parmesan & stir till you see the egg mixture thicken slightly. Keep combining with the spaghetti for a minute or two.
The heat from the spaghetti and pancetta will cook the eggs till almost fully. It's best to combine the eggs while the pan is off the heat as otherwise, the eggs will very easily scramble.
Serve immediately with more grated parmesan and pepper to your liking.
Notes
Serving Size: 250 gr of pasta will give you 2 very generous serves of pasta or 3 normal serves.Cooking notes: The heat from the spaghetti and pancetta will cook the eggs and prevent them from scrambling. If you see that the pan is a bit too dry, add a few spoonfuls of pasta water to loosen the spaghetti.Storage: I find that the spaghetti alla carbonara is best eaten immediately so that it has the best consistency. It does not tend to reheat well because of the egg.
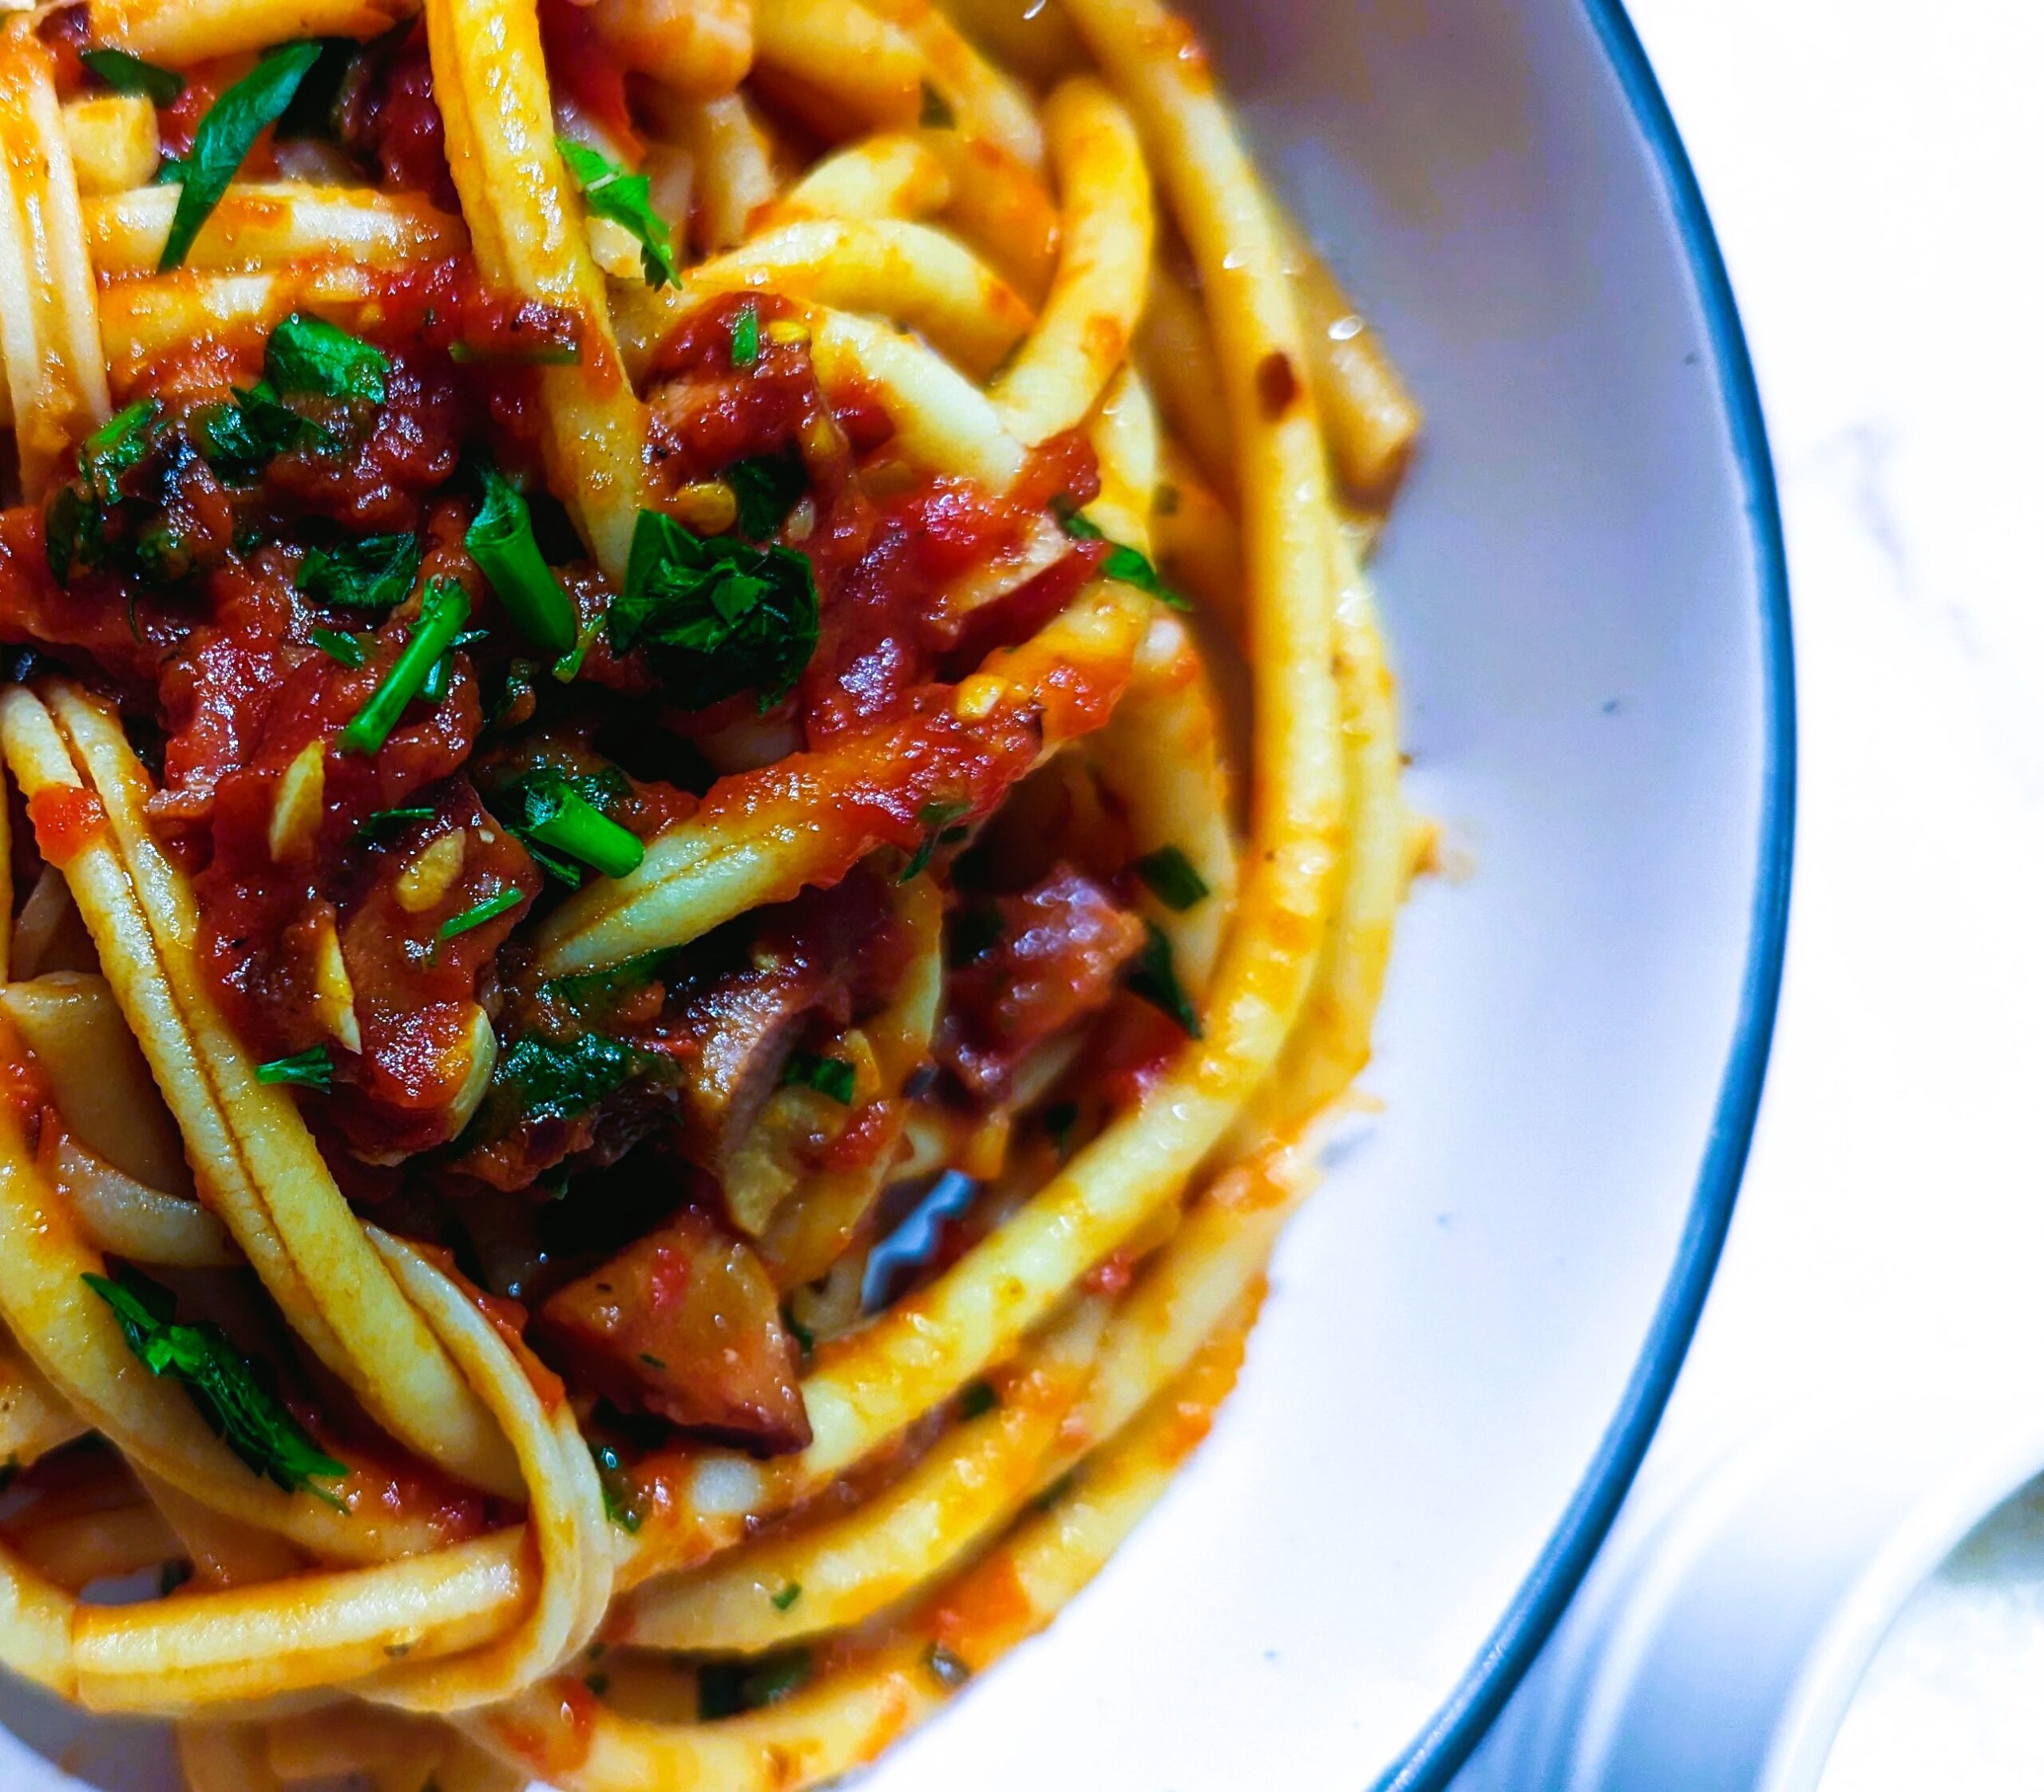
This simple and classic pasta dish is so tasty with a rich tomato sugo and it will be ready in just under 30 minutes!
Ingredients for this Spaghettoni All’Amatriciana
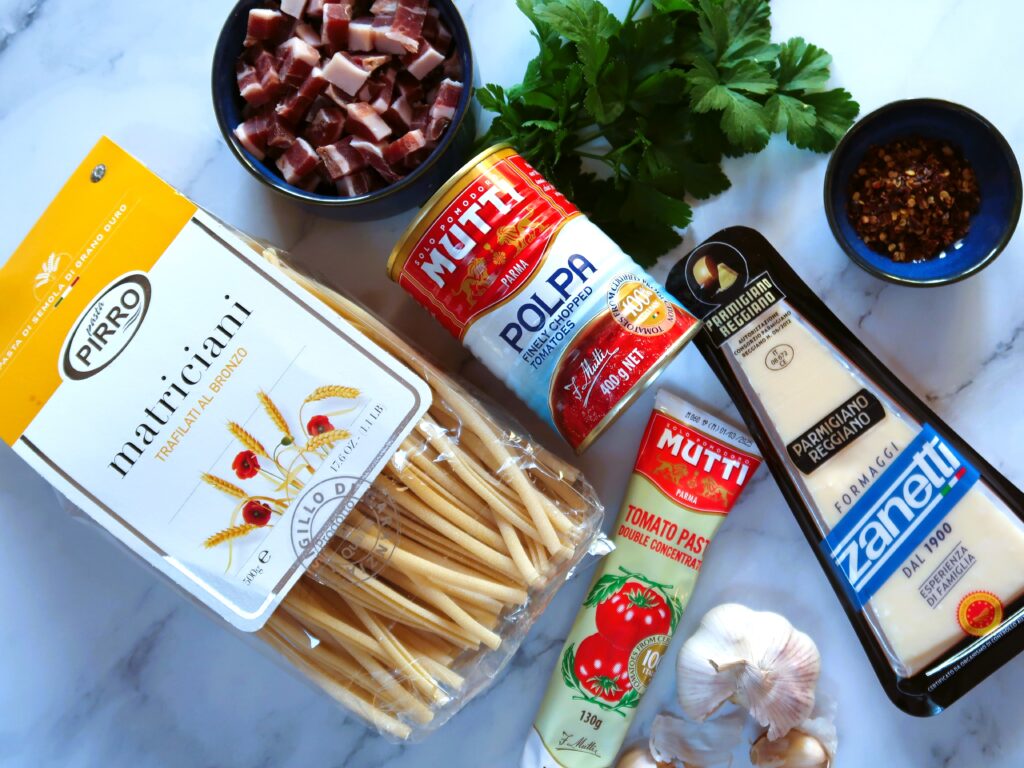
Only a handful of ingredients are required for this simple Spaghettoni All’Amatriciana:
Spaghettoni: Some thick spaghetti or bucatini are great! I found this lovely Matriciani Pastaand as soon as I saw it I though, I have to make a pasta all’Amatriciana with them! Any pasta will also work but preferably something that can hold the sauce well.
Pancetta: I opt to use Pancetta (which is cured pork belly), even though cured Guanciale (pig jowl) is the traditional part of the pig you would make Amatriciana with. Guanciale can be a bit hard to find, so Pancetta is the perfect alternative. Bacon can also be used but it does taste slightly different as it’s smoked rather than cured in salt and spices like pancetta is.
Garlic, chopped
Tinned chopped tomatoes & Tomato paste: I always use Mutti brand. The tomato paste adds a lovely sweetness to the sauce that cuts away some of that saltiness from the Pancetta.
Chilli Flakes for a bit of a kick or omit if you prefer non spicy!
Handful of chopped parsley
Grated Parmesan or Pecorino, to serve
Extra Virgin Olive Oil, Salt & Pepper
How to make Spaghettoni All’Amatriciana
Fry the Pancetta
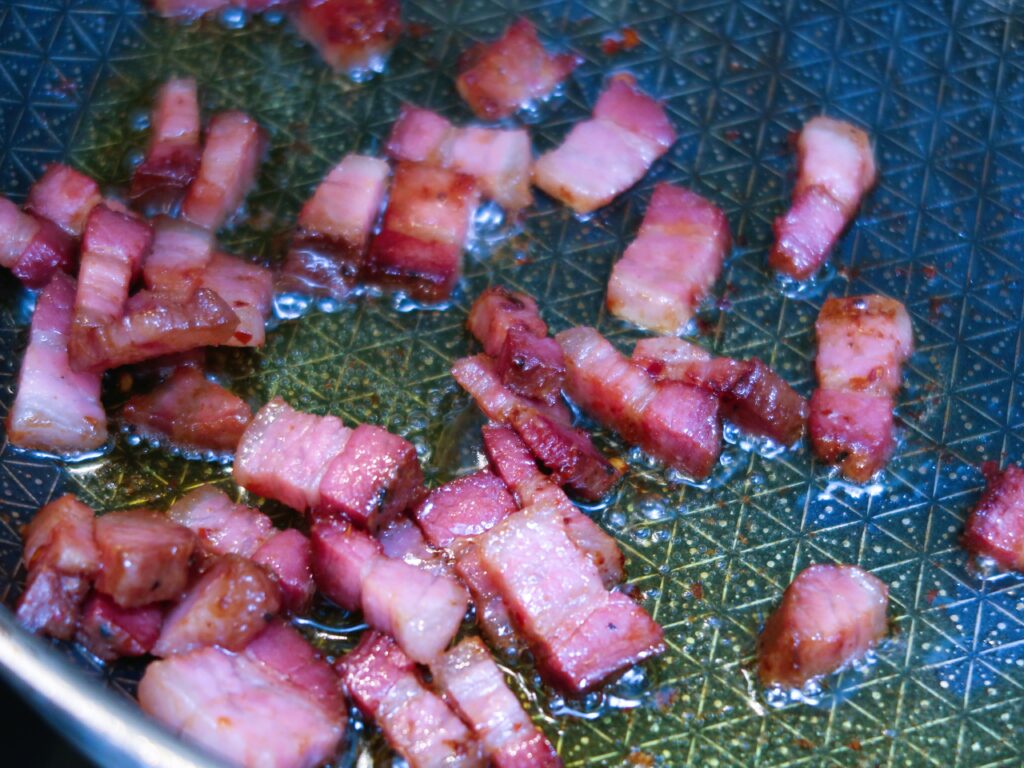
The first step is to fry off the chopped pancetta in a large non-stick pan with a tablespoon of olive oil (we will be using the same large fry pan for the sauce and to combine the spaghettoni. You want the fat to cook out and for the pancetta to get a bit crispy, cook for around 4-5 minutes on medium heat.
Once crispy, remove the pancetta from the pan and set aside. Wipe off any burned bits from the pan if needed.
In the meantime bring a large pot of generously salted water to the boil for the pasta.
Make the Sugo al Pomodoro
In the same fry pan over low/medium heat, add a few tablespoons of olive oil. Add the chopped garlic and gently fry for a minute or so.
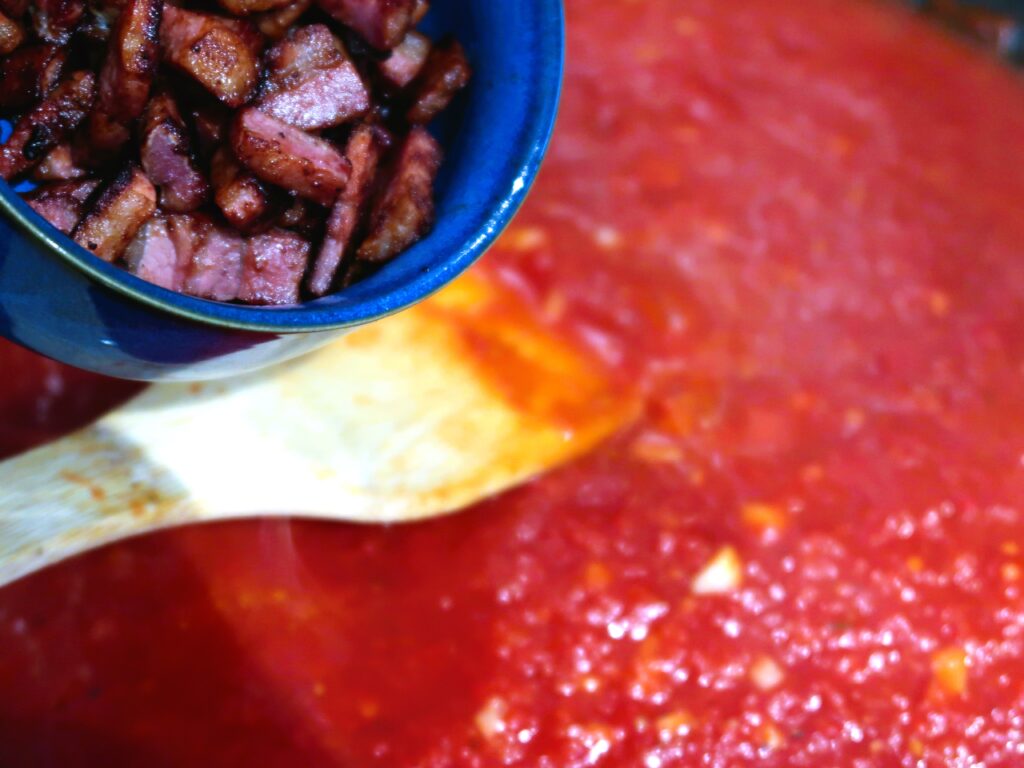
Add the tinned chopped tomatoes. Fill the tin halfway with water and add that to the sauce too to rinse out the tin. Add the tomato paste and combine.
Add the salt (adjust if needed – I find half a teaspoon is sufficient if the fried pancetta is very salty already), some cracked pepper, and the chilli flakes. Cook gently over low/medium heat for 15-20 minutes.
After 15 minutes, add the cooked pancetta and parsley and stir through. Turn the heat off.
Combine & Serve
Once the pasta is cooked till al-dente, strain it and reserve a ladle of cooking water. Add the pasta to the pan with the sauce and some cooking water to combine.
Serve with some grated parmesan & some cracked pepper. Enjoy!
Fry off the chopped pancetta in a large non stick pan with a tablespoon of olive oil. You want the fat to cook out and for the pancetta to get a bit crispy. Cook for around 4-5 minutes on medium heat
Once crispy, remove the pancetta from the pan and set aside. Wipe off any burned bits from the pan if needed
In the meantime bring a large pot of generously salted water to the boil for the pasta and cook as dente as per packet instructions
In the same fry pan over low/medium heat, add a few tablespoons of olive oil. Add the chopped garlic and gently fry for a minute or so
Add the tinned chopped tomatoes. Fill the tin half way with water and add that to the sauce too to rinse out the tin. Add the tomato paste and combine
Add the salt (adjust if needed – I find half teaspoon is sufficient if the fried pancetta is very salty already), some cracked pepper and the chilli flakes
Cook gently over low/medium heat for 15-20 minutes
After 15 minutes, add the cooked pancetta and parsley and stir through. Turn off the heat
Once the pasta is cooked, strain it and reserve a ladle of cooking water. Add the pasta to the pan with the sauce, and add some cooking water to combine
Serve immediately with some grated parmesan & cracked pepper
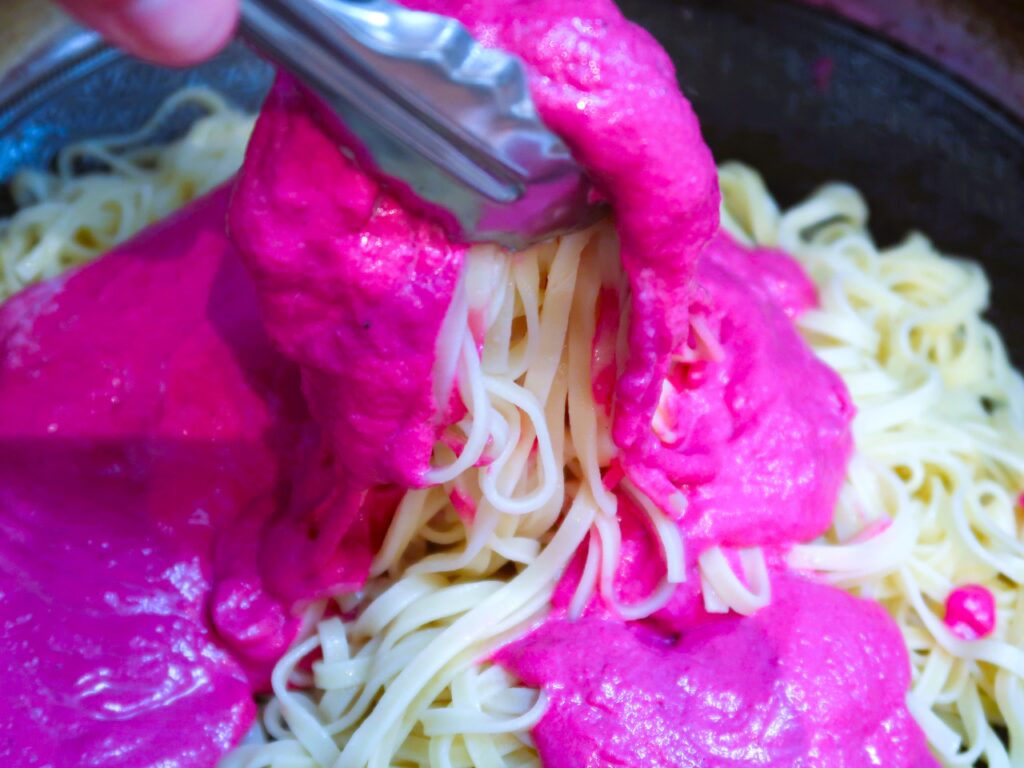
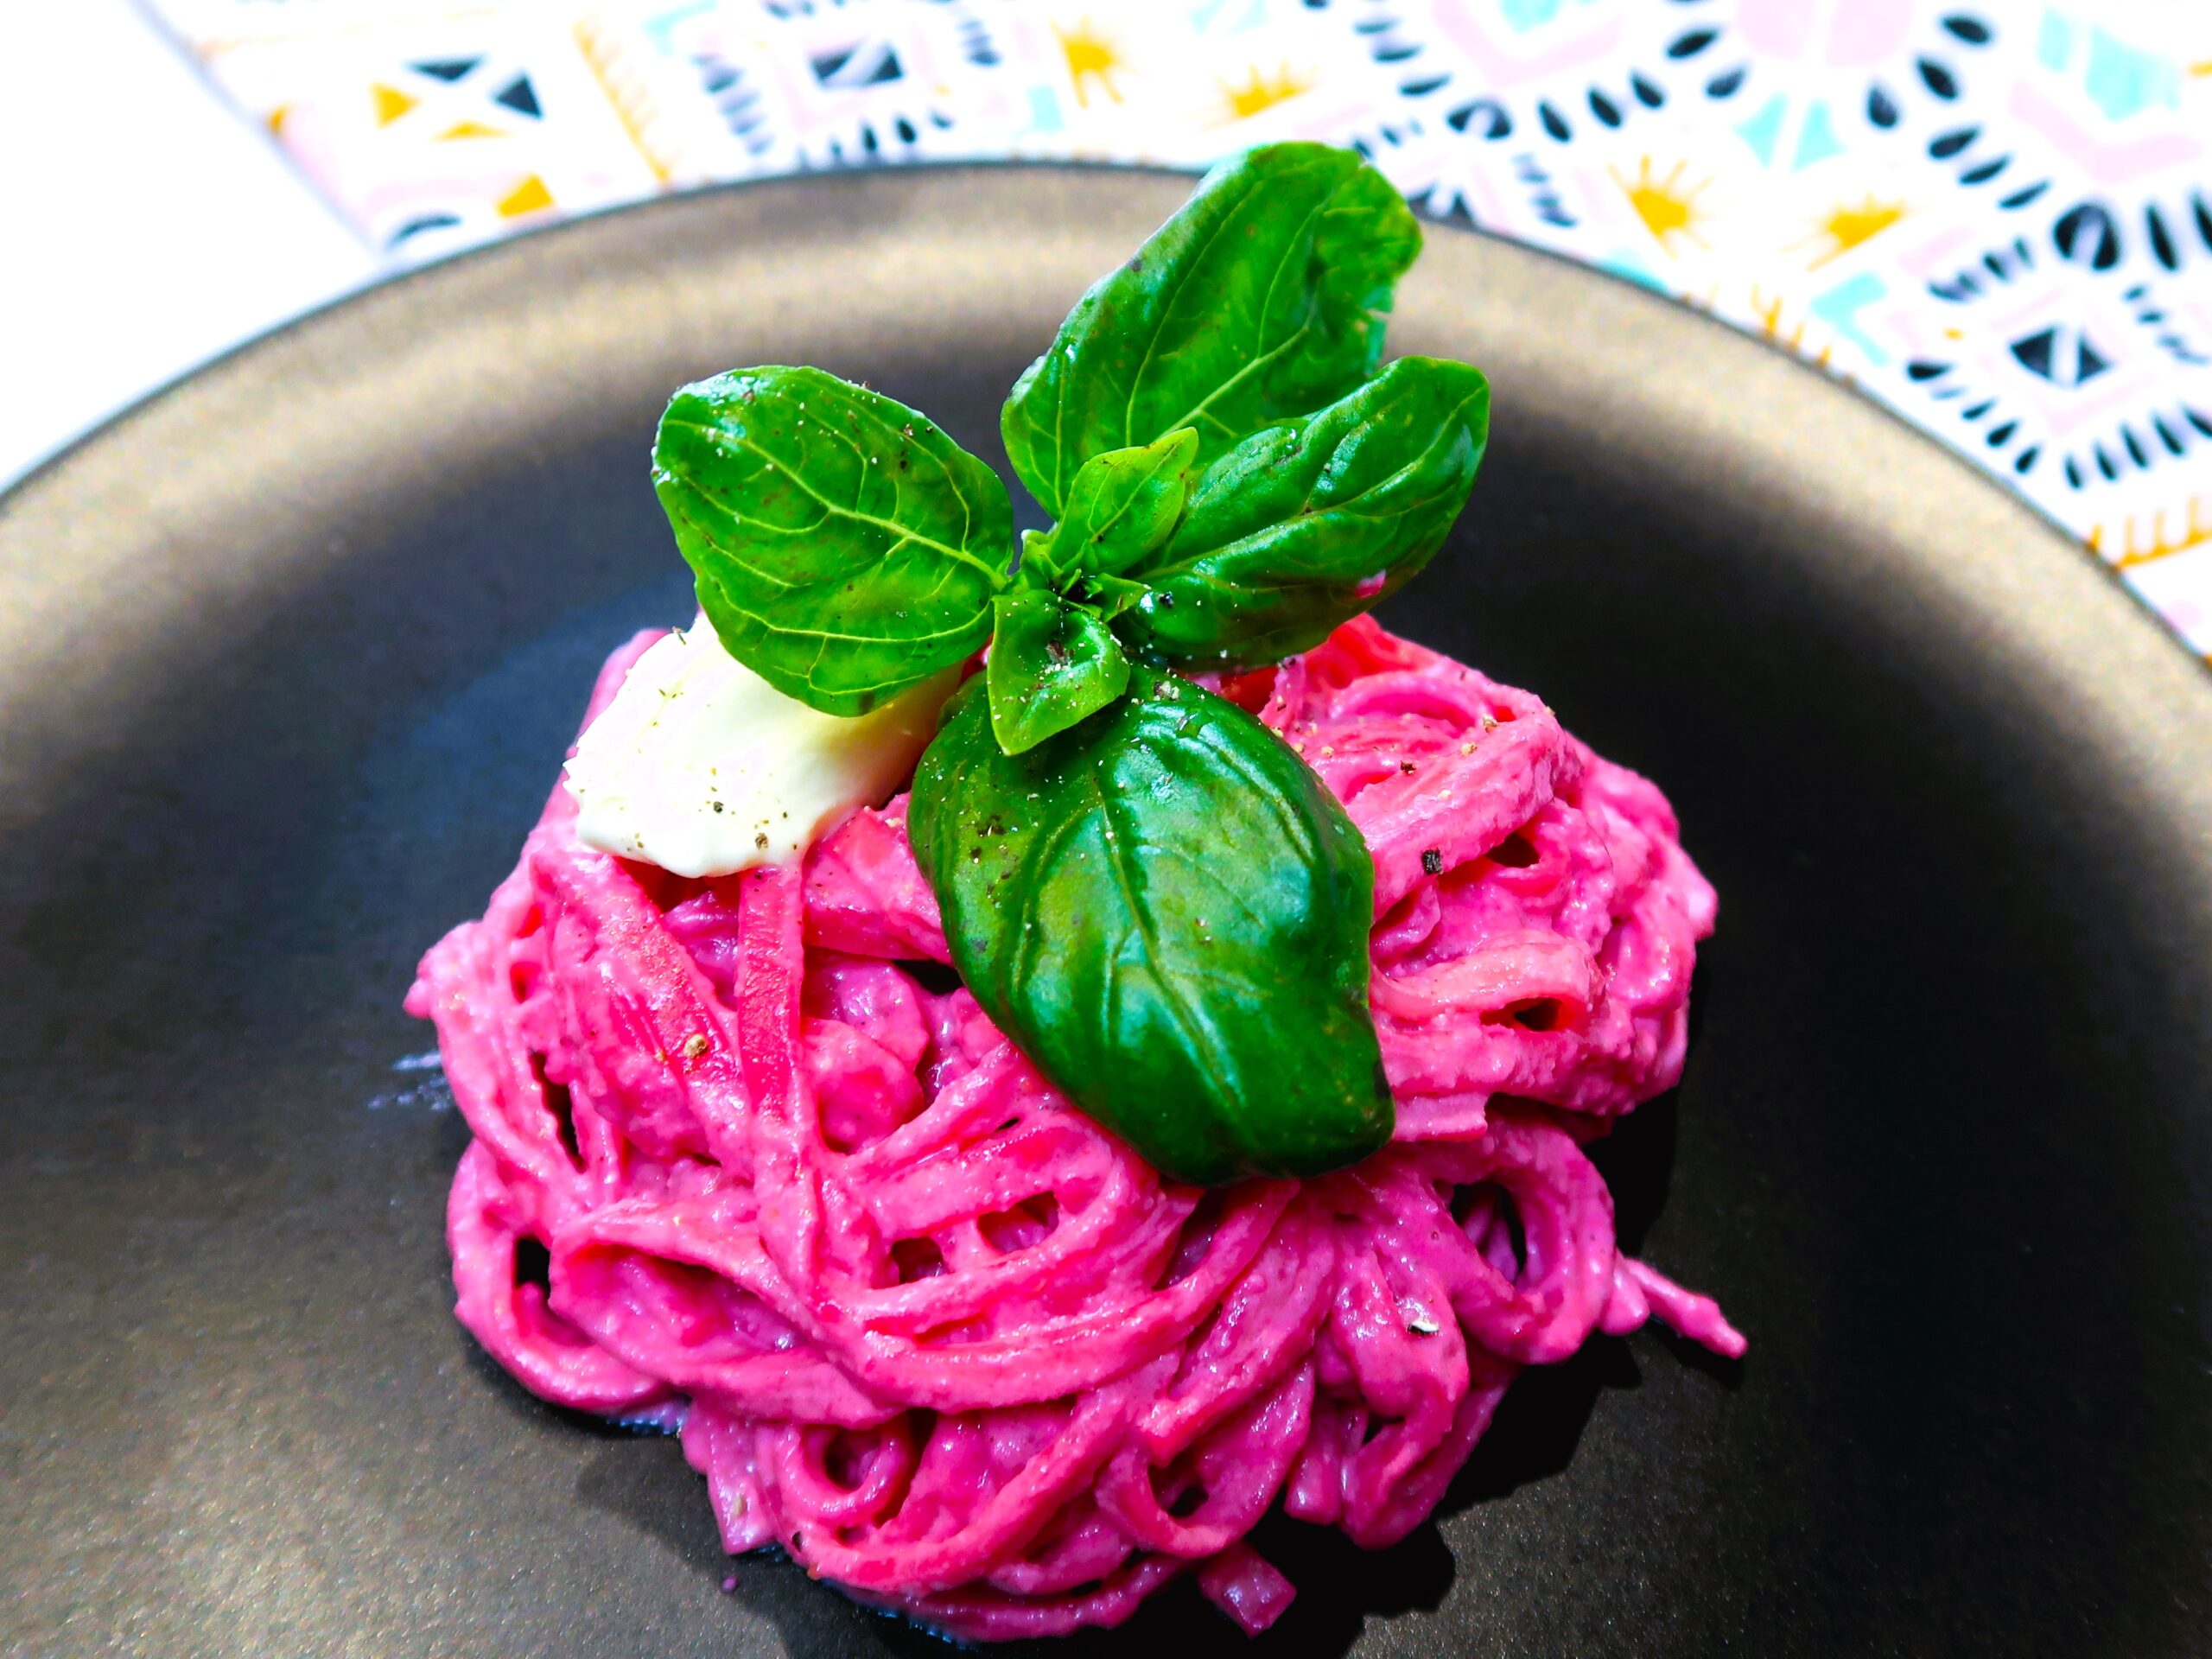
I had to try to make this Pasta after seeing so many versions online with the craze of the recent Barbie movie. The result was a gorgeous, bright pink beetroot pasta dish that is so creamy and luscious. It’s made in 20 minutes, with a simple sauce made in a blender with just a handful of ingredients, it’s as pretty as it gets and a delight to eat.
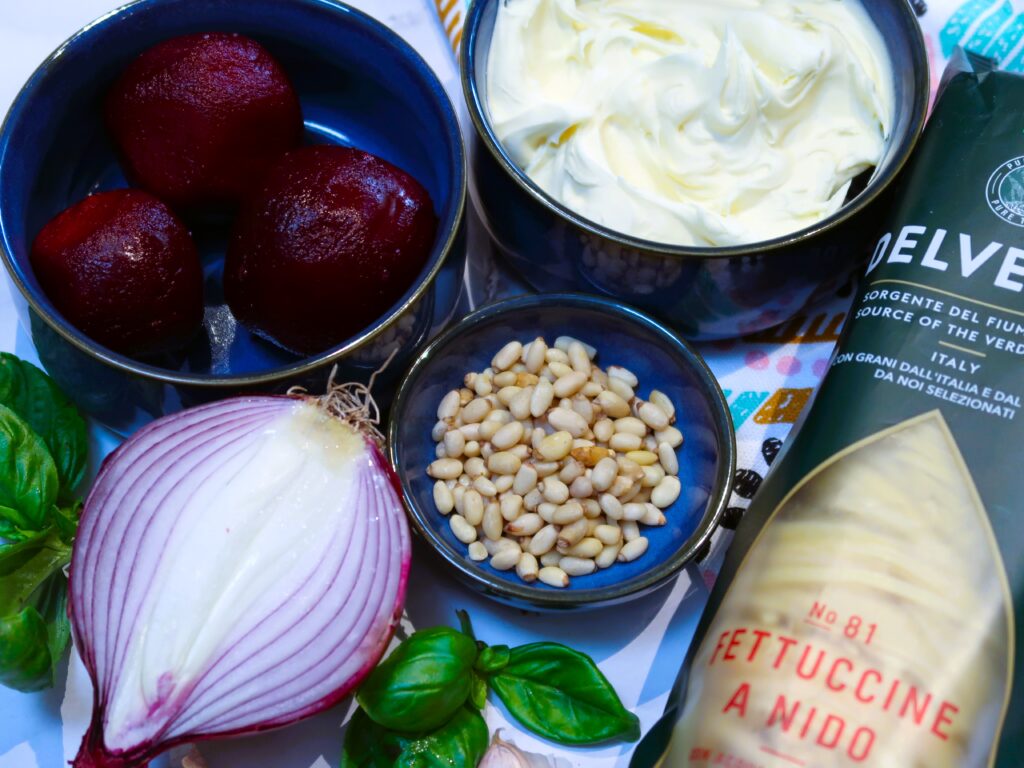
Ingredients to make this Beetroot Pasta
Fettuccine or Tagliolini Pasta: I like to use a fettuccine for this dish but any other pasta that you like will also work perfectly!
Mascarpone cheese: This recipe for this Beetroot Pasta uses about 3/4 of a standard 250 gr tub of Mascarpone.
Beetroot: for this recipe I used the pre-cooked vacuumed sealed beetroot that is already cooked and peeled with no added ingredients.
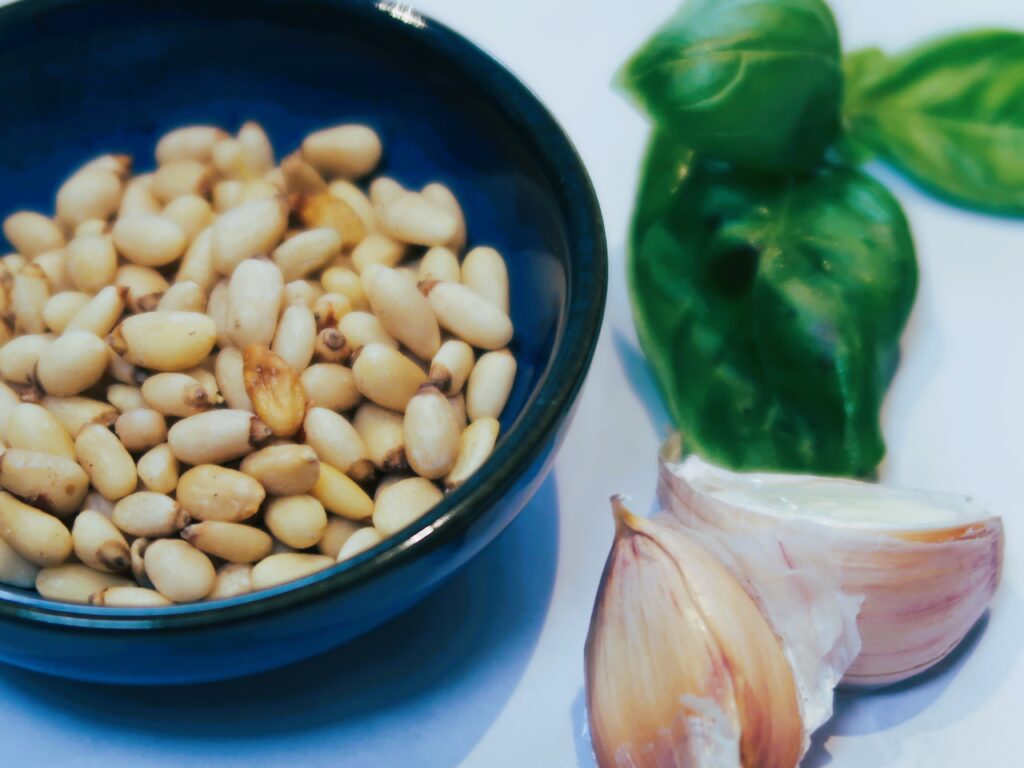
Pine nuts
Red onion and a garlic clove: to make the sofritto to start off the sauce
Extra Virgin Olive Oil, Salt & pepper
Basil Leaves and Parmesan to serve
Some Facts about Mascarpone and Substitutes
This is a popular variety of cream cheese that is used in Italy in a variety of savoury and sweet dishes, the most popular would be in a classic Tiramisu dessert.
Mascarpone can be found in most supermarkets. If you can’t get a hold of Mascarpone, a similar alternative that you can substitute it in this recipe would be normal cream cheese.
There are though, a couple of main differences between the two. First is the texture: Mascarpone has a creamier, more velvety texture. This is because the base of it is cream, rather than milk. It has in turn more fat too. Second the Taste: Mascarpone has a more mellow creamy taste – whether cream cheese has a slight tang to it.
The other option for a lighter version would be to substitute the Mascarpone for Fresh Ricotta Cheese. The consistency is although different from Mascarpone. It might require a bit more blending as the sauce might not result as smooth.
How to make this Beetroot Pasta
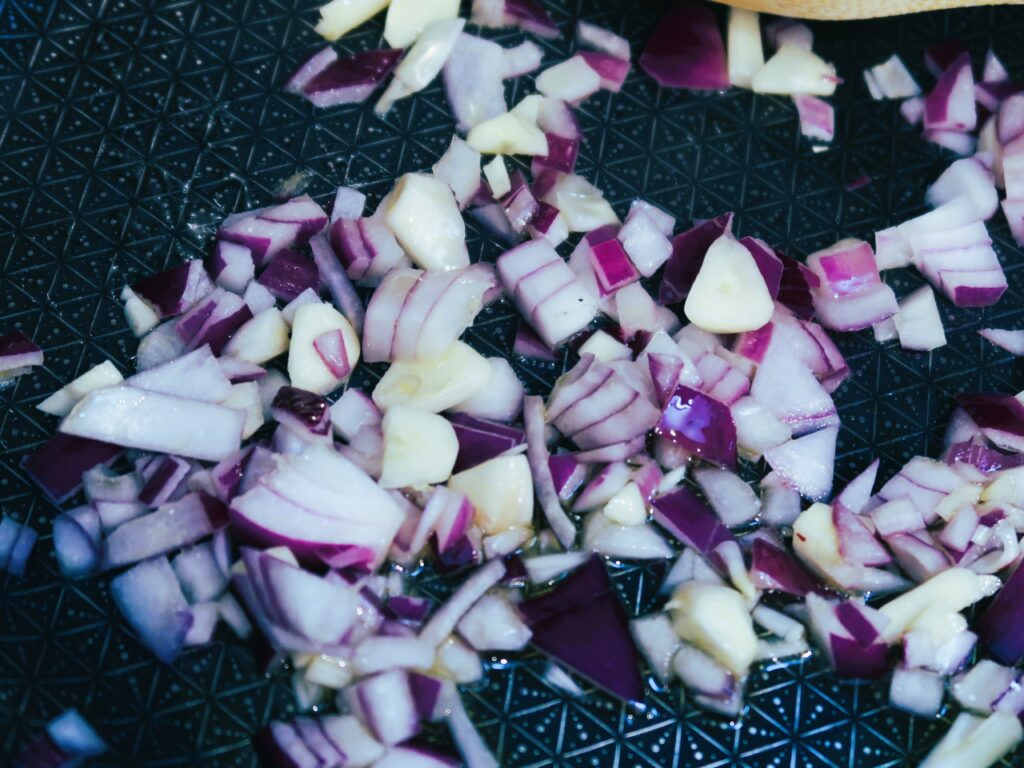
Make the soffritto
In a pan with 2 tbsp of olive oil over low to medium heat, very gently fry the chopped onion and garlic till softened for at least 5-6 minutes.
Combine the pine nuts and beetroot
Add the pine nuts and continue cooking for an additional 2 minutes so that they can toast along with the onion and garlic.
Add the chopped beetroot with a generous pinch of salt and pepper and combine for an additional minute. Take off the heat and let cool slightly.
Meanwhile, bring a pot of salted water to the boil and start cooking the fettuccine.
Blend the Pink Sauce
In a blender add the onion, garlic, pine nuts, beetroot and the mascarpone. Add a few tablespoons of olive oil for easier blending.
Blend in tall bowl with a stick blender or in a standing blender (I just used what I use to make my smoothies) till smooth, creamy and bright pink.
Combine & Serve
Once the pasta is cooked till perfect al-dente, combine it with the sauce. This is best done in the cooled pan (the sauce will split easily if the pan is hot) or large bowl and serve immediately.
Top with basil leaves, more pepper and a spoonful of mascarpone or shaved parmesan to your liking.
Servings and Storage Notes for this Beetroot Pasta
This recipe makes 2 very generous serves or 3 standard serves using 250 gr of pasta.
As the sauce has fresh mascarpone, it’s best eaten immediately as that is when the texture will be at it’s best.
It does not reheat well as I noticed the sauce splits due to the high fat content of the mascarpone cheese.
In a pan with 2 tbsp of olive oil, very gently fry the chopped onion and garlic till softened for 5-6 minutes.
Add the pine nuts and continue cooking for an additional 2 minutes
Add the chopped beetroot with a generous pinch of salt and pepper and combine for an additional minute. Take off the heat and let cool slightly. Meanwhile, bring a pot of salted water to the boil and start cooking the pasta.
In a blender add the onion, garlic, pine nuts, beetroot and the mascarpone. Add a few tablespoons of olive oil. Blend till creamy and bright pink.
Combine with the fettuccine and serve immediately. Top with basil leaves, more pepper and a spoonful of mascarpone or shaved parmesan to your liking.
Notes
Servings and Storage Notes for this Beetroot Pasta:
This recipe makes 2 very generous serves or 3 standard serves using 250 gr of pasta.
As the sauce has fresh mascarpone, it’s best eaten immediately as that is when the texture will be at it’s best.
It does not reheat well as I noticed the sauce splits due to the high fat content of the mascarpone cheese.
Course: Main Course
Cuisine: Italian
Keyword: beetroot pasta, easy dinner, easy recipe, pasta, pasta dish
Travelling to the Greek Islands? These stunning beaches in Greece are must-see attractions on your next holiday! Discover 5 of the Best Beaches in Greece and get some handy tips on getting there.
These are 5 of the best beaches in Greece
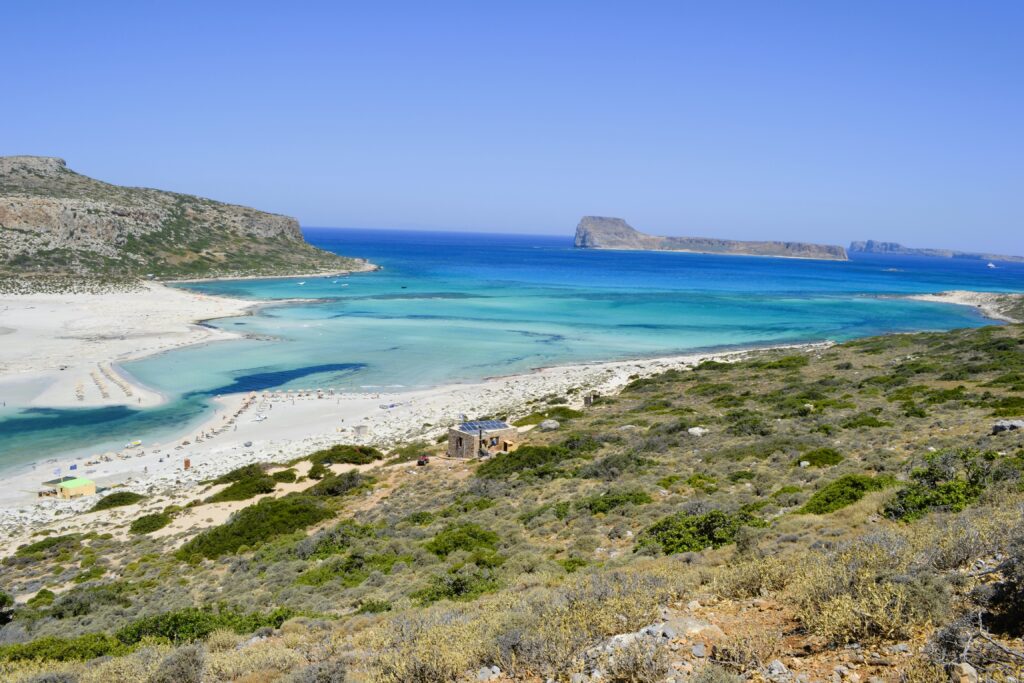
Balos Beach, Crete
Balos Lagoon
Located in Crete, the largest of the Greek islands. Seeing the Balos Lagoon for the first time will absolutely blow you away! A beautiful lagoon with turquoise waters and a white (sometimes also pink) sandy beach, makes this one of the best beaches in Greece – or even Europe!
Getting to Balos Beach
Perhaps it was the trek to get there that made us appreciate the beauty of this place even more. Balos can be reached by ferry (20 minutes from Kissamos port) or by driving.
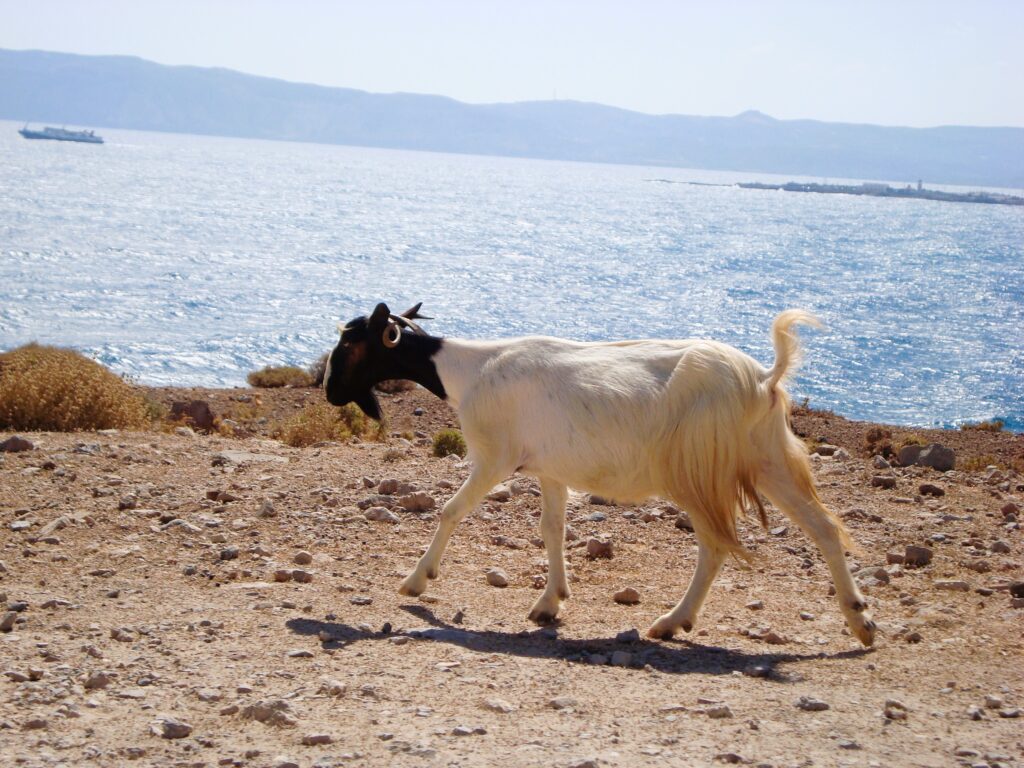
The goats along the dirt track to reach Balos
We opted for the latter and braved the unstable 10 km dirt road, with lots of rocks and goats.. yes goats, getting in our way. Once you get to the carpark, you need to trek down on foot for 20-30 minutes to reach the beach. Took some effort but that said, it was worth it. The road is not the easiest of drives so if you are not comfortable in your rental car – opt for the boat ride instead.
Beach type
White sandy beach
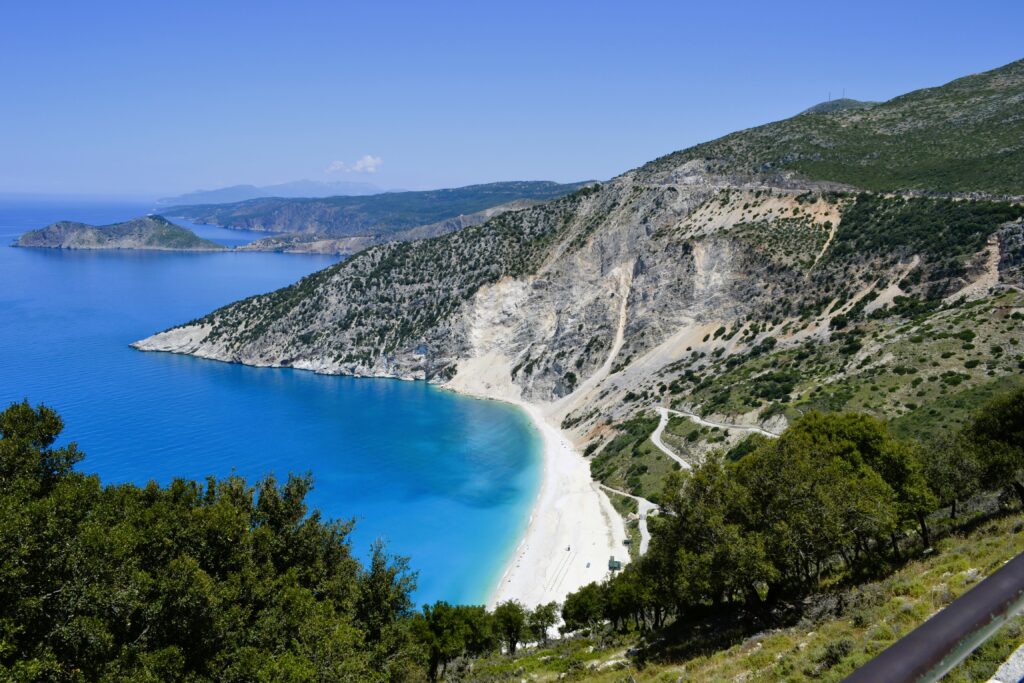
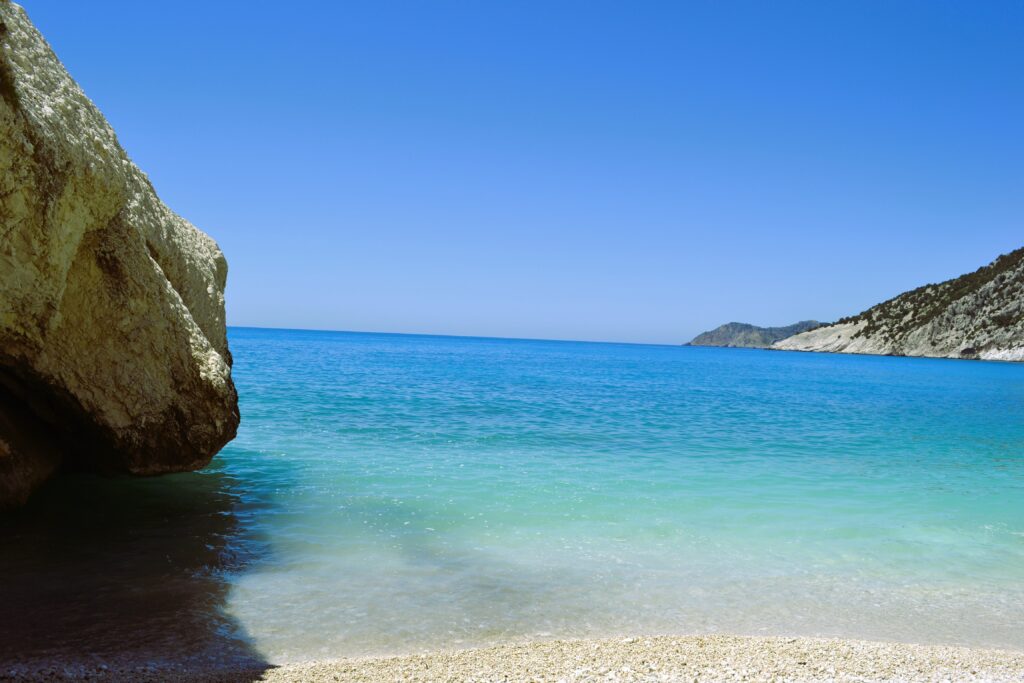
Myrtos Beach, Kefalonia
Myrtos beach from road viewpoint
Located on the green island of Kefalonia, Myrtos Beach is one of the most photographed locations and makes the list as one of the top beaches in Greece to visit. With white pebbles and surrounded by marble cliffs, this scenic beach is a must-see when visiting Kefalonia. You can read more about Myrtos and Kefalonia in my post HERE.
The blue waters at Myrtos beach
Getting to Myrtos Beach
Myrtos is located about 8 km from Assos. There is a steep windy road to reach the beach via car or taxi (45 minutes from Argostoli) and you can stop along the way for some fantastic insta-worthy shots. There is free parking as you reach the beach, but it does get very busy in summer so get there early.
Beach type
Smooth pebbled beach
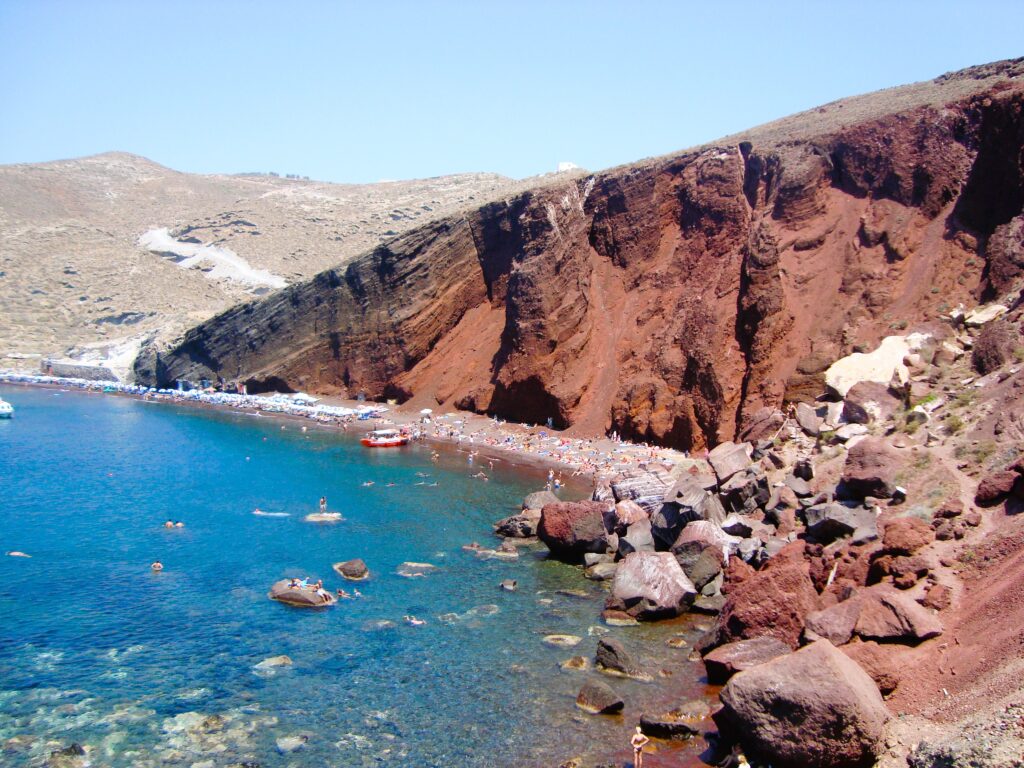
Red Beach, Santorini
The distinctive red cliffs at Red Beach in Santorini
Also called Kokkini Amos, the remnants of past volcanic eruptions created this beautiful, one-of-a-kind, red and black sandy beach. The tall red cliffs surrounding turquoise clear water make this one of the best beaches to see in Santorini.
Getting to Red Beach
Located right next to the famous archaeological site of Akrotiri, also known as the Pompeii of Greece, Red Beach is around 20-minute drive from Fira. Local buses also run during the summertime from Fira. Catamaran and boat tours also often stop at Red beach on the way to the nearby White Beach.
Sunset over Fira, Santorini
Beach type
Sandy with red sand
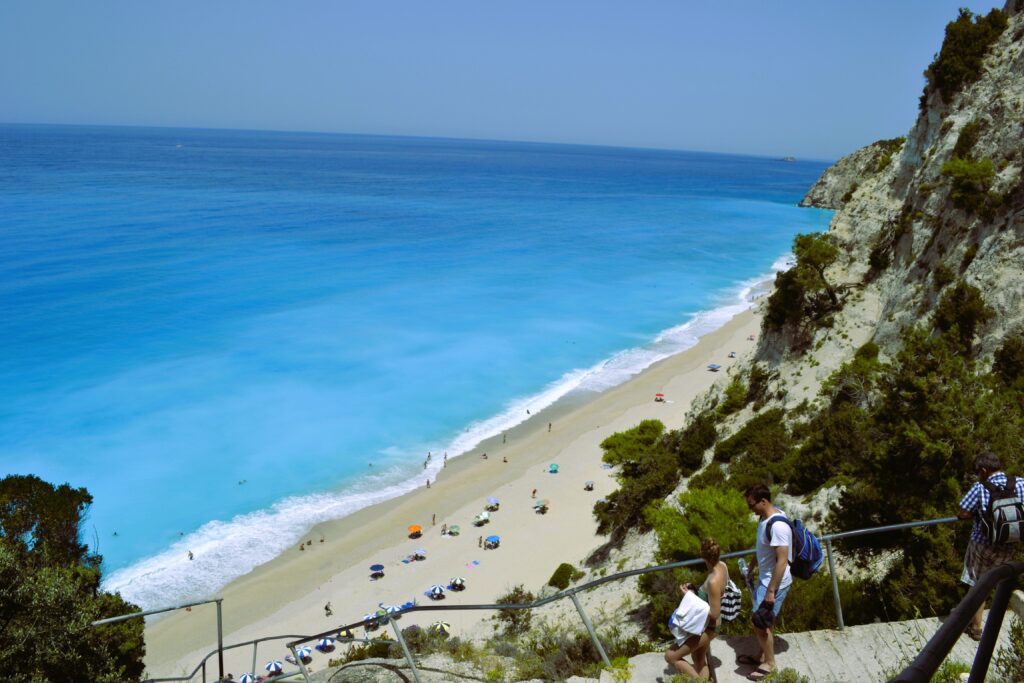
Egremni Beach, Lefkada
The stairs to reach Egremni beach
This beach is in the lesser known island of Lefkada, one of the largest of the Ionian Islands. It’s also the only island that’s connected to the mainland by a long floating bridge.
Lefkada Town
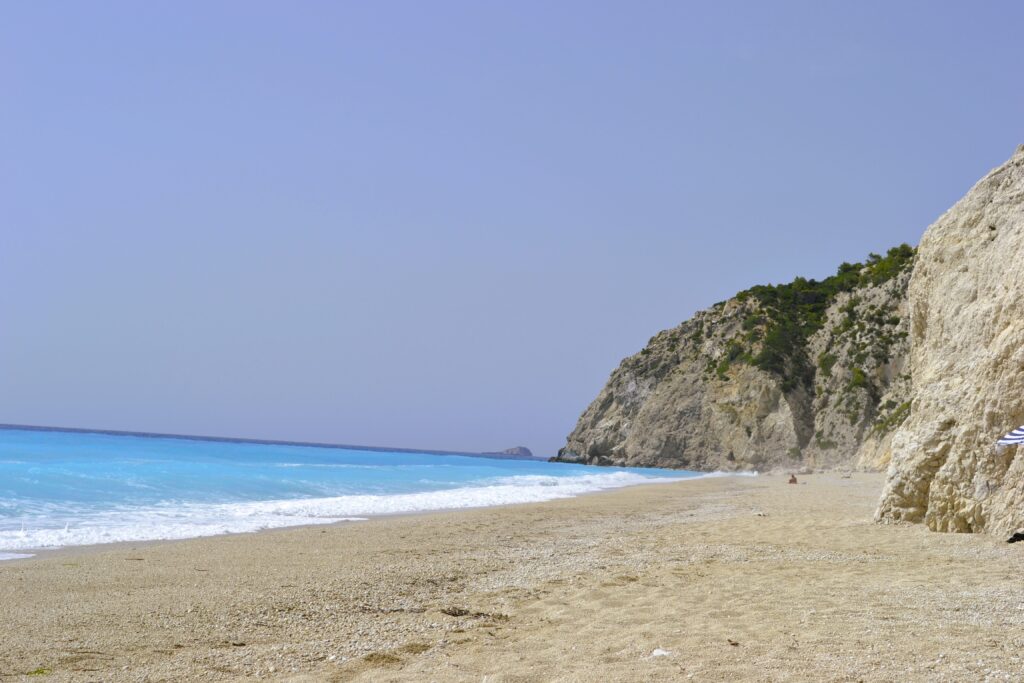
Egremni is a top attraction of the island. The views and the colours of this beautiful beach’s bright blue crystal waters are stunning. The white cliffs surrounding the long stretch of beach make this one of the best natural beauties to visit in Lefkada.
Getting to Egremni Beach
You can reach Egremni Beach via car from Lefkada Town in about 40 minutes or via water taxi from Vassiliki (1.5 hours). If driving, to get to the beach you will need to park the car at the top and reach the beach on foot, down a long set of steep stairs. Word of warning though, It’s about 400 steps, and in the summer heat, it might not be for everyone!.
Crystal blue water at Egremni
In 2015, a big earthquake caused extensive damage to Egremni. Luckily, the beach has since been reopened and the stairs and roads to reach it have been repaired.
Beach type
Coarse sand and small pebbles
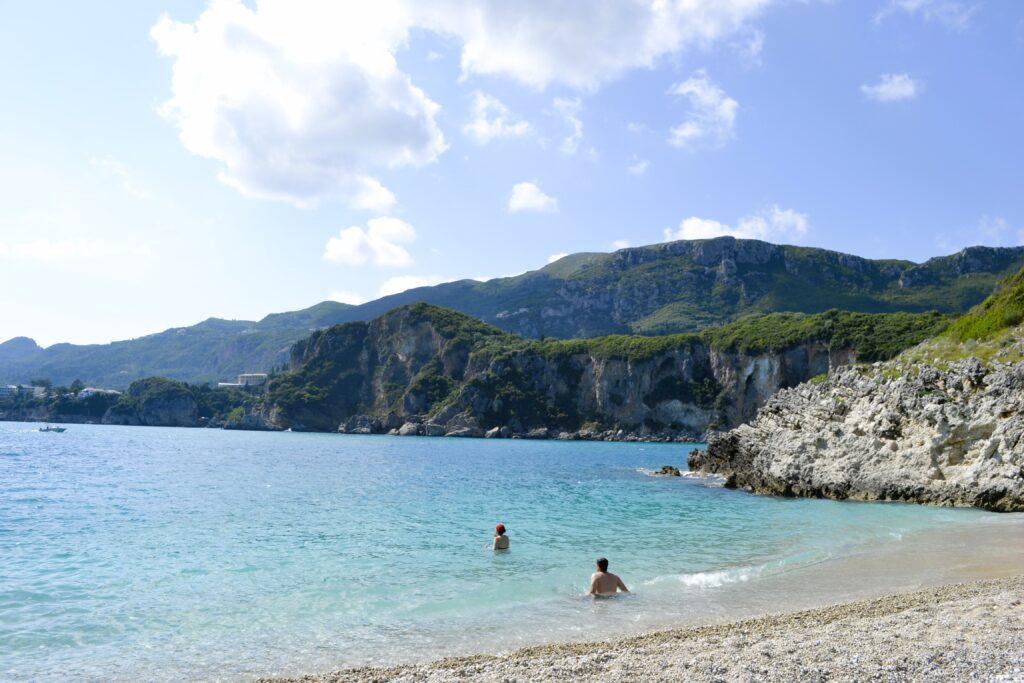
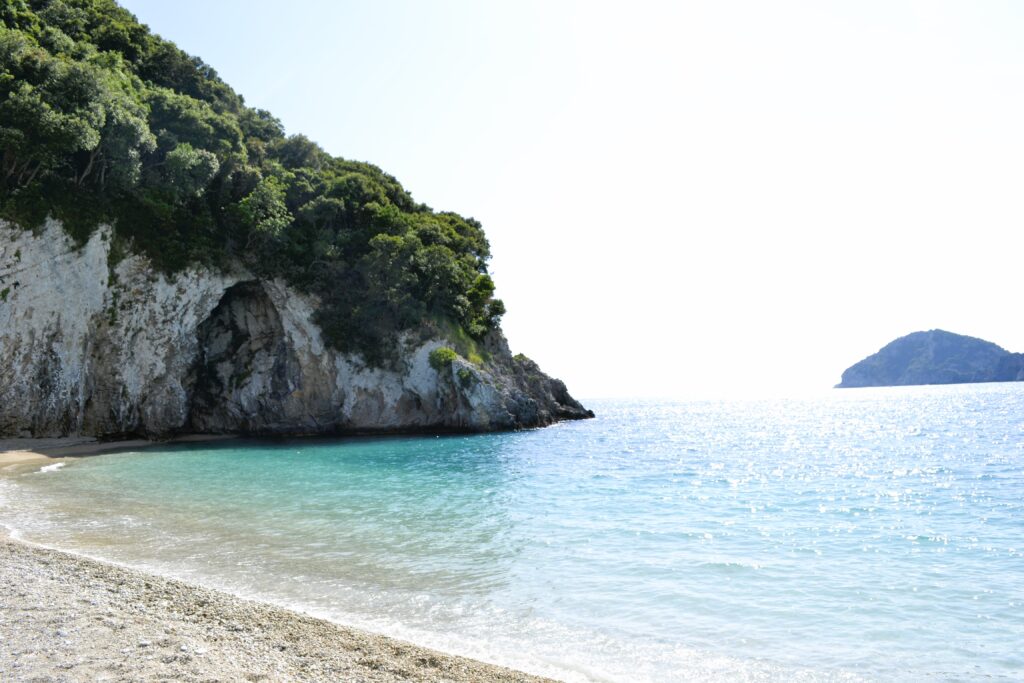
Rovinia Beach, Corfu
Rovinia Beach
One not to be missed in the island of Corfu’, Rovinia Beach is surrounded by green hills with beautiful emerald waters. A beautiful beach with both pebbles and sand line this small secluded cove and it’s worth a visit!
Getting to Rovinia Beach
Rovinia Beach is located in Liapades village, just 30-minute drive from Corfu town. The beach itself is a little hard to find, as it’s only become popular in recent years and the signage is not very clear. To reach the beach from Liapades, it’s a 10-15 trek down a dirt path so come prepared! This useful guide will help you get there.
The small secluded Rovinia beach
Beach type
Sand and small pebbles
Book
I hope you enjoyed this post on 5 of the Best Beaches in Greece! Want to read more about Greece? Check out my post on Kefalonia.
Ever ended up in a hotel, after hours of travelling and lots of $$$ spent, just to be disappointed with it? Here’s my list on the Top 5 mistakes to avoid when booking accommodation.
Image by Gerd Altmann from Pixabay
So you got the flights booked (if you haven’t, check out my other post on How to Book the cheapest flights Online) and next thing on the list is to book accommodation.
So where to stay? What accommodation to go for? What’s in the area? Is there Wi-Fi? SO MANY QUESTIONS! Surely it’s not just me, I’m an over-planner in travelling. No matter what trip it is, there are some things that you should always check before booking so that you don’t end up disappointed.
Image by StockSnap from Pixabay
Top 5 Mistakes to avoid when booking accommodation
Mistake # 1: Not researching Hotel Location
This has to be my number 1 on the list of Top 5 Mistakes to Avoid when booking accommodation. Because even if the hotel or accommodation turns out to be a total dud – you can leave your stuff and go out. Go and see some fabulous places. Eat something amazing at the best food places in town at your doorstep.. and it won’t take you hours to get there.
Especially if you are staying somewhere for a limited amount of time, you won’t waste precious holiday time (and money) trying to get to and from wherever you are going.
In smaller cities or towns if you want to be close to the main attractions its quite straight forward. Just stay in the city centre or historical town centre. But in bigger cities it can get more complicated.
Tokyo Skyline – How do you choose the best location to stay in a city so vast?
In bigger cities like Tokyo for example, which has over 20 districts, where do you even start with choosing somewhere? So get researching on the popular areas to stay and speak to someone you know that has been there already.
Think of what you want to be doing while there. Are there main attractions that you absolutely want to see? Is it shopping or is it checking out the best local dining spots that you are after?
Once you have a rough idea of the location you want to stay in, go on Google Maps, on street view, and check out the area, the streets. Does it look dodgy? Does it look nice? Has it got your vibe? This will give you a good starting point and narrow down accommodation options from hundreds, to perhaps a handful.
Mistake # 2: Not checking accommodation options
Image by Erick Palacio from Pixabay
This will of course depend where you are travelling to – but generally, be open for compromise from your usual place to stay when travelling. Don’t make the mistake in just assuming there is just one accommodation type to stay in.
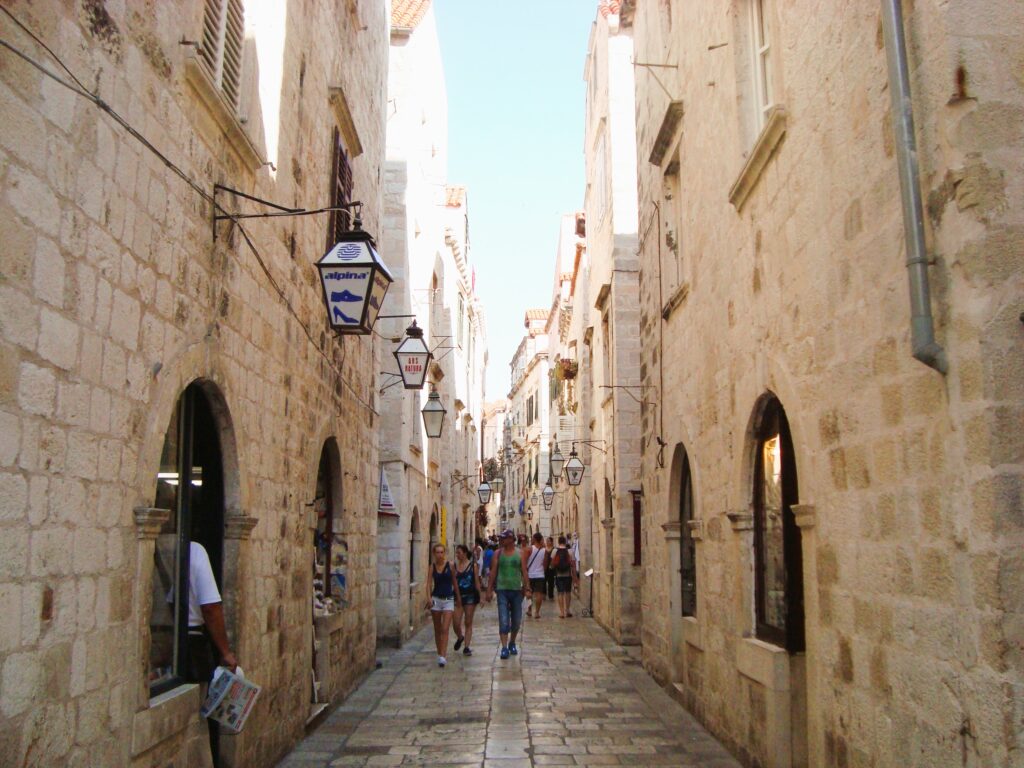
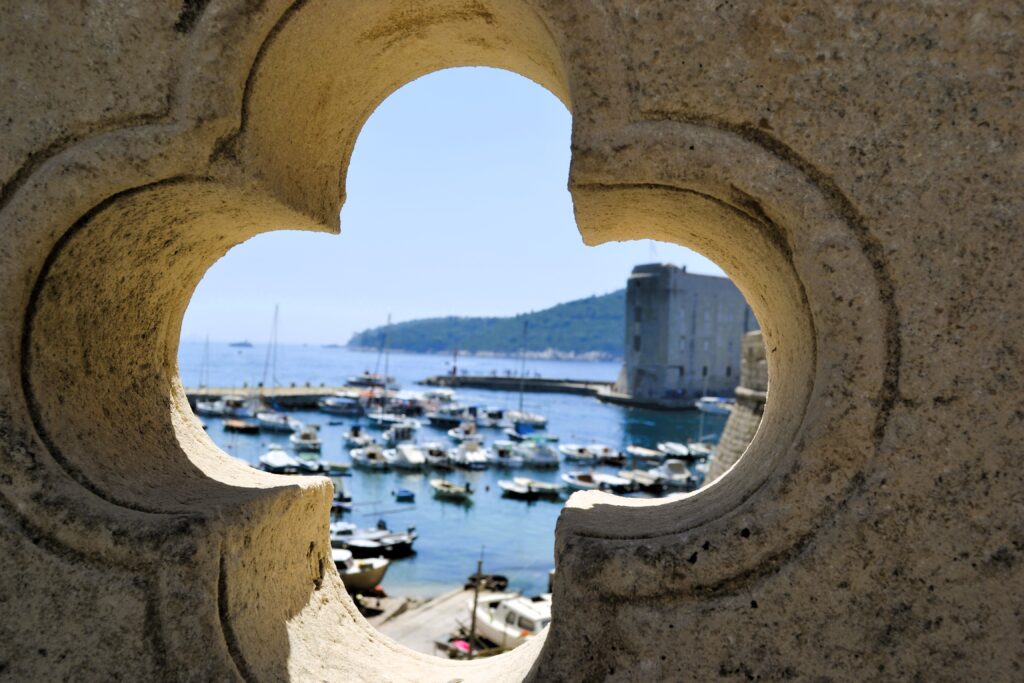
Some destinations might not be equipped for large hotels. The larger hotel might be on the outskirts of town, away from all the action. An example of this is the city of Dubrovnik in Croatia. If you want to stay right in the Old Town, smaller accommodation providers and Guesthouses are generally where you can stay if you want to be in right the beating heart of the walled city.
Old Town Dubrovnik
When travelling to a major, modern city and you want to have amenities (but read #Mistake 3 first too) and just need a place to sleep while you are out exploring, hotels will probably be your best bet.
But if you are looking for a place to stay that has a bit more space for kids and facilities like a kitchen? Then serviced apartments are a great alternative. In regional areas, family friendly cabins in accommodation parks are also a good option too.
If you are on the hunt for a one of a kind place place that has a local ‘home away from home’ feel, holiday and short stay rentals from VRBO or AirBNB might a more suitable option for you.
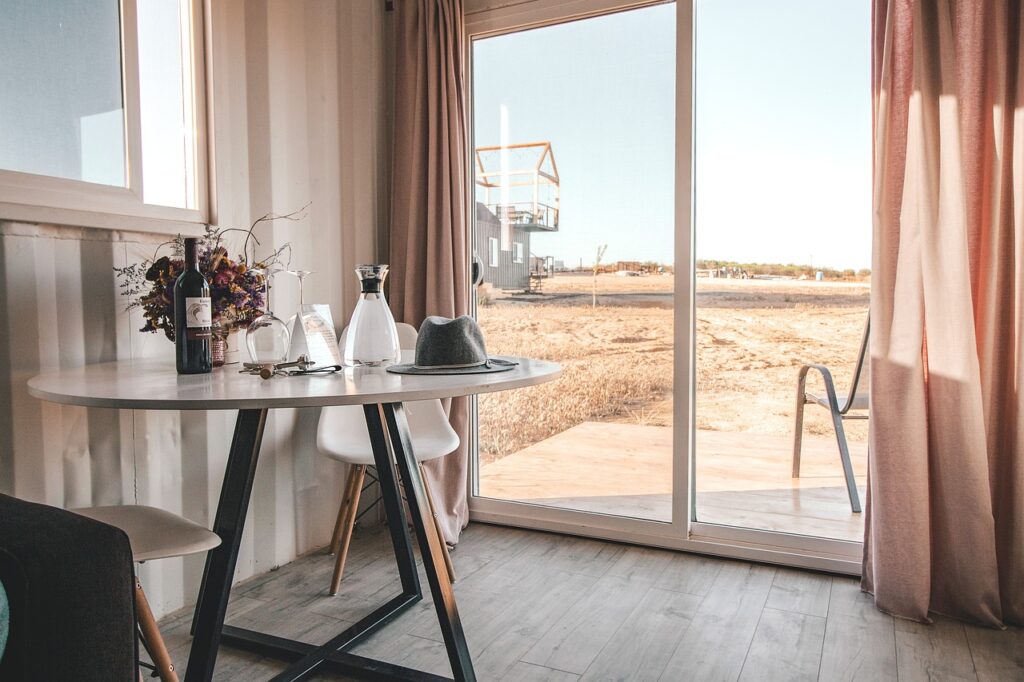
Mistake # 3: Not checking room inclusions
Image by Soner Köse from Pixabay
This has to have happened to everyone at least once when travelling. You get to your hotel or accommodation, unpack and then think. OPPS. I should have checked that before booking!
Think of this example. While the room you booked might not have a coffee machine for you to have your morning cup of espresso, that can be a minor inconvenience. But not having air-conditioning during a scorching hot European summer or spending exorbitant amounts on roaming because there is no Wi-Fi (yes, some places still don’t include it so don’t assume they all do), these sorts of things can put a damper on your holiday.
Image by congerdesign from Pixabay
So, think of what are the non-negotiable amenities that you want or need when staying somewhere and check, check, and check again before you book! If you can’t find the information online, call the hotel or email them for peace of mind. A surprisingly high number of accommodation providers DO NOT list all their amenities on their websites. Yes, it’s crazy!
A word on Breakfast Inclusions:
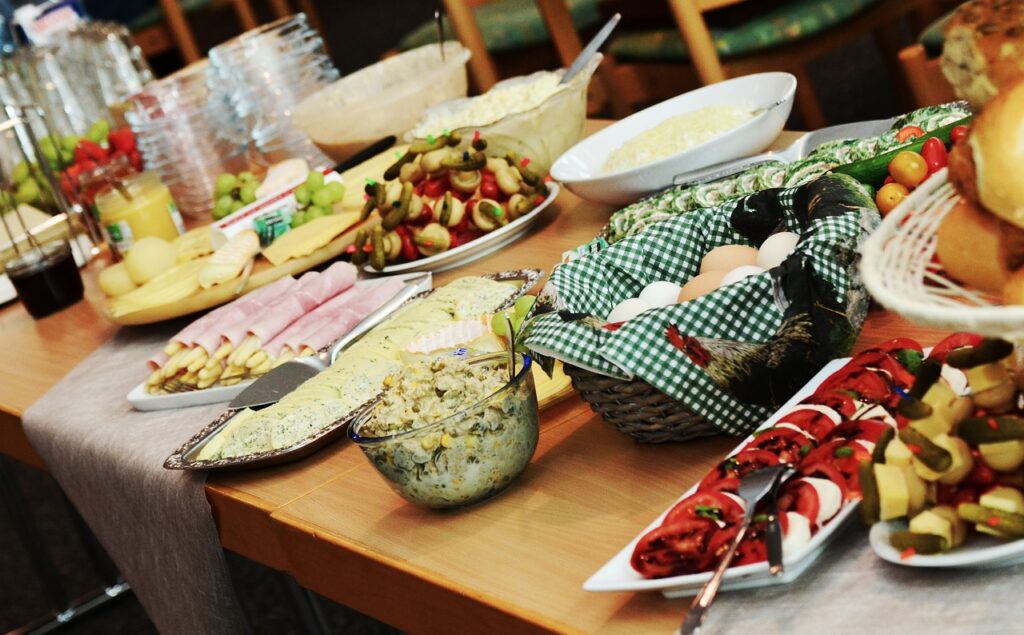
Rooms in serviced hotels in particular may have the option to include breakfast at an additional cost. Do consider if it is worth it to add to the cost of the room. Knowing what type of breakfast it is might also help in seeing if it’s worth adding it on or not. A generous cooked buffet breakfast might cost a bit more but it might also mean that you won’t need to buy as much for lunch.
But a continental breakfast in a 3 star hotel in Rome for example might cost you around 7 to 10 Euro per person, when you can go a local bar and have a cappuccino and a fresh pastry for less than 4 Euros per person. Brushing elbows and standing at the bar with the locals, completely free :).
Mistake # 4: Not comparing prices
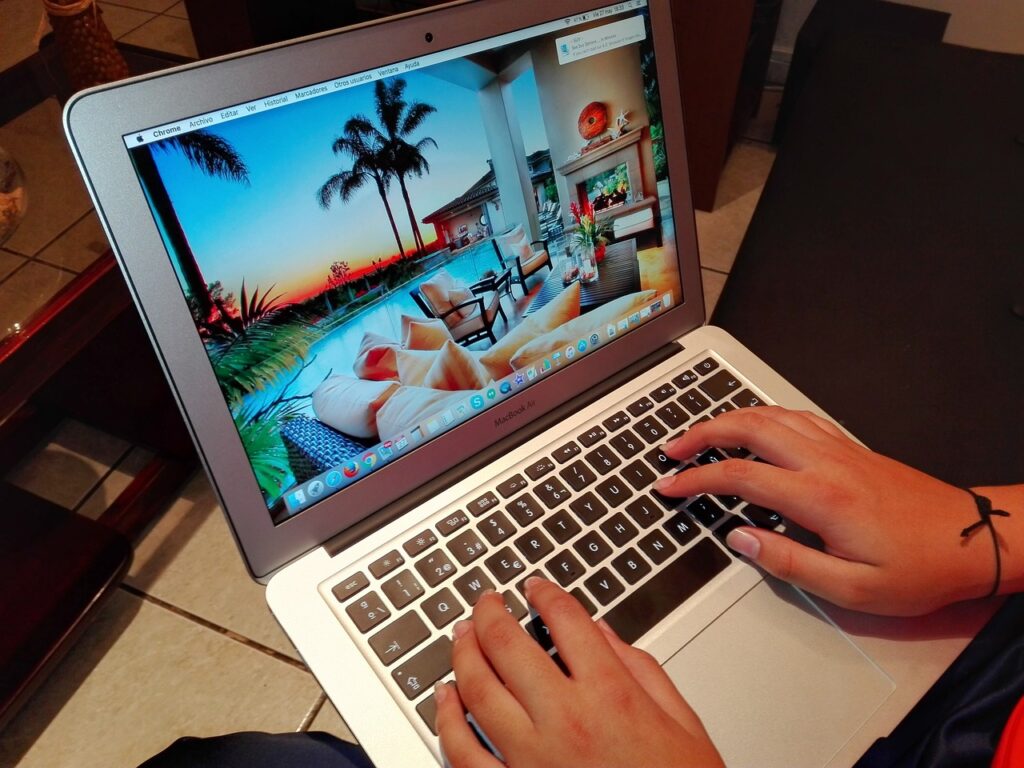
Booking a hotel online can be pretty straight forward if you know exactly where you want to stay and if you want to book directly with the hotel/accommodation provider.
Image by Cristian Quezada from Pixabay
These days there are also many comparison sites like Kayak, Trivago, booking.com, Expedia.com that you can use to compare and book accommodation online. Memberships for many online companies are free to sign up to and will give you access to discounts and/or special deals when you book and travel often.
Often the prices listed for all of these sites also differ, regardless if you looking at the same accommodation. Check at least a few of the sites and compare the pricing and booking conditions, but ensure the source you book from is a reputable, well-known company.
Make sure you are happy with the booking conditions so that you don’t end up having to pay for additional things when you arrive. Or even worse – that your booking is nowhere to be found!
Image by 峰 陈 from Pixabay
A word on cancellation policies:
Travel Plans can change for a variety of reasons and most times it’s outside of our control. Booking a room with a flexible cancellation policy is the smartest idea so that you do have that maximum flexibility to cancel in case you cannot travel anymore. Do know though, that flexibility comes at a price. If you want a flexible cancellation policy it will cost you more so factor than in when comparing rates.
Image by Steve Buissinne from Pixabay
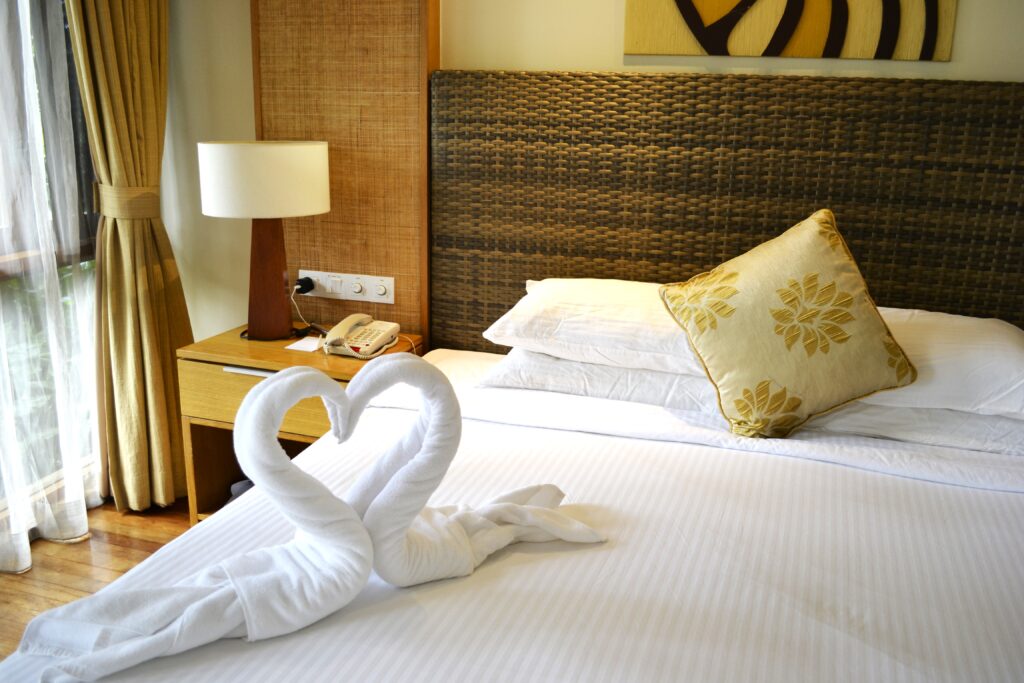
Mistake # 5: Not checking reviews
Another mistake to avoid when booking accommodation is not checking reviews. A place might look fantastic in the pictures, look new and clean, but you might turn up and the accommodation is dirty, the staff rude, and really be below your expectations. Always check the reviews! Read More on my post on reviewsThis is the ONE thing you want to see in a bad hotel review.
Image by Paul from Pixabay
Book
I hope you enjoyed my post and found the tips useful in my 5 mistakes to avoid when booking accommodation. You can check out more of my articles with more handy travel tips right here:
Reviews are everywhere. For where you eat, shop, ride and of course stay! They are essential to check out the real deal on a hotel before you book. We look at why you should read reviews, what to look for and the ONE thing you want to see in a bad hotel review to make sure your stay is fuss free with no hidden surprises.
Image by Alexander from Pixabay
Why should you check reviews?
A place might look fantastic on the pictures, look new and clean, but you turn up and the accommodation is dirty, the area is a awful and the staff is rude. It’s happened to me and I’m sure it’s happened to many of you too.
That’s why hotel reviews are so valuable. They can give you real insights from travellers that have tried and tested a place before you go and stay. It’s as close as you can get from a recommendation from a friend!
Image by ming dai from Pixabay
Since sites like Tripadvisor.com and online travel agents plugged in reviews directly on booking sites, reviews are everywhere! But where do you start without having to read hundreds of them? Read on for some tips! And to find out what is the ONE thing you want to see in a bad review.
What do you look for in a hotel review?
Look for reviews that are thorough, factual and to the point. You want to mainly read reviews that focus on the highlights of the location, the cleanliness, amenities & how the staff deals with the guests. Always filter reviews by the most recent. By reading the first 10-20 reviews, this is where you will see patterns and if there have been recent management changes.
Image by Ryan McGuire from Pixabay
If there are photos that guests have left, check these out too! Compare them to the images loaded by the accommodation provider itself and see if they are indeed realistic of what the rooms and spaces looks like.
How many good reviews is enough?
Look for the overall percentage of positive reviews and average score for each review. If the highest score is 5 for example, you would be generally looking for the majority of the reviews with a score of 4 and above for a good standard. Filter by recent reviews to check whether they are consistently good. It doesn’t matter if a place is budget or luxury. Cleanliness & friendly customer service are extremely important to make it a comfortable stay, no matter what is your budget!
Image by Oleksandr Pidvalnyi from Pixabay
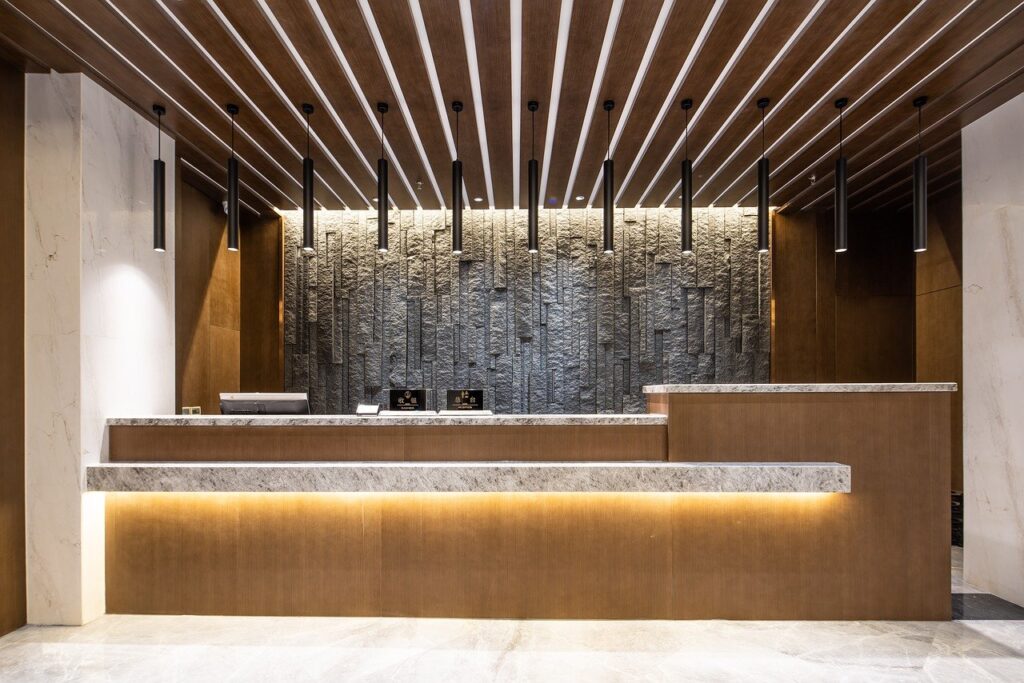
New Accommodation or Hotels recently opened
Even if a hotel is new & recently opened and they don’t have many reviews – what is there to read is a good indication on how the accommodation is doing so far.
In hotels for example, dealing with reviews is generally the responsibility of a particular person. Especially once a new place has opened, getting good reviews is an important strategy to ensure return customers and to bring in new ones!
Image by Tom from Pixabay
If there are mainly bad reviews when a place has just opened, even though the place might be brand new, it’s not a good sign! It might mean that the management has still not worked out all their processes and things are getting missed such as cleanliness standards & staff training.
Negative reviews and the ONE thing you want to see in a bad hotel review
Why people leave negative reviews
It’s extremely difficult to find a hotel that has no negative reviews. Peoples expectations are different. Staff change. All it takes is for someone to have an off day and they will leave a bad review.
Something extremely small might have caused a guest a huge bother (I’ve read all sorts) or, in more malicious cases, people also leave reviews out of spite when they don’t get their way.
Image by Gerd Altmann from Pixabay
Sometimes, people also just like to write a negative review as it’s just easier to complain online rather than in person. Once the guests have left, there is very little that the hotel/accommodation provider can do to redeem themself. Read on to find out what is the one thing that you want to see in a bad review.
What to look for in a negative review
Bad reviews are not a bad thing though. In most cases if they are genuine – they are excellent opportunities for management of a hotel or accommodation providers to gain very valuable feedback in what can be improved and what can be done to make future guests stays seamless.
Image by congerdesign from Pixabay
My advice is, take the bad reviews with a grain of salt. Look for consistent issues that are reoccurring across multiple bad reviews – if they are mentioned several times then perhaps it is an actual issue. A once off negative review on something that has not been mentioned by other reviews recently, or a highly emotionally charged review is unlikely something to be wary about.
The one thing that you want to see in a bad review is this though: A management response!
The one thing that you want to see in a bad review: The ideal management response
Image by 峰 陈 from Pixabay
What you are looking for is a genuine, professional response where management shows:
That they APOLOGIZE! They are sorry about the issue that has been brough to their attention
What actions have been taken to solve the issue/s
Management might also advise guests to contact them directly, so that the issue can be rectified offline
Thank guests for leaving the review and writing that they wish to see them again!
A management response is SO important! It not only shows that the management cares about the guests but also that they are open to feedback to improve things moving forward. So even if there are some bad reviews, if you see responses by the management that is a great sign!
On the other hand, not seeing a response to a bad review, or unprofessional responses by management, just shows that there is little care in what guests think. Issues raised are taken personally or totally dismissed rather that as an opportunity to improve the guest experience for next time.
Hope you are now equipped with some useful information for the next stay that you book!
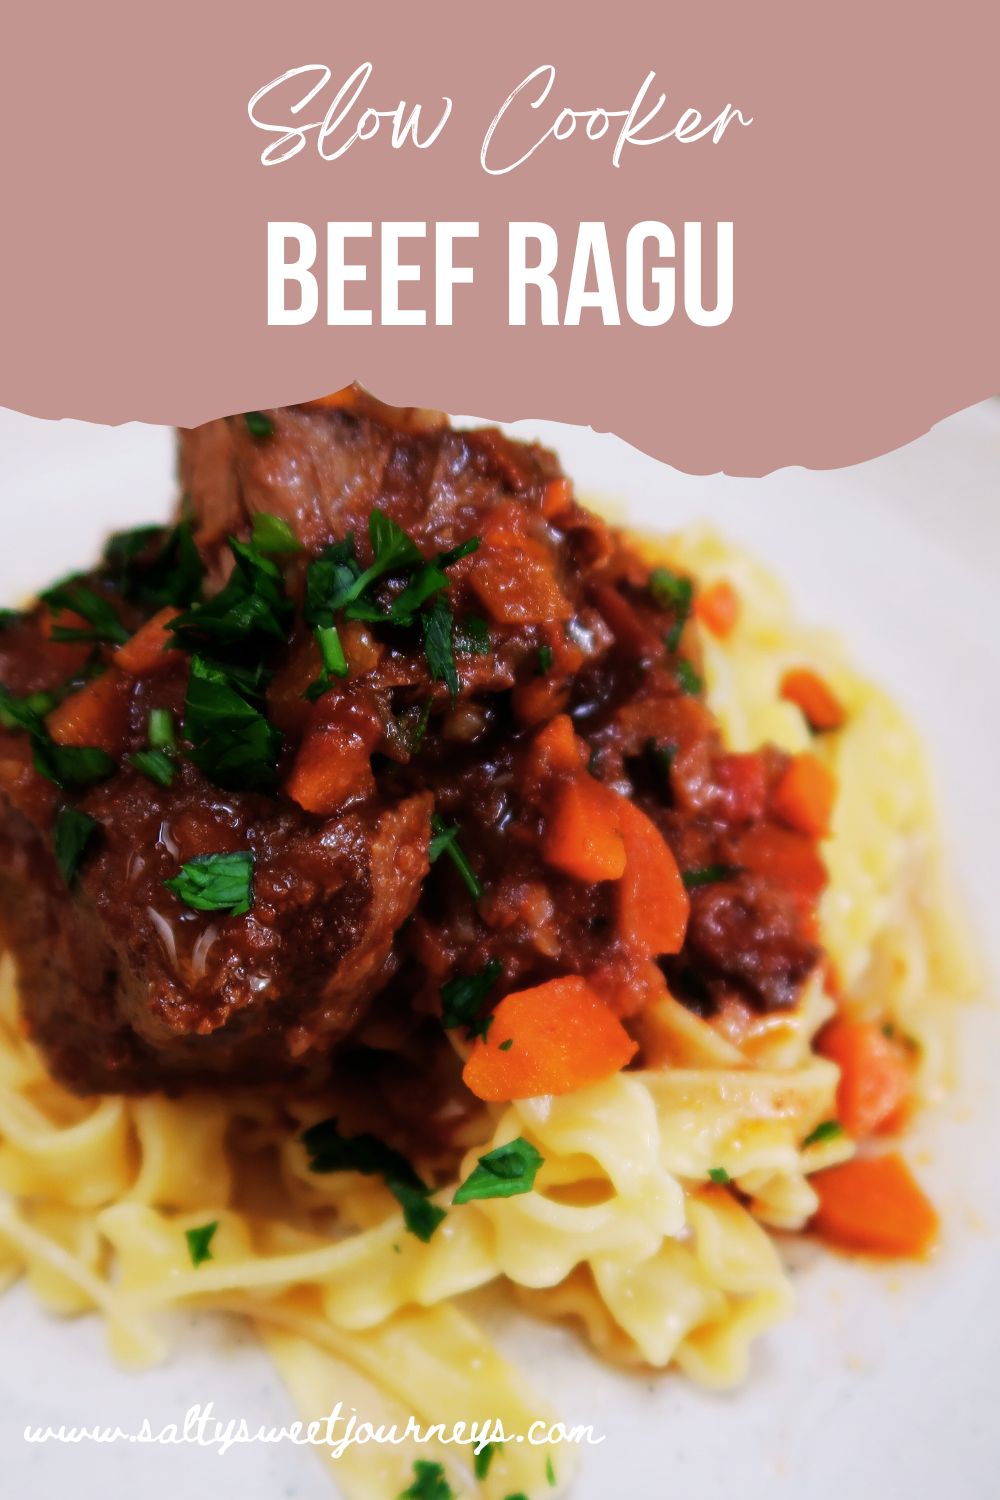
This warming Slow Cooker Beef Ragu is the perfect make-ahead sauce, delicious over pasta or just as good with bread, rice, or creamy polenta. Put everything in the slow cooker, set, and forget! By dinner time you will have the most melt-in-the-mouth ragu ready to be served.
About this Slow Cooker Beef Ragu
I love a good meat sauce or ragu, and although I generally stick to Italian flavours when I’m having ragu with pasta, the slight difference with this one – is that it has some ingredients that are found in the Hungarian Goulash– the humble beef stew.
It’s traditional of Hungary and has been around for a long time, it’s origins from the 9th century. The meat is usually cooked in a large pot with potatoes in the sauce and served with some crusty bread. In italy, Italians also call this dish Spezzatino and in the north it’s usually served with polenta.
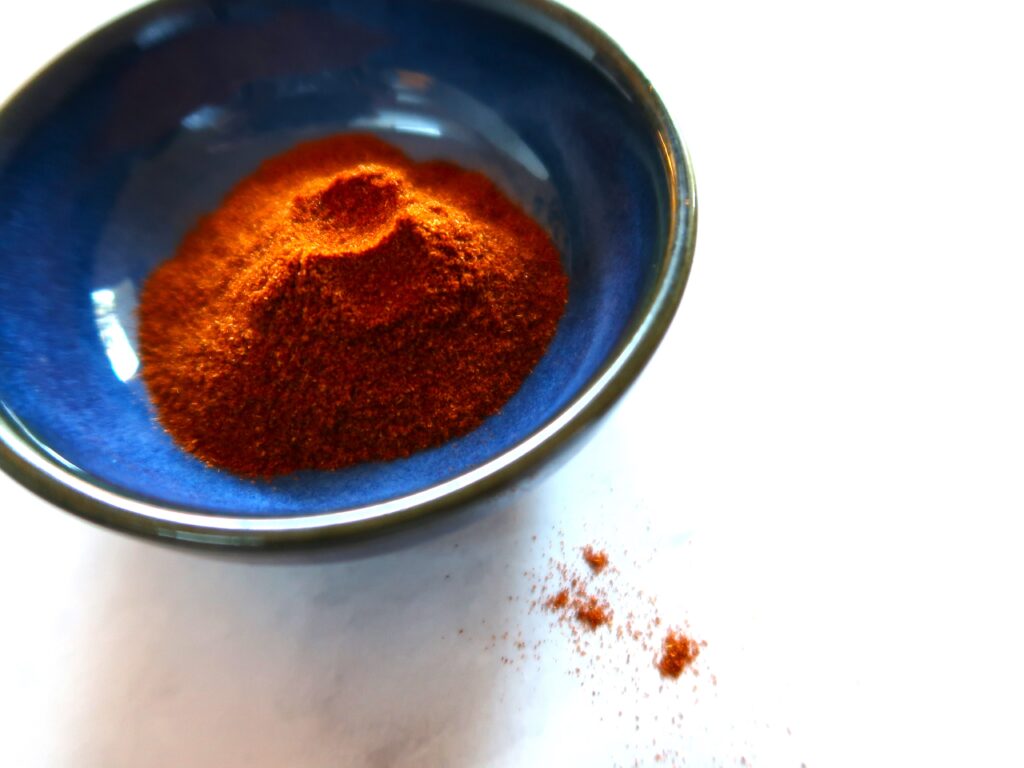
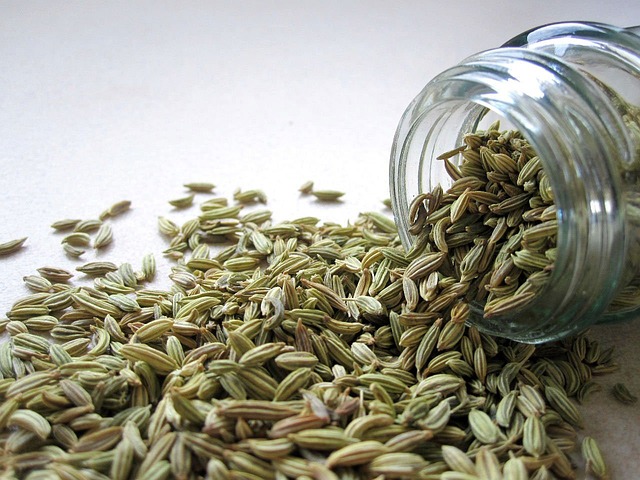
The main and indispensable spice for this stew is Paprika. The paprika adds a beautiful depth of flavour once it has been cooked over low heat for a long time. I don’t put too much in this recipe to not overpower the sauce – but it’s definitely a background flavour that adds another layer to this dish, also alongside Fennel Seeds.
This recipe has been made for the slow cooker, but you could also most definitely make it over the stove, in the oven or if you are in a rush, in the pressure cooker! See recipe notes.
If you like this recipe – I’ll have a post coming soon on my Slow Cooked Beef Cheek Ragu recipe, also equally delicious on a steamy bowl of pasta.
Paprika is the essential spice in this receipe
What you need for this Slow Cooker Beef Ragu recipe
The recipe is written for 6 people based on 500gr of pasta – but you will probably see that once cooked, the sauce itself is quite a generous serve so you will probably have some left for another time or to freeze. This is what you need for this recipe:
Pappardelle – I like to use something that has a bit of grip to get the sauce clinging to the pasta. A curly pappardelle pasta like the one in the pictures, a frilly Mafaldaor even some fresh egg fettuccine is fantastic with it!
Beef chuck steak, bone-in – this kind of cut of meat on the bone is perfect. It’s marbled with fat and with long, slow cooking times it becomes so tender!
The most important things to bring this dish to the next level are SPICES! – Paprika (I opted for sweet), fennel seeds, garlic powder
Salt and pepper
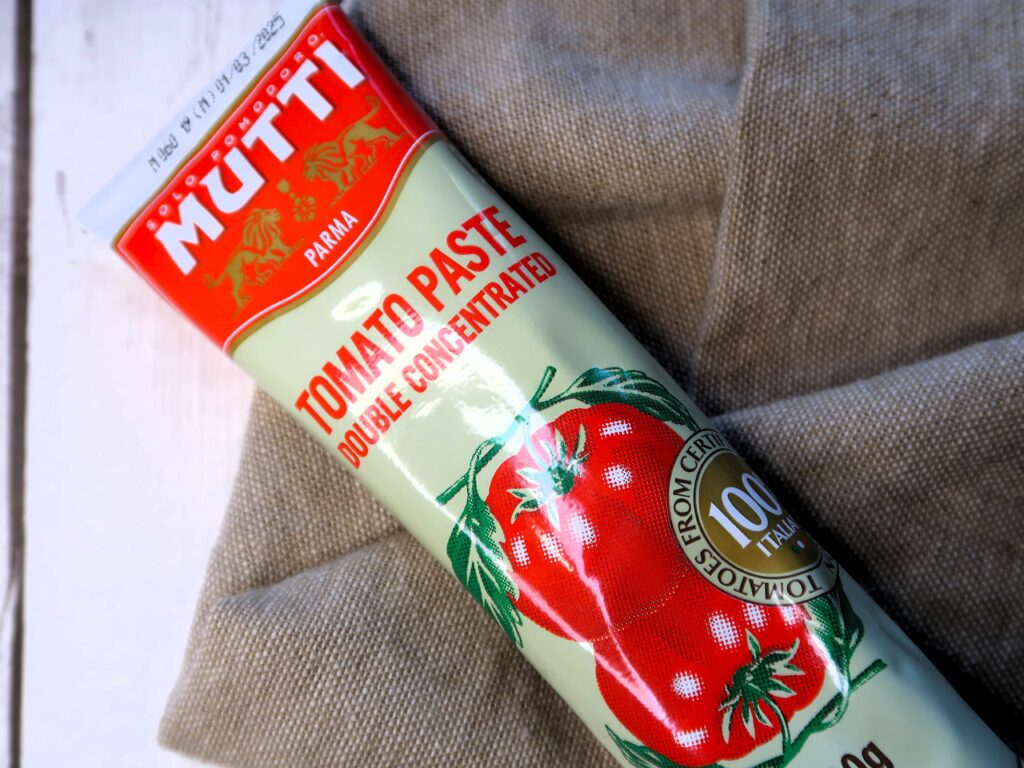
Mutti Tomato Paste, my favourite brand!
How to make this Slow Cooker Beef Ragu
Sauté
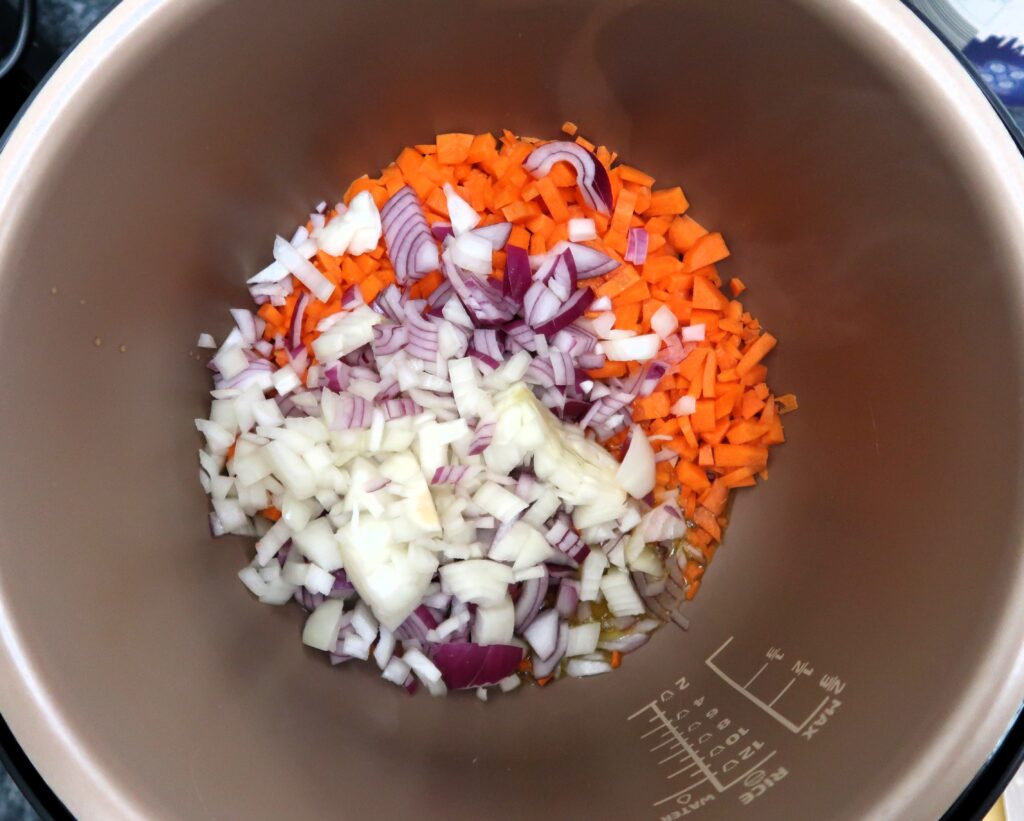
Add your chopped garlic, carrots and onions to your slow cooker with the olive oil. Set the slow cooker to sauté (or you can do this on a separate pan of your slow cooker doesn’t have this option) and caramelize the vegetables gently for 5-10 minutes.
The veg ready for the slow cooker
Once the vegetables have softened, add the spices: The paprika, fennel seeds, salt, pepper & garlic powder and give a stir.
Add your tinned tomatoes, tomato paste, Worcestershire sauce and lastly your meat and combine well. Fill the tinned tomatoes can with water and add that in.
Image by PublicDomainPictures from Pixabay
Slow Cook
Put the lid on your slow cooker and start the slow cooking time for 6 hours on high or 8 hours on low. After 6 hours, the meat should be super tender!
Adjust seasoning and thicken if needed
If you find that there is too much oil/fat that has raised to the surface – this is the time to skim it all off with a spoon. Don’t worry the sauce will be just as flavourful underneath without it! Check seasoning and adjust to taste (half a teaspoon of salt at a time).
Check the consistency of the sauce, and if you would like the sauce thicker, try this: Add 2 teaspoons of cornflour to 50 ml of warm water in a small bowl and stir the flour in till completely mixed through. You can then pour that into your slow cooker and put it back on sauté mode on high for 5 minutes till the sauce reaches the desired consistency. You will see the sauce thicken beautifully, and with no flour lumps!
Just before the sauce is almost ready, start cooking your chosen pasta till perfectly al dente. Remove the bones of the meat (if any), and with two forks, shred any large pieces of meat. Add some chopped parsley to the sauce and serve on your pappardelle. Enjoy!
Serving Variations for the Slow Cooker Beef Ragu
This Slow Cooker Beef Ragu is fantastic on pasta, I love this on some pappardelle or fettuccine! It can also be served in so many other ways:
A crusty loaf of bread and a simple green salad
Plain rice
Potato mash
Chopped boiled potatoes with parsley, butter and garlic
Add your chopped garlic, carrots and onions to your slow cooker with the olive oil. Set the slow cooker to sauté (or you can do this on a separate pan of your slow cooker doesn’t have this option) and caramelize the vegetables gently for 5-10 minutes
Once the vegetables have softened, add the paprika, fennel seeds, salt, pepper & garlic powder and give a stir
Add your tinned tomatoes, tomato paste, Worcestershire sauce and lastly your meat and combine well
Add the water and stir everything through to make sure the meat is all coated in the liquid
Put the lid on your slow cooker and start the slow cooking time for 6 hours on high or 8 hours on low
After 6 hours, the meat should be super tender! Check the consistency of the sauce, and if you would like the sauce thicker, follow recipe note 1. If there is too much oil/fat that has raised to the surface – this is the time to skim it all off with a spoon. Check seasoning and adjust to taste (half a teaspoon of salt at a time).
Just before the sauce is almost ready, start cooking your pasta perfectly al dente (about 8-10 minutes depending on the pasta you are using)
Remove the bones of the meat (if any) & shred with two forks any larger pieces of meat. Add some chopped parsley to the sauce. Serve on your pappardelle
Notes
If you want the sauce thicker, try this trick that works EVERY.SINGLE.TIME!: add 2 teaspoons of cornflour to 50 ml of warm water and stir the flour in till completely mixed through. You can then pour that in your slow cooker and put it back on sauté mode on high for a 5 minutes till the sauce reaches the desired consistency. You will see the sauce thicken beautifully, and with no flour lumps!
Cooking times if using: Stove top: 4 hours on low heat after all ingredients are sauteed and meat and all other ingredients are in the pot. Oven: 4 hours in preferably a cast iron pot, lid on at 160 degrees. Check after 2 hours and you can put the lid slightly askew the last hour – and if it is reducing too much, add some water. Pressure cooker: 1.15 hours for 1.5 kg of meat. Note that with pressure cooking the sauce will be more watery as the steam cannot escape. You will need to reduce the sauce to make it thicker for 5-10 minutes, just follow first recipe note
Storage: the sauce can be stored in the fridge for 3 days or in the freezer for 3 months
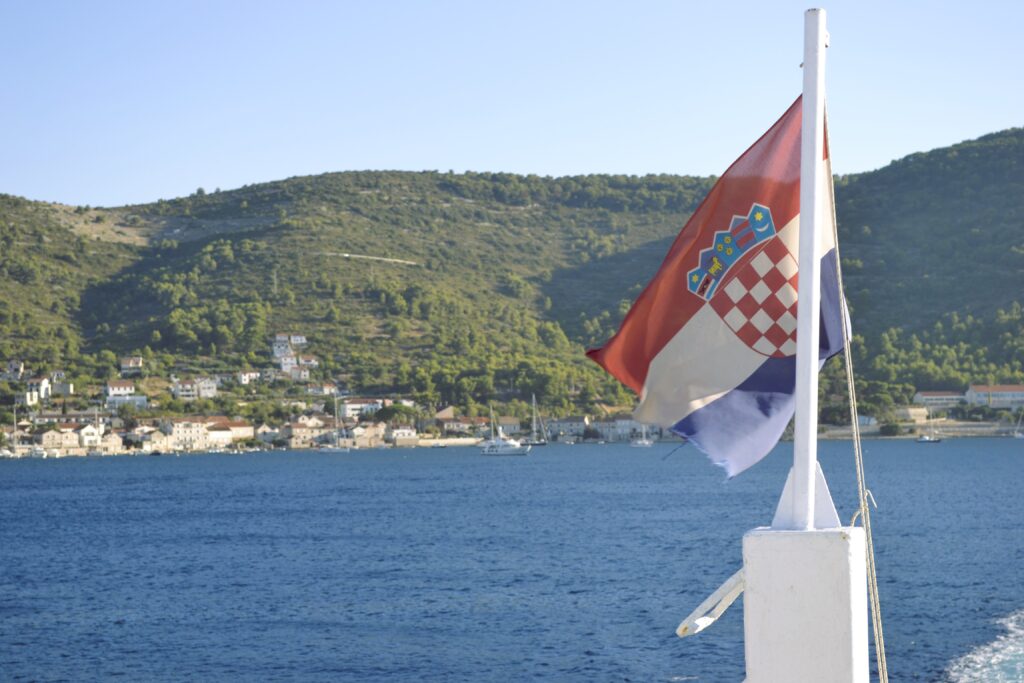
Croatia Island Hopping? Let me take you to explore 3 of the best islands in Croatia, Korčula, Vis & Hvar. Crystal-clear blue waters and gorgeous little towns make these islands must-see destinations. Check out the grand walls of Dubrovnik and the city buzz of Split as gateways, and of course, let’s not forget the food, the seafood is the best you will ever taste!
Dubrovnik Views
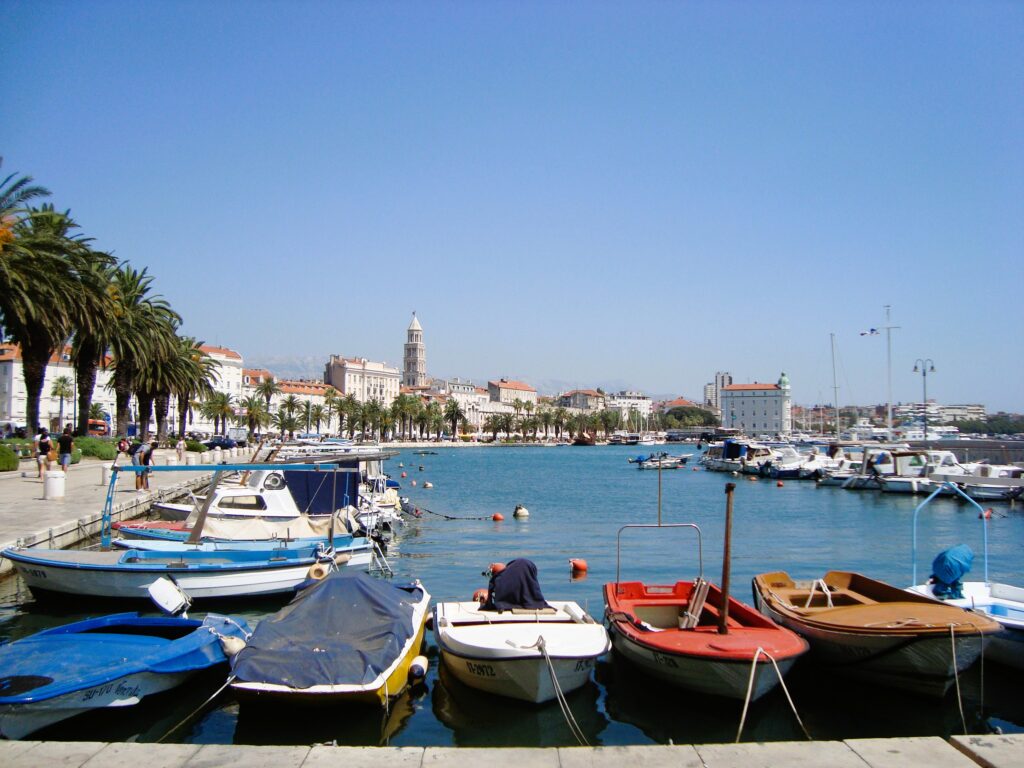
Starting your trip: Dubrovnik or Split?
None of the Islands I talk about in this post have airports, so you will need to take a ferry to get there. Most people opt for getting to the islands from either Dubrovnik or Split, in mainland Croatia. Where should you start your trip from? If you have the time to do both cities, do both. Depending on what islands you are visiting, it may make ferry connections easier so that you are not backtracking.
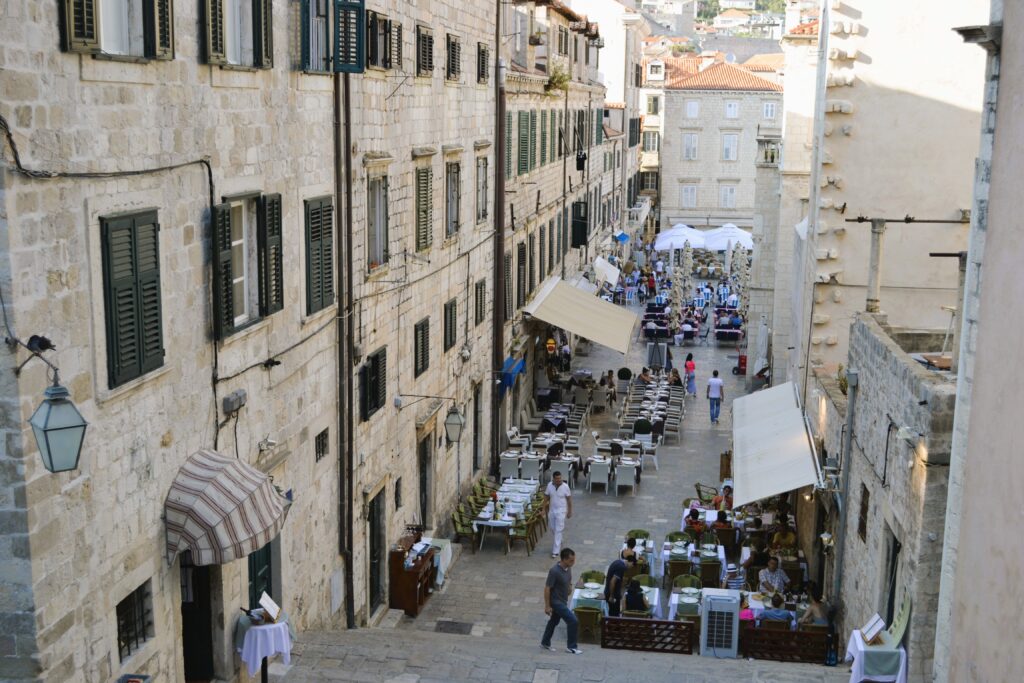
Cobbled Streets in Dubrovnik
Dubrovnik is a much smaller town, but it’s jam-packed with history and beautiful to explore due to its location, well-preserved old town, and fortified walls. It is very touristy and can be quite expensive if staying in hotels (many people opt to stay in local guesthouses). Split on the other hand has much more of a city vibe, and is much bigger and more affordable for budget travellers. It really depends on what your preferences are when you are traveling to make you go for either Split or Dubrovnik as your base.
Most of the popular ferry routes in Croatia are run by large car ferries or catamarans. Jadrolinija ferries, serves routes to the islands from Dubrovnik & Split as well as from Italy to Split (from Ancona, 11 hours) and to Dubrovnik (from Bari, 7 hours). Local company Krilo also runs services from Split to some of the Croatian islands like Hvar, Korčula & Brac.
Travelling by ferry between the islands
Once on the islands, buses will get you around to the main town centers. Bikes can also be hired from local travel agencies as well as cars and scooters from car rental companies. My preference is to personally hire a car so you can go and explore easily at your convenience. A thing to note is that hiring a car in summer (especially around July / August) can be difficult, and if you leave it to when you arrive, cars may not be available. Book in advance if possible.
Sunset over Croatia
What to eat in Croatia
In most places in Croatia, the menus at restaurants (called Konobas in Croatian) are well-catered for tourists. You will find lots of pasta & pizza (some better than others), meat, and seafood. I was initially put off by the very touristy-looking menu, but I must admit, in most instances, I was quite impressed. The fish & seafood in Croatia is abundant and delicious, especially on the coast and the islands.
The typical Dalmatian Style seafood is just grilled and dressed very generously with olive oil, parsley, and garlic. There is an old saying in Croatia:
The fish in Croatia must swim 3 times, first in the sea, then in olive oil, and then in wine!
Traditional Dalmatian Saying
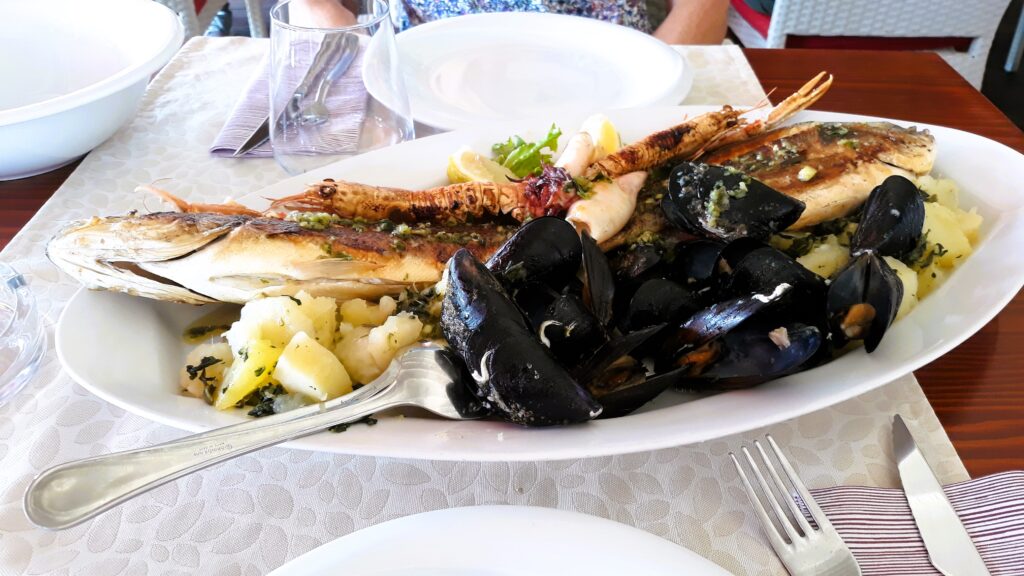
Seafood platter served with potatoes
You will generally find Skampi (prawns with long claws), octopus, squid, and local Adriatic fish varieties on a seafood platter.
Other popular dishes are Black Ink Risotto, Octopus salad, and generous plates of ‘small fried fish‘ (minnows). A traditional side dish to accompany seafood and meat is par-boiled potatoes with a local variety of a green similar to Swiss chard, called Blitva.
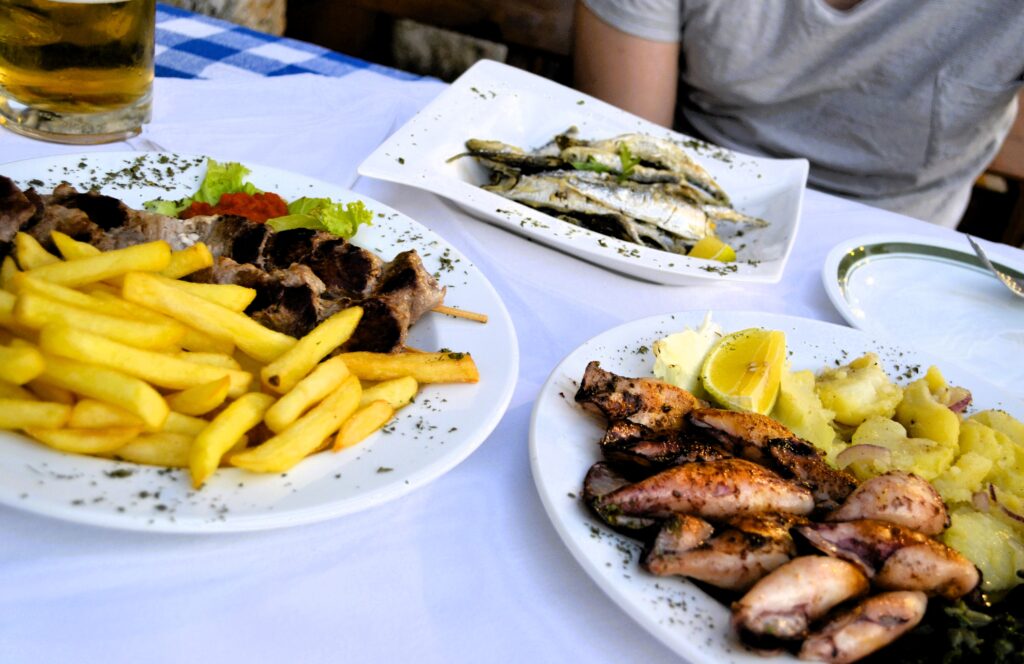
Seafood and grilled meats at the Konobas in Croatia
For any meat eaters out there, you will also find plenty of grilled meat dishes and stews too. Cevapi is a popular street food in Croatia. They are skinless sausages made of pork and beef, with lots of paprika and garlic. They are served grilled, usually in flatbreads, loaded with lots of Ajvar, a spicy and extremely delicious capsicum/red pepper, and eggplant spread. You can often find imported Ajvar in European specialty stores to buy too.
Restaurants or ‘Konoba’ in Dubrovnik
Ice cream shops are plentiful in Croatia and Rožata (a Croatian version of baked crème caramel) are popular desserts if you still have room!
These are 3 of the Best Islands in Croatia
Korčula
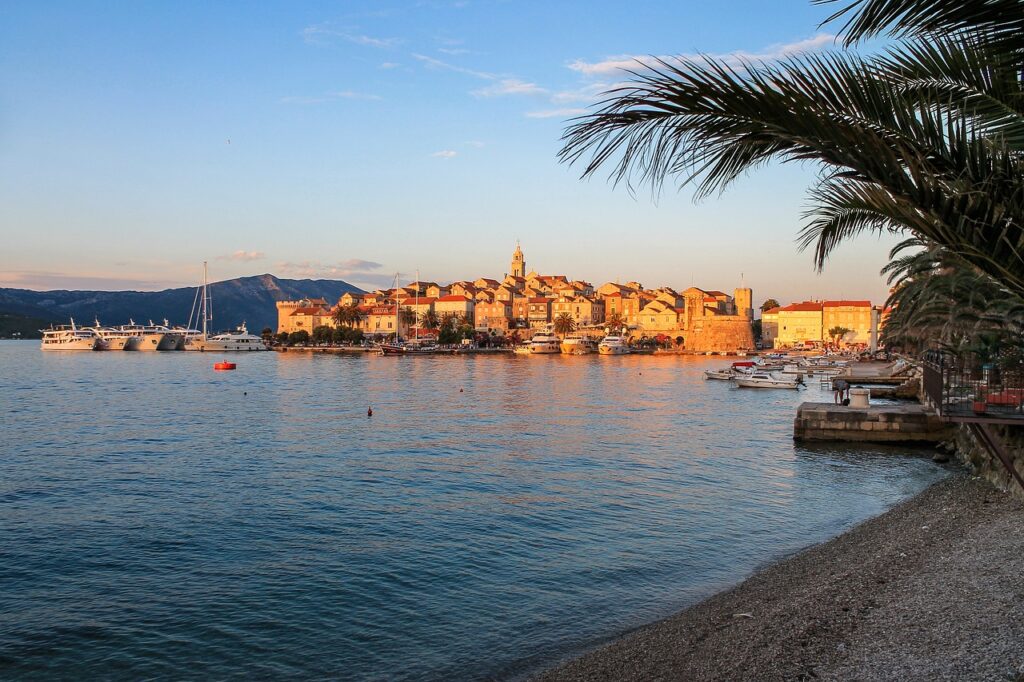
Korčula Old Town – Image by invisiblepower from Pixabay
What to see in Korčula
Popular on the tourist route and one of the larger Adriatic Islands – Korčula has a glorious Old Town that is almost a miniature version of Dubrovnik. Beautifully maintained and built with Gothic and Renaissance architecture, it’s a must see in Korčula. If you look at a map of the old town, the streets were cleverly laid out in a fishbone shape in order to protect from the sun and wind.
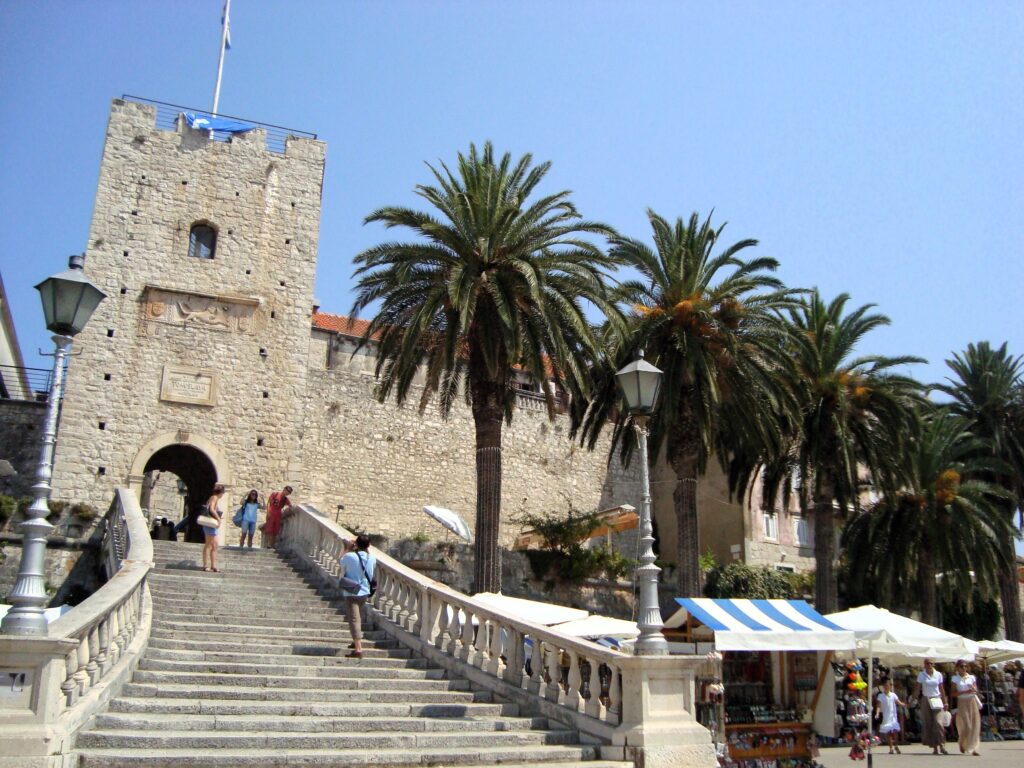
Old Town Gate in Korčula
An interesting, although controversial, part of history for Korčula, is that it claims to be Marco Polo’s Birthplace, so you can see from the outside his supposed house, as well as a museum, and (lots of) souvenir shops.
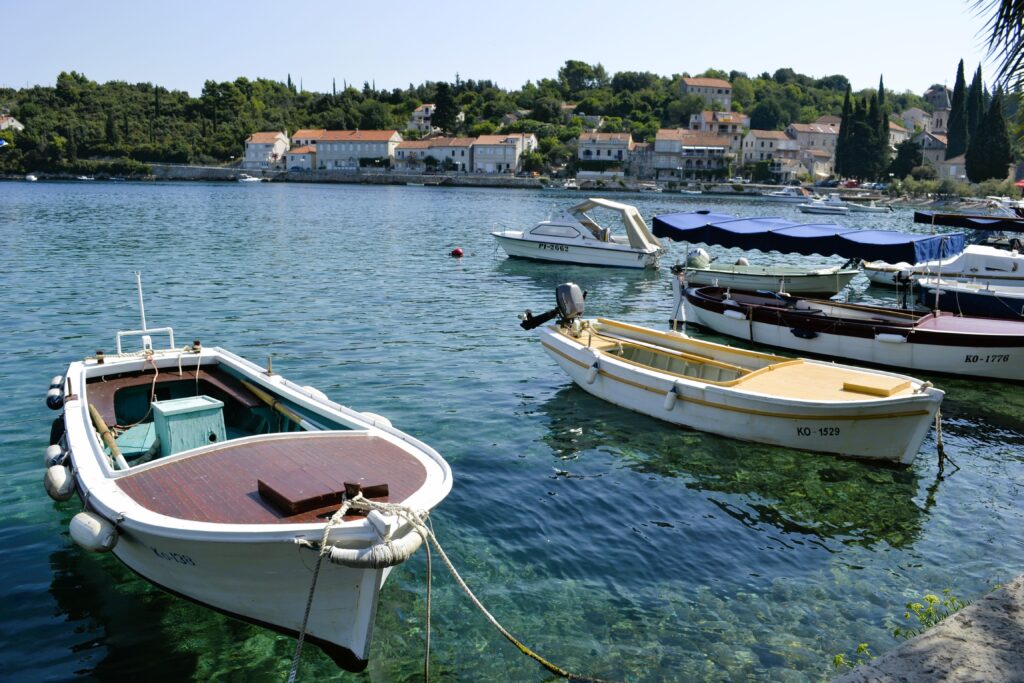
The village of Racisce – 12 km west of Korčula Town
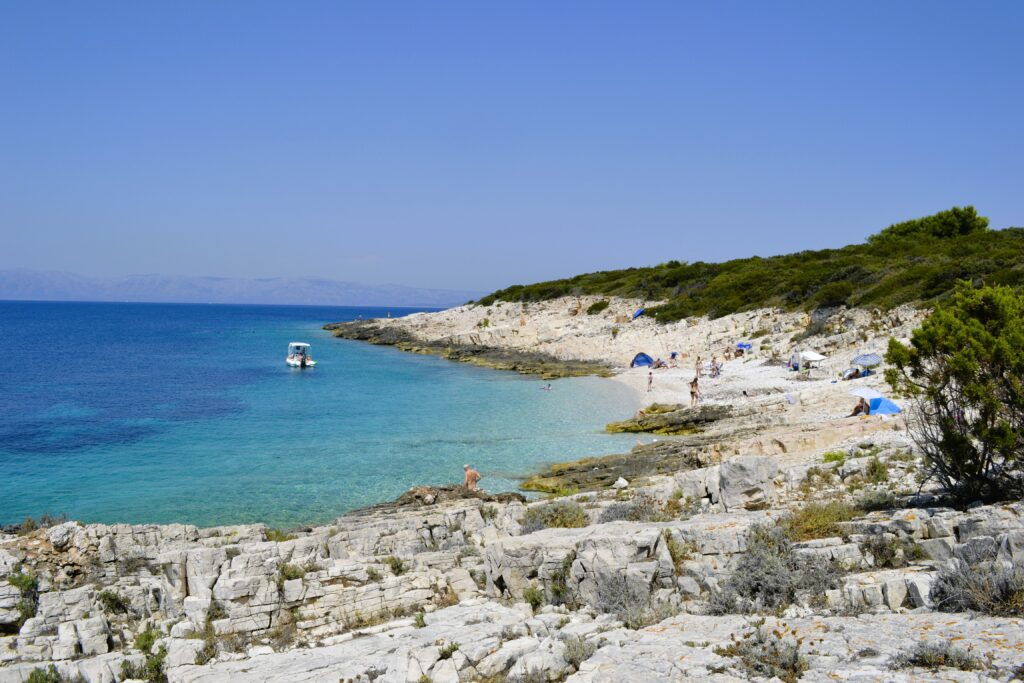
The beaches in Korčula are stunning and there are lots of places to see. Most of them are pebbles or rocky so arm yourself with some proper footwear! Nearby Lumbarda, does although have some great sandy beaches. If you are after a bit more quiet, the nearby islands of Proizd, with its turquoise waters and sloping rock formations, and Badija with its Franciscan monastery and deers roaming around, are fantastic day trips from Korčula.
Proizd Island – 35 minutes via boat from Korčula
How Long to Stay in Korčula
4 – 5 Days
Accommodation in Korčula
There is a limited amount of full-service hotels on the islands, most of the accommodation is apartments and guesthouses. Korčula Town, Vela Luka & Lumbarda are the most popular places to stay. The small village of Racisce is a bit quieter but also a great little town to be based in if you have a car to get around. Check out Booking.com for a wide range of accommodations in Korčula.
Getting to Korčula
There are two major Ferry ports in Korčula – Domince & Vela Luka. Daily Ferries and Catamarans from Dubrovnik (approx. 2 hours), Split (approx. 3 hours), Hvar (approx. 1.5 hours).
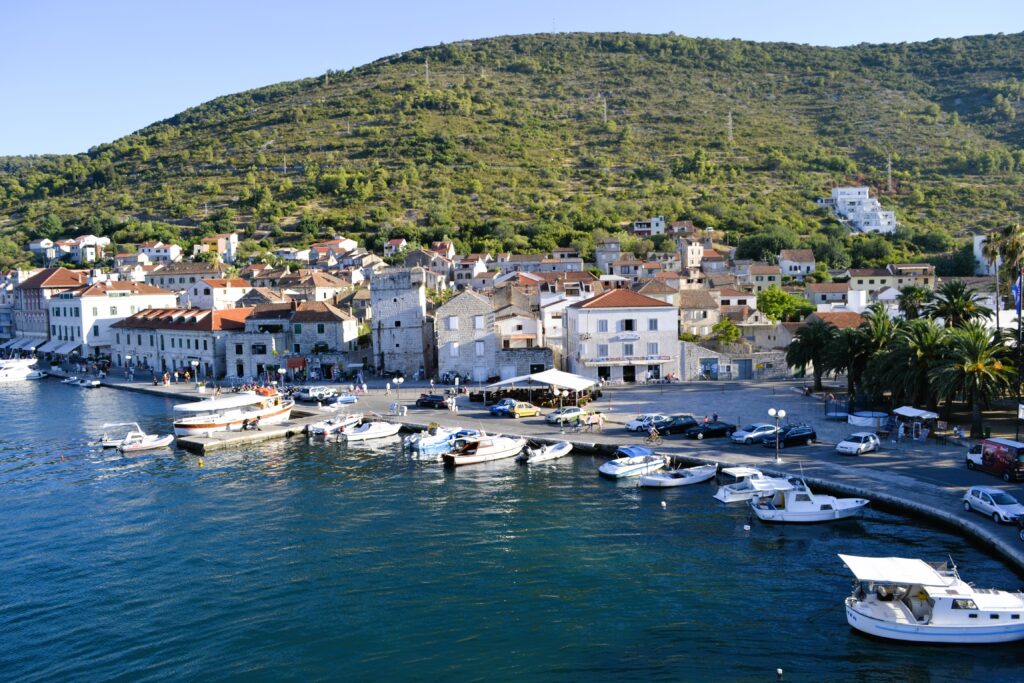
One of the less developed islands of Croatia, Vis is still rugged & filled with vineyards and was fairly undiscovered to tourism up till recently. This is mainly due to the island actually being closed off to tourist only up till 1989 as it was a military base.
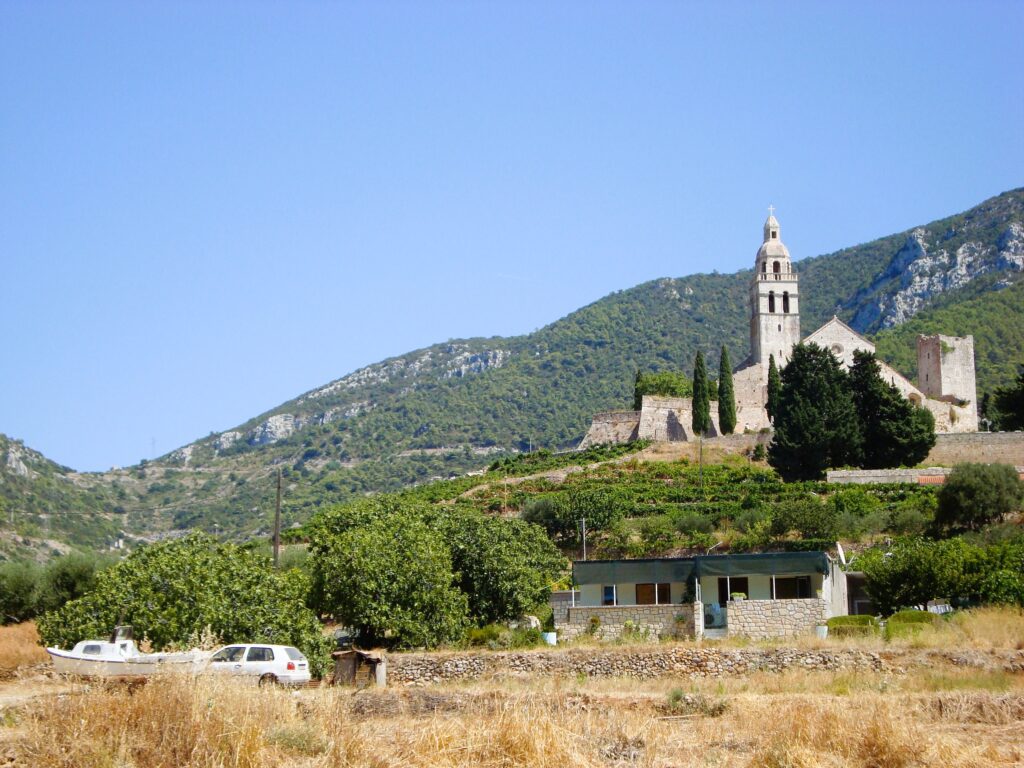
Church of St Nicholas, Vis
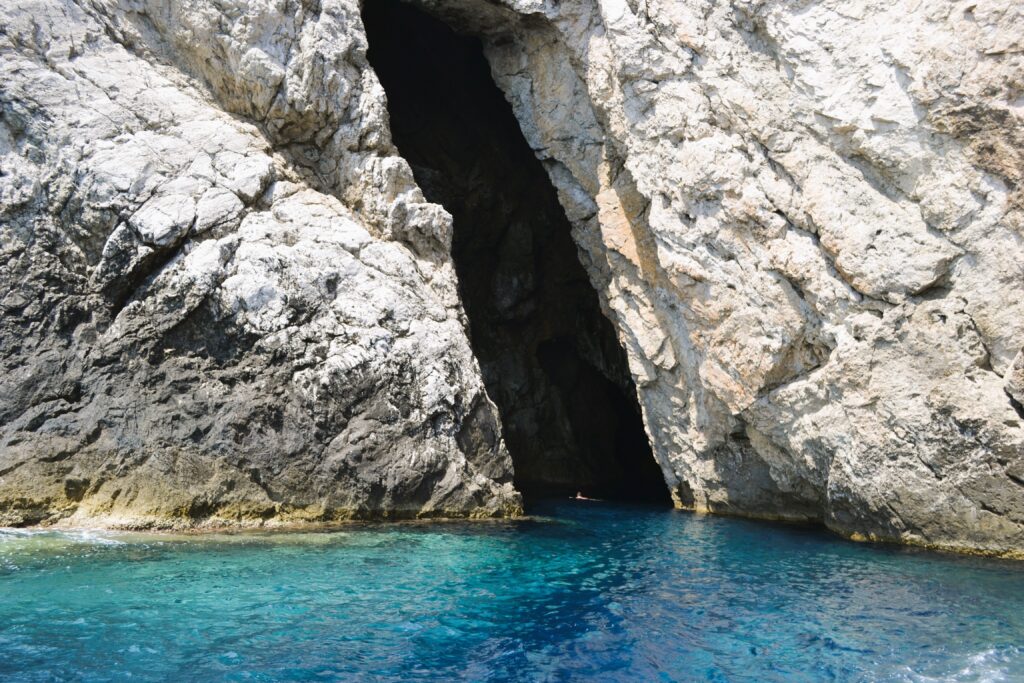
The two main towns of Vis and Komiža are cozy and stretch along the coastline of this small island. The main attractions are the local beaches of Stiniva & Zaglav (there are many more coves too) and taking a boat trip to Biševo to view the Blue Cave.
Biševo Cave, near Vis
How Long to Stay in Vis
3 – 4 days
Accommodation in Vis
There is a limited amount of hotels on the islands, most of the accommodation is apartments and guesthouses. Most of the accommodation is located in Komiza or Vis Town. Check out Booking.com for a wide range of accommodations in Vis.
Getting to Vis
There is one Ferry port in Vis – Vis Town. Daily Ferries and fast catamarans from from Split (approx. 1.5 to 2.5 hours).
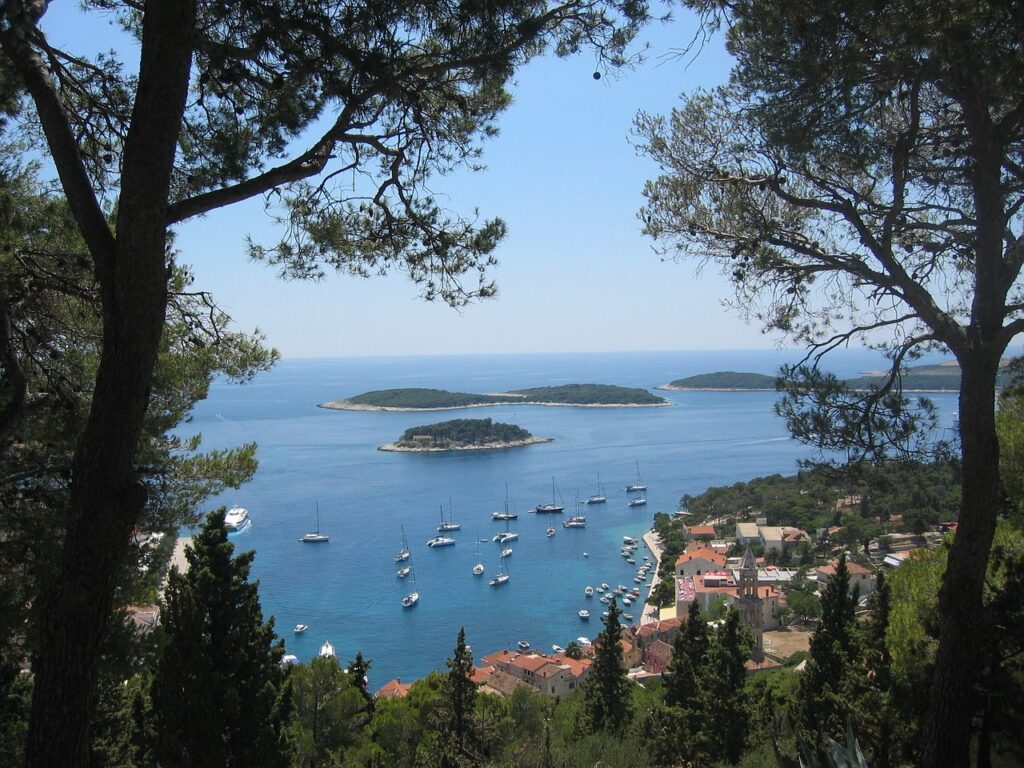
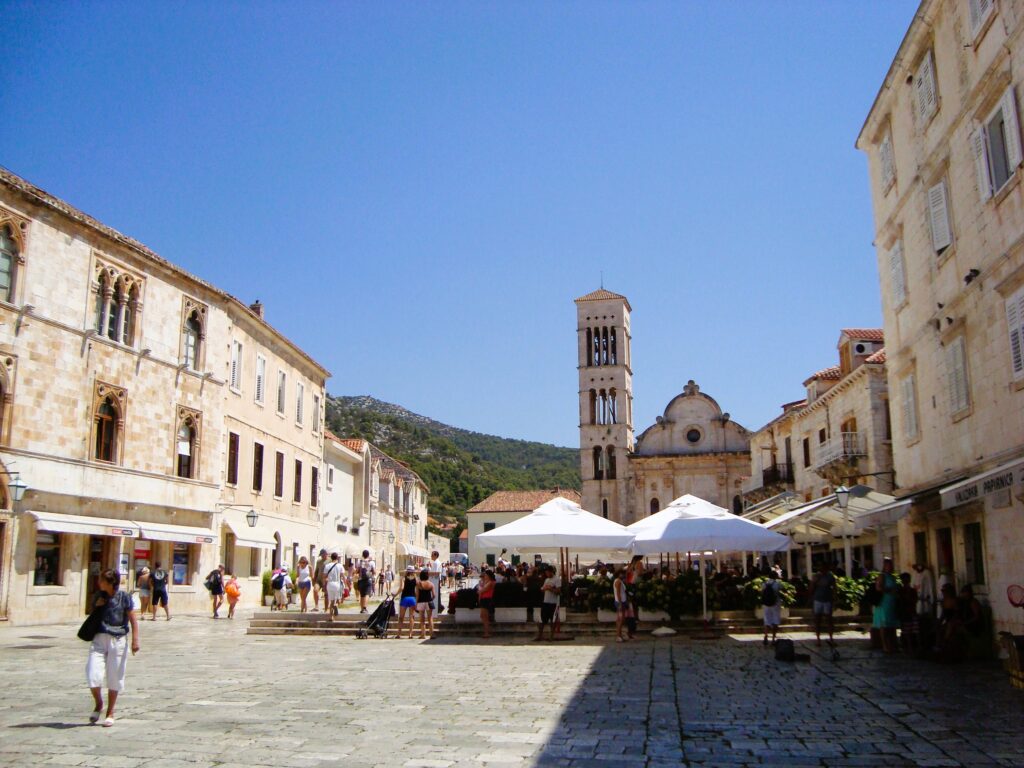
Green Hvar has become to be known as one of the party islands of Croatia. It has lots of bars, beach clubs and can get very busy over the summertime. The main town of Hvar is located on the harbour and rows and rows of luxury yachts line the waterfront of this beautiful island. The town centre itself is quite small and can be seen easily in a few days. St Stephens Cathedral has been standing proud in the main square for centuries and is worth a visit as you stroll through town.
St Stephen’s Square & Cathedral in Hvar
Take a 30-minute hike to Hvar Fortress for fantastic views over the island. To cool off, head to the nearby beach of Dubovica or take a boat trip over the swim in the clear blue waters of Pakleni Islands.
How Long to Stay in Hvar
2 – 3 days
Accommodation in Hvar
Due to being ‘the place’ to be in Croatia, Hvar has some of the most luxurious and expensive accommodations of all the islands. Accommodation in the old part of Hvar town can be very pricey and noisy over the summertime so venturing further out of town and staying in apartments and guesthouses can be a more affordable option. Stari Grad in the north of the islands also has accommodations and is a quieter, more affordable alternative to Hvar Town. Check out Booking.com for a wide range of accommodations in Hvar.
Hvar Fortress & Harbour – Image by Joëlle Moreau from Pixabay
Getting to Hvar
There are two major Ferry ports in Hvar – Stari Grad and Sucuraj. Daily Ferries and Catamarans from Split (just over 1 hour), Korčula (approx. 1 hour), Dubrovnik (approx. 3 hours).